41
41
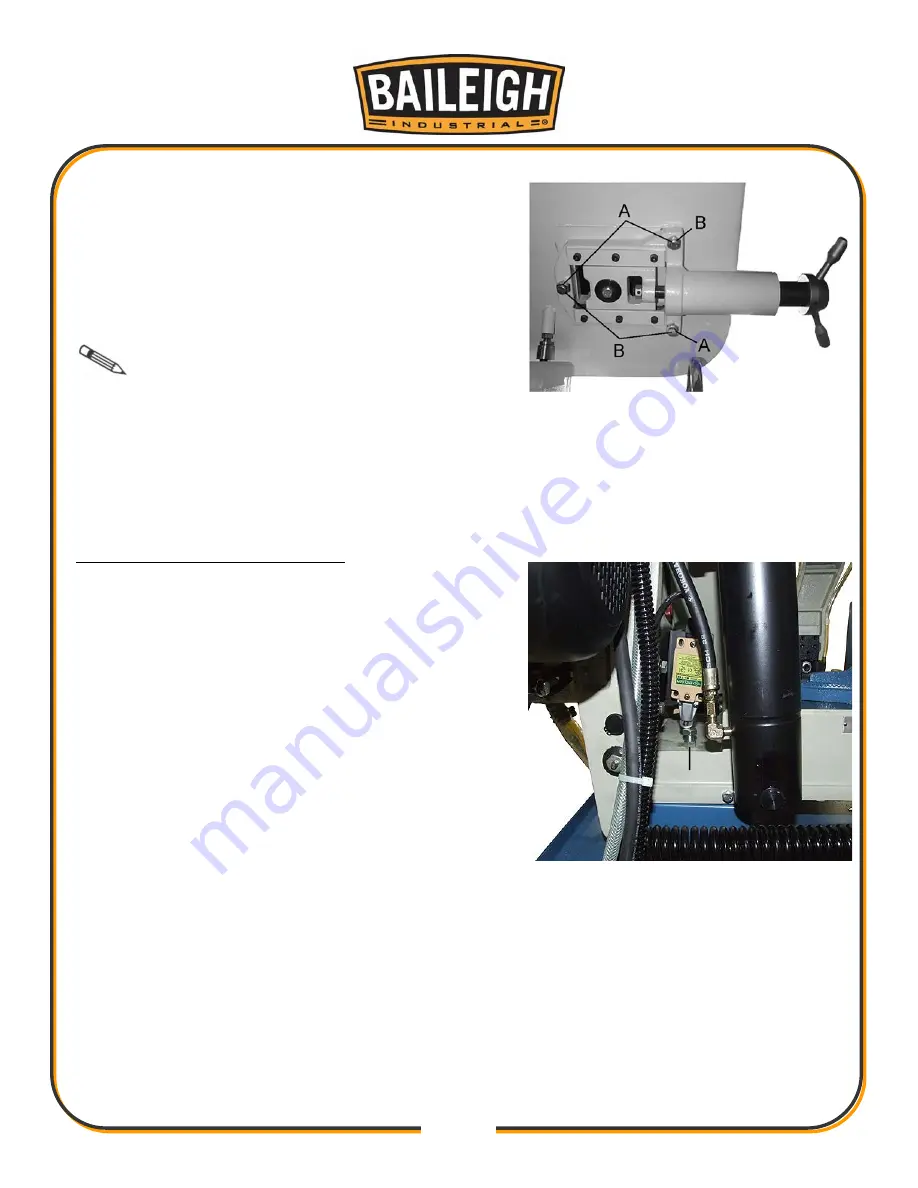
5. Loosen the three bolts (A) located on the top of the
tacking nuts.
6. Tracking adjustment is accomplished by either
loosening or tightening three adjusting nuts (B).
7. Tracking is set properly when the back of the blade
lightly touches the wheel flange.
Note:
Over-tracking (allowing blade back
to rub hard against wheel flange) will damage the
blade wheels and blade.
8. Tighten locking bolts (A) once proper tracking is completed.
9. Close the blade covers.
Automatic Shut-Off Adjustment
The motor shall shut off immediately after the blade
has cut through the material and just before the head
comes to rest on the horizontal stop bolt.
1. If the machine continues to run after the workpiece
has been fully cut, locate and adjust the micro
switch stop bolt (A) by moving the stop bolt up.
2. If the machine shuts off before the workpiece has
been completely cut, move the micro switch stop
bolt (A) down.
3. Tighten the jam nut when the adjustment is
complete.
A
Содержание BS-330M
Страница 17: ...14 14 DESCRIPTION OF MACHINE PARTS A G E D C F B H I J K L N P Q O M S T U V W X R Y...
Страница 32: ...29 29...
Страница 48: ...45 45 ELECTRICAL PANEL LAYOUT...
Страница 49: ...46 46 ELECTRICAL SCHEMATIC...
Страница 50: ...47 47 PARTS DIAGRAM...
Страница 51: ...48 48...
Страница 65: ...62 62 NOTES...
Страница 66: ...63 63 NOTES...
Страница 67: ...64 64 NOTES...


