


14 | Getting Started
www.BabyLock.com
To set up the Pro-Stitcher carriage
U
CAUTION: Before plugging any cables into the carriage or the tablet computer, be sure the quilting
machine power cord is unplugged from the wall so there is no power to the quilting machine or
Pro-Stitcher carriage.
1. Place the Pro-Stitcher carriage on the frame with the connectors toward the back of the frame.
Carefully lift the quilting machine and place it on the carriage so the wheels engage the aluminum
carriage tracks, making sure not to set the wheels on top of the encoder cables. This is easier to do
with two people, one at each end of the quilting machine.
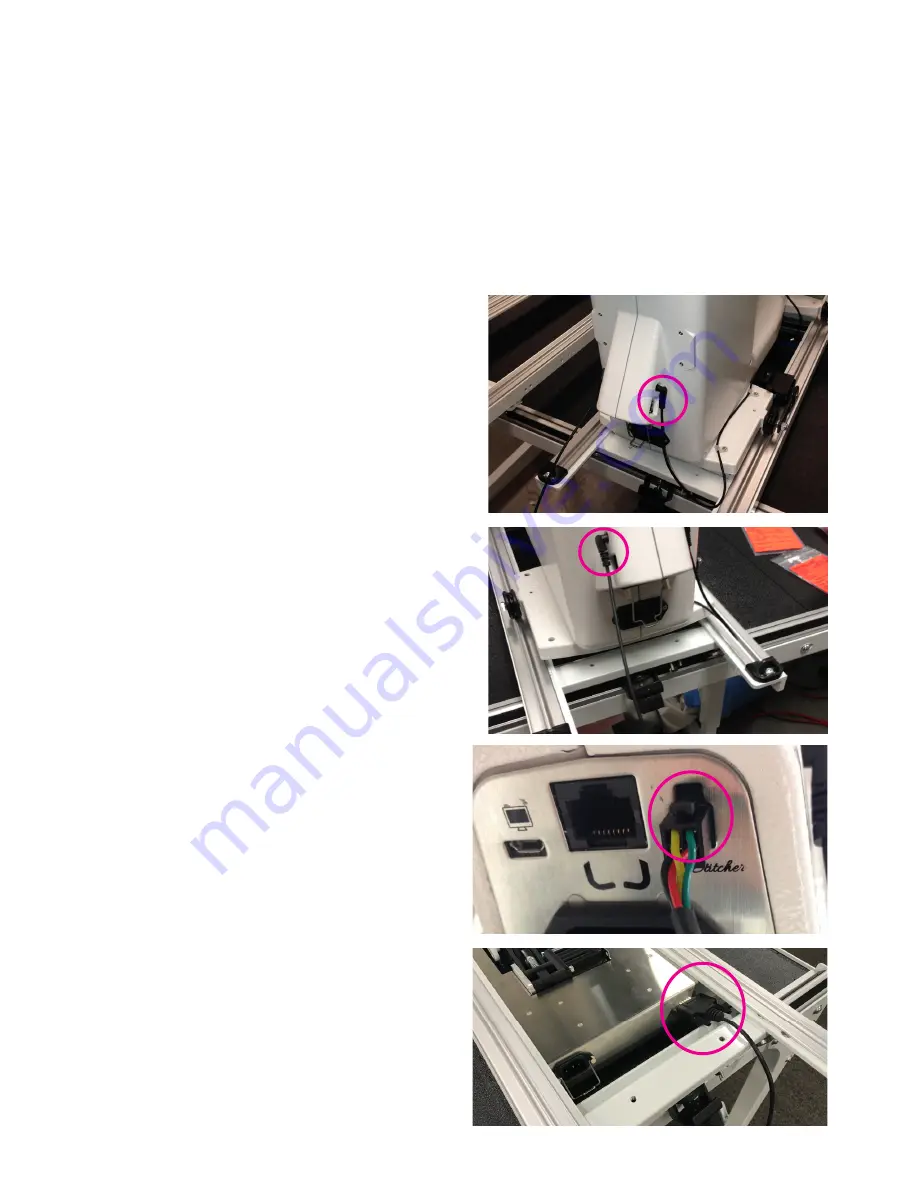
2. Plug the loose end of the machine encoder cable
(Y) into the round connector above the USB
connection as shown.
3. Plug the end of the carriage encoder cable (X)
into the round connector above the square laser
connection as shown.
4. Plug the small end of the Pro-Stitcher carriage
communication cable
(see Parts List, item M)
into
the top right connector, labeled Pro-Stitcher, on
the machine back connection panel.
5. Plug the large end of the Pro-Stitcher carriage
communication cable
(see Parts List, item M)
into
the back of the carriage (right side as seen from
back of machine). Tighten the black screws
using a flat-head screwdriver.
Содержание Regalia BLPS4-RG
Страница 1: ...Getting Started Guide for the Regalia Model BLPS4 RG...
Страница 26: ......


