


9
REV. 6/18/21
INSTAXPIO-JT1
ASSEMBLY
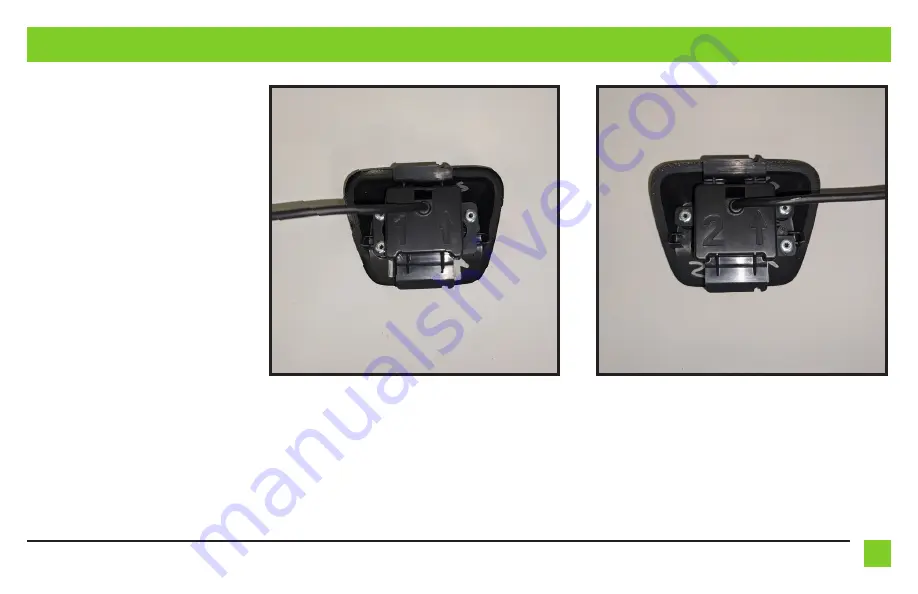
(Figure A)
(Figure B)
1.
Place the wire from the aftermarket camera
through the hole between the numbers and
the arrow.
2.
Keep the orienitation correct as to not mount
the camera incorrectly. The top of the factory
housing is the longer part of the housing.
The top of the camera is indicated by the QC
sticker and the top of the bracket is indicated
by the arrow pointing towards the top of the
factory housing.
3.
Place the factory housing over the camera.
4.
Replace the 3 factory screws. The positions
differ depending on the factory backup
camera (Figure A) or surround view or 360
camera (Figure B).


