2: U
si
ng x
S
el
ec
to
r •
1
1
Chapter Two:
Using xSelector
xSelector is designed primarily so that operators can choose sources from the Livewire network, which are sent
to the unit’s audio output. Most, if not all, of these operations are done using the controls provided on the unit’s front
panel. This chapter will get you familiar with these controls.
Power Up!
Although xSelector has a built-in web server for configuration and administration, you can get xSelector
connected to your network using just front-panel controls (See the Quickstart preface to this manual for instructions
on how to do this). Some users will prefer to assign an IP address using the front panel controls, and then perform
the rest of the configuration from the node’s web pages; we’ll cover Advanced Programming in Chapter Three.
As soon as you plug xSelector in, it performs a short power-on self test. Once booted, the LED to the right of the
selector knob will turn from red to green. The OLED display illuminates and you’ll see the default screen showing
the meters.
Basic Operation
Operating xSelector from the front panel is quite simple. Streams can be selected, assigned to an instant access
filmcap button if desired, and the headphone/ output volume may be adjusted.
Selecting a Stream to Record, Store or Play
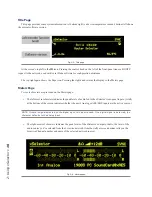
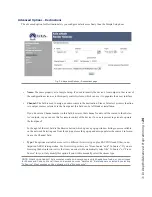
From the default menu screen click the control knob once. The source selection screen, shown below, will be
displayed.
Fig. 2-1: Source selection page.
Содержание xSelector
Страница 1: ...xSelector Installation User s Guide Manual Rev 1 January 2019 p n 1490 00105 002 TelosAlliance com...
Страница 6: ......
Страница 8: ...CAT 6 small and light yet sound and data pour forth What magic is this...
Страница 18: ...Do digital streams dream of electric DJs Just Bradbury knows...
Страница 26: ...To and fro bits flow Audio anywhere now Fingertips decide...
Страница 52: ...Elvis Costello was a true visionary Kesha not so much...
Страница 56: ...THIS PAGE INTENTIONALLY LEFT BLANK...


