background image

4          

AVTECH Inc.

Installation 


TemPageR 3E

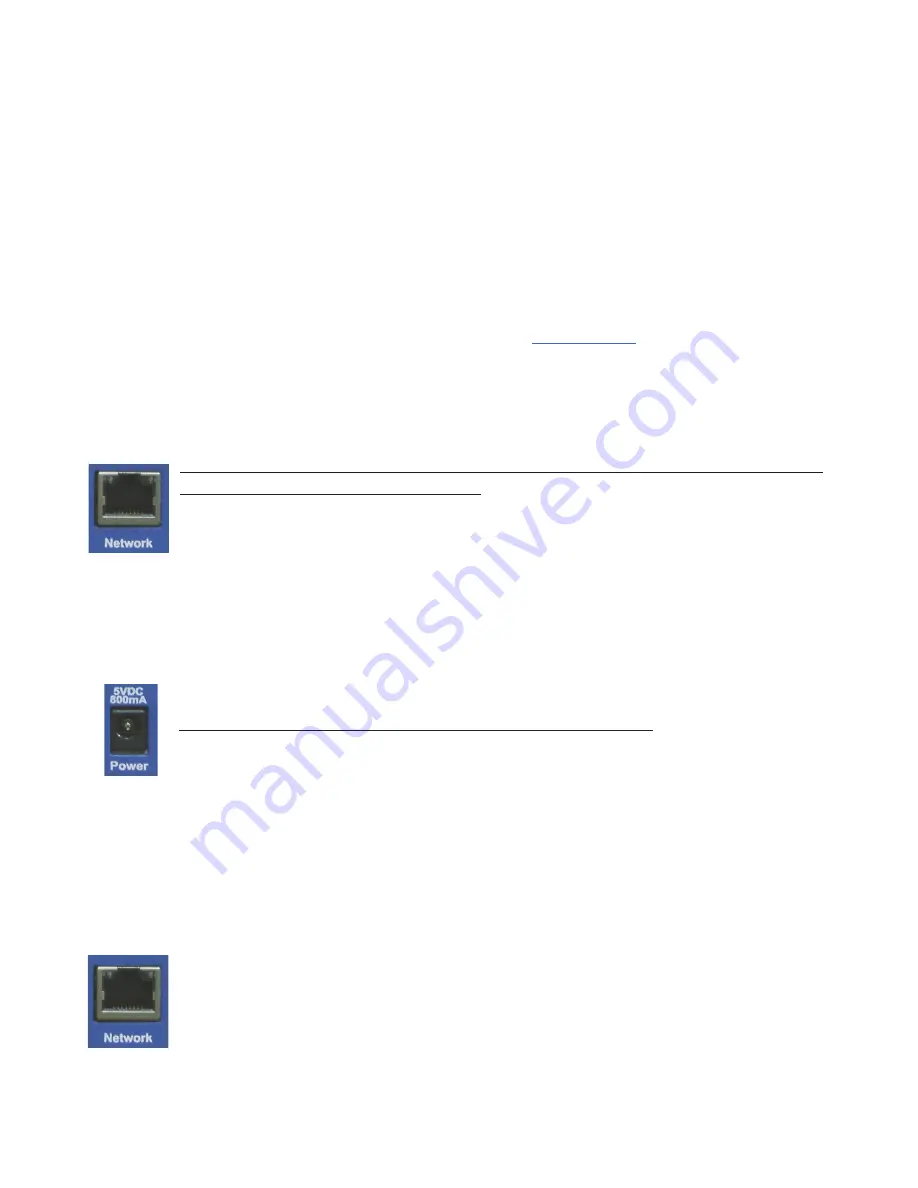
Activity LED is blinking orange, please refer to the ‘Performing Firmware Recovery’ section of 

the ‘Advanced Topics’ chapter. This is an RJ-45 port.

C. 

Temperature Sensors

 (digital sensor channels) — AVTECH’s Digital Temperature Sensors can 

be connected to these sensor channels. These are RJ-11 ports.

Step 1:

  Install The AVTECH Device Discovery Utility

The AVTECH Device Discovery Utility is used to initially discover the TemPageR 3E after it is 

connected to your network. The Device Discovery Utility can be installed from the AVTECH Install & 

Update CD or downloaded from the ‘Downloads’ section of the 

AVTECH.com

 website. Install this utility 

on a Windows-based computer that is located on the same network that the TemPageR 3E unit will be 

connected to. Install this now and we will come back to the Device Discovery Utility in a later step.


Step 2:

  Install The TemPageR 3E ID Box

The TemPageR 3E must be connected in the following order for initial configuration and 

discovery on the network to be successful. Locate the Ethernet cable included with your 

package and connect one end to the ‘Network’ port on the front of the TemPageR 3E unit. 

Connect the other end of the Ethernet cable to an open port on the switch or router that 

will give the TemPageR 3E unit access to your network. 

Next, locate the ‘AVTECH 5v 1A Power Adapter’ and plug it into a surge protected UPS power source. 

This will allow alert notifications even after a complete power loss.

NOTE: The TemPageR 3E unit should be plugged into a UPS. 

Attach the other end of the power adapter to the ‘Power’ port on the TemPageR 3E unit 

only if the TemPageR 3E unit is already connected to the network. Be sure to remove the 

sticker over the ‘Power’ port before attaching the ‘AVTECH 5v 1A Power Adapter’ to the 

TemPageR 3E unit.

IMPORTANT NOTE: DO NOT CONNECT POWER to the TemPageR 3E unit during the initial setup UNTIL AFTER you have 

connected it to your network as described above or it will cause problems automatically assigning the initial IP address.

Once the network and power connections have been completed, verify that the LED located on the top-

left side of the network jack lights up indicating power and network connectivity.

Step 3:

  Discovery And Network Settings

Once the TemPageR 3E unit has been properly installed according to Step 2 above, open 

the AVTECH Device Discovery Utility and click the ‘Search’ button. The AVTECH 

Device Discovery Utility will attempt to discover the TemPageR 3E unit connected to 

your network by sending out a UDP broadcast on UDP port 30718. 

Содержание TemPageR 3E

Страница 1: ...World s Most Popular Real Time Temperature Monitor For Physical IT Facilities Environment Monitoring TemPageR 3E Phone Fax Web 401 628 1600 401 628 1601 AVTECH com User s Guide Reference Manual 120914...

Страница 2: ...owledgements AVTECH the AVTECH Logo AVTECH Software the AVTECH System Manager Character AVTECH com AVTECHSoftware com Device Discovery Device ManageR Environment Alarm Environment Monitoring Made Easy...

Страница 3: ...ect Included Sensors And Accessories 8 Step 5 Check TemPageR 3E Firmware Version 8 Configuration And Setup Screens 9 Alert Methods 9 Email 9 Initial Email Setup 10 Test Email 10 Email To SMS 10 SNMP 1...

Страница 4: ...Sensor 15 Dry Contacts 15 Additional Screens And Interfaces 16 Network 16 Security 16 Advanced 17 Using Trace Output 18 Help 18 About 19 Web Interface 19 Advanced Topics 21 Upgrading Firmware 21 Rese...

Страница 5: ...include email email to SMS actions such as toggling Signal Tower LEDs for Room Alert models sending URL Web Requests and more If you have not looked at Device ManageR before take a look because it tr...

Страница 6: ...y email to computers mobile phones BlackBerrys pagers PDAs and more By having another monitoring application like AVTECH s Device ManageR monitor TemPageR there are additional options for logging grap...

Страница 7: ...onal sensors that are not mentioned above instructional material explaining the proper setup of that component should be included with it If you cannot find the proper instructional materials check th...

Страница 8: ...other end of the Ethernet cable to an open port on the switch or router that will give the TemPageR 3E unit access to your network Next locate the AVTECH 5v 1A Power Adapter and plug it into a surge...

Страница 9: ...ted to be performed on multiple units i e all selected units simultaneously The Set IP button is used to assign a static IP address gateway IP address subnet mask and DNS server IP address or to set t...

Страница 10: ...re a computer on the local network to act as a time server for other devices Visit AVTECH s Frequently Asked Questions FAQs to learn more The Save Settings feature can be used to download the current...

Страница 11: ...P address assigned to the computer i e IP address of computer 192 168 2 3 IP address of TemPageR 3E 192 168 2 4 If the IP address of the TemPageR 3E unit is still not updated continue with steps 7 9 7...

Страница 12: ...Temperature Sensor provides a real time digital temperature reading at the location of the temperature probe Position the sensor in the desired location running the sensor cable back to the TemPageR...

Страница 13: ...pliant and can be accessed by any application that can issue a SNMP Get request Other monitoring applications can therefore be used to perform SNMP Get requests and receive SNMP Traps Email Email aler...

Страница 14: ...ings NOTE If a domain name is entered in the Mail Server Address field the TemPageR 3E unit must be assigned static IP settings and have a DNS server IP address set Test Email A test email can be sent...

Страница 15: ...may confirm it and post it online for the convenience of other users SNMP The TemPageR 3E unit is fully SNMP compliant and can be monitored by applications capable of performing an SNMP Query or Get r...

Страница 16: ...scheduling and more Device ManageR also allows for Actions on Alert Alert clear conditions such as toggling Signal Tower LEDs Room Alert models Send Web URL requests sending screenshots from AXIS came...

Страница 17: ...field below the Sensor Label High and low thresholds for the temperature are entered in the High and Low columns Temperature thresholds must be entered in the temperature scale selected on the Advance...

Страница 18: ...es Fahrenheit and or 55 to 125 degrees Celsius Accuracy is within 0 5 degrees Its non conductive casing makes it a perfect sensor for monitoring the temperature of fluids in extreme environments walk...

Страница 19: ...sensor that connects to one of the switch sensor contact sets via a low voltage 2 wire cable Smoke Sensor RMA SS1 SEN The AVTECH Smoke Sensor allows a real time notification of the presence of smoke...

Страница 20: ...address and subnet mask in the appropriate fields When finished click the Accept Change button then Save Settings NOTE If configuring static IP settings on the TemPageR 3E unit be sure that the setti...

Страница 21: ...ime display daylight savings time setting time server IP address and trace configuration options The temperature scale selected in the Temperature Scale drop down will be the default temperature scale...

Страница 22: ...he live trace output Once trace is running try to replicate any issues that are occurring so they are captured in the trace output If having issues sending email send a test email while viewing the tr...

Страница 23: ...proxy or Microsoft ISA server soliciting traffic and requests from the TemPageR 3E unit Below the menu bar on the TemPageR 3E is the device name date and time display and MAC address display NOTE If t...

Страница 24: ...will correspond with the Fahrenheit or Celsius scale selected on the Advanced tab of the Settings screen Below these two rows is the sensor display area The display for each sensor within the sensor...

Страница 25: ...ere the TemPageR 3E Firmware Update file was saved select it and click the Upload button A dialog will then load asking for confirmation of the firmware upload Click Ok to upload the TemPageR 3E Firmw...

Страница 26: ...ter with a single Ethernet adapter 2 Download the most current version of the TemPageR 3E Firmware Update file from the Downloads section of the AVTECH com website 3 Connect the TemPageR 3E unit to th...

Страница 27: ...al database Device ManageR also has the ability to discover any Axis network camera and acts as a single interface for viewing camera images for multiple cameras distributed across the network Cameras...

Страница 28: ...Protect Your IT Facility Don t Wait Until It s To Late AVTECH com...

Отзывы: