


38
Configure the Product’s IP Address
If you connect the product to your computer via a network cable, you need to specify
an IP address for the product. An IP address can be obtained automatically through
the DHCP server, or you can specify a static IP address. Please follow the steps in
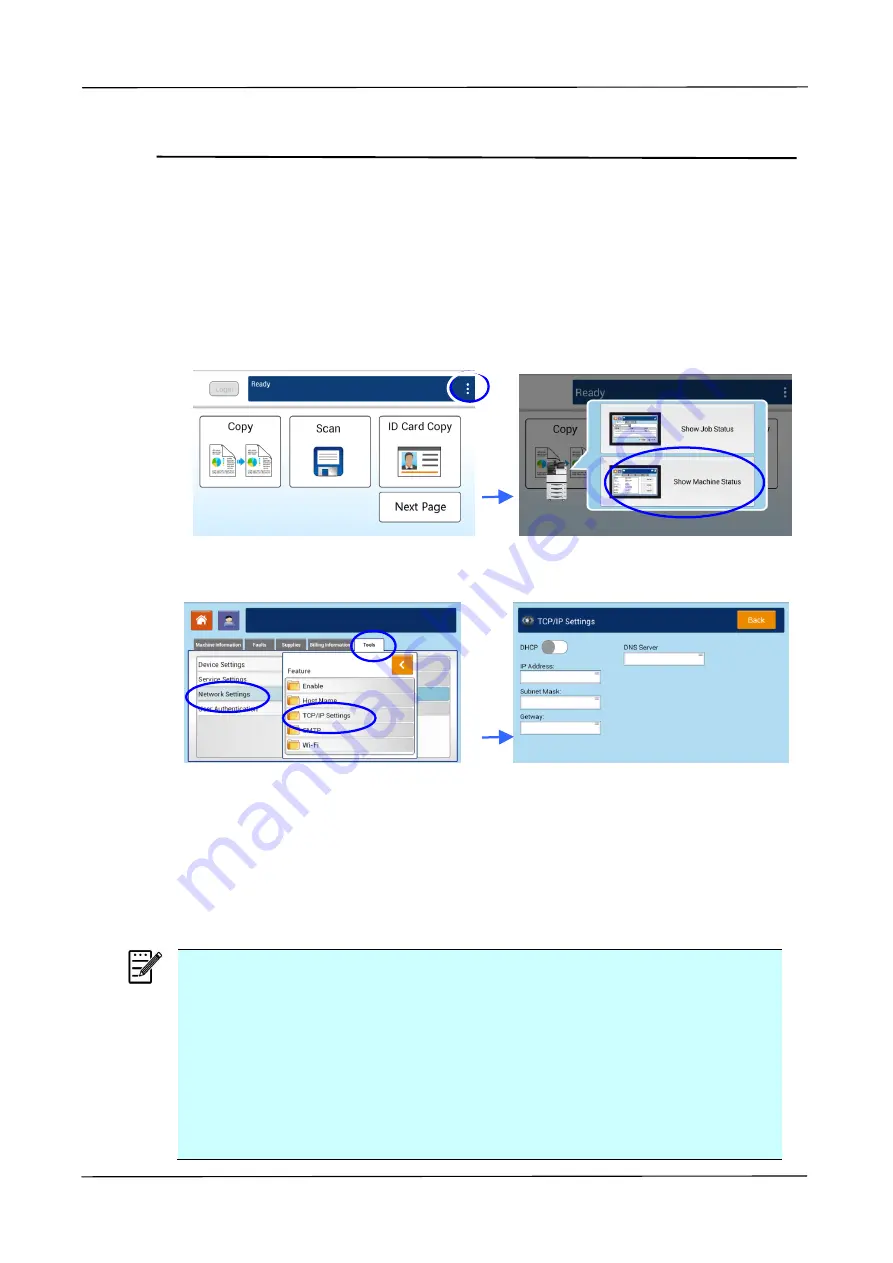
below to configure the IP address of the product.
1.
Tap [
More Settings
] on main screen and then choose [
Show
Machine Status
].
This will prompt the [
Machine Status]
page.
2.
Touch the
「
Tools
」
tab, and then the
「
Network Settings
」
>
「
TCP/IP Settings
」
option. The following TCP/IP screen will be displayed.
3.
Touch
「
IP address
」
,
「
Subnet Mask
」
,
「
Gateway
」
, and
「
DNS Server
」
fields
to specify each of values. If you wish to disable DHCP, be sure to enter the
address information in the
「
IP address
」
,
「
Subnet Mask
」
, and
「
Gateway
」
respectively
.
4.
After TCP/IP settings have been completed, touch
「
Back
」
to leave the screen.
5.
Touch the
「
Home
」
button on the Control Panel to show the main operation
screen.
Note:
If you are using a DHCP server to automatically choose the IP address of
the product, it is recommended that you set the host name for the
product or use the default host name. Otherwise, after the product is
used for a period of time, the DHCP server does not guarantee to choose
the same IP address. If you want to change the default host name of the
product, tap [
More Settings
] on the upper-right corner of the main
screen, and then tap [
Show Machine Status
]
>
[
Tools
]
>
[
Network
Settings
]>[
Host Name
]
to enter your new host name.
If you have further problems about the network setting, please contact
your network administrator.
Содержание AM5630i
Страница 21: ...8 Pull down the manual tray and remove the tape Open Side Door and remove the tapes on the fuser...
Страница 27: ...14 Touch Screen Used to display information and provide access to the product s functions...
Страница 37: ...24 Installing the Paper Stopper Lift the Paper Stopper to collect the paper Paper Stopper...
Страница 40: ...2 Installing Your Machine 27...
Страница 194: ...9 Troubleshooting 181 4 Finally push the lock hooks back into its original places as shown Then close the Side Door...


