Installing and Confirming I/O Cards 9
6
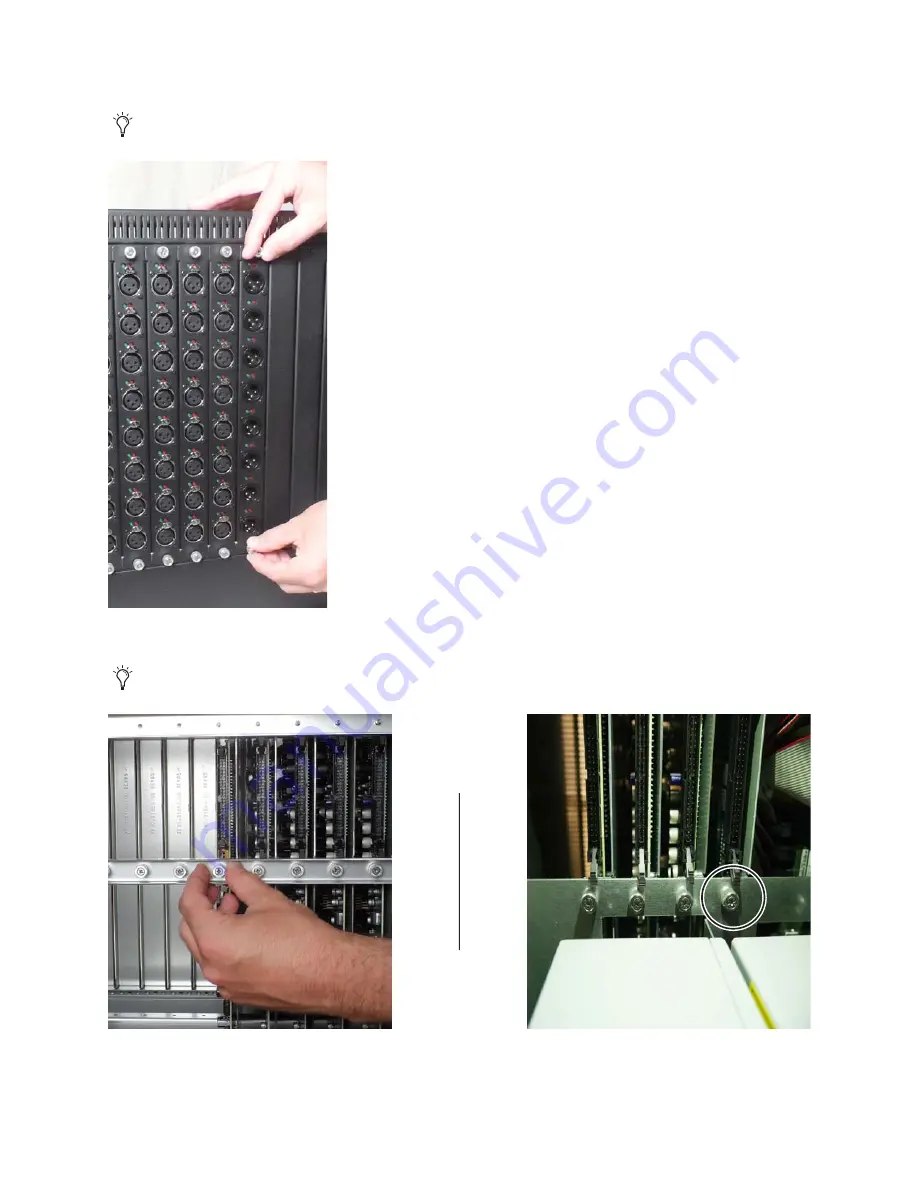
Push the card into the slot so it is flush with the front panel, and tighten the two captive thumbscrews on the front of the card to
secure it to the Stage unit.
7
Inside the back of the Stage unit, tighten the single captive thumbscrew to secure the card to the chassis.
If the card does not slide all the way into the slot, make sure the latches on the port of the card are pushed fully inward.
Figure 8. Tightening the front captive thumbscrews (Stage 64 shown)
You might need to disconnect some or all ribbon cables to access the thumbscrews.
Figure 9. Securing the card to slot G of the Stage 64 chassis (shown at left) and to slot D of the Stage 32 (shown at right)
Содержание DSI-192
Страница 1: ...Stage I O Card Installation Guide Stage 64 and Stage 32 for Avid VENUE S6L Systems...
Страница 4: ......
Страница 9: ...S6L Stage I O Card Installation Guide 4...
Страница 17: ...S6L Stage I O Card Installation Guide 12...
Страница 20: ......


