


52
Detail:
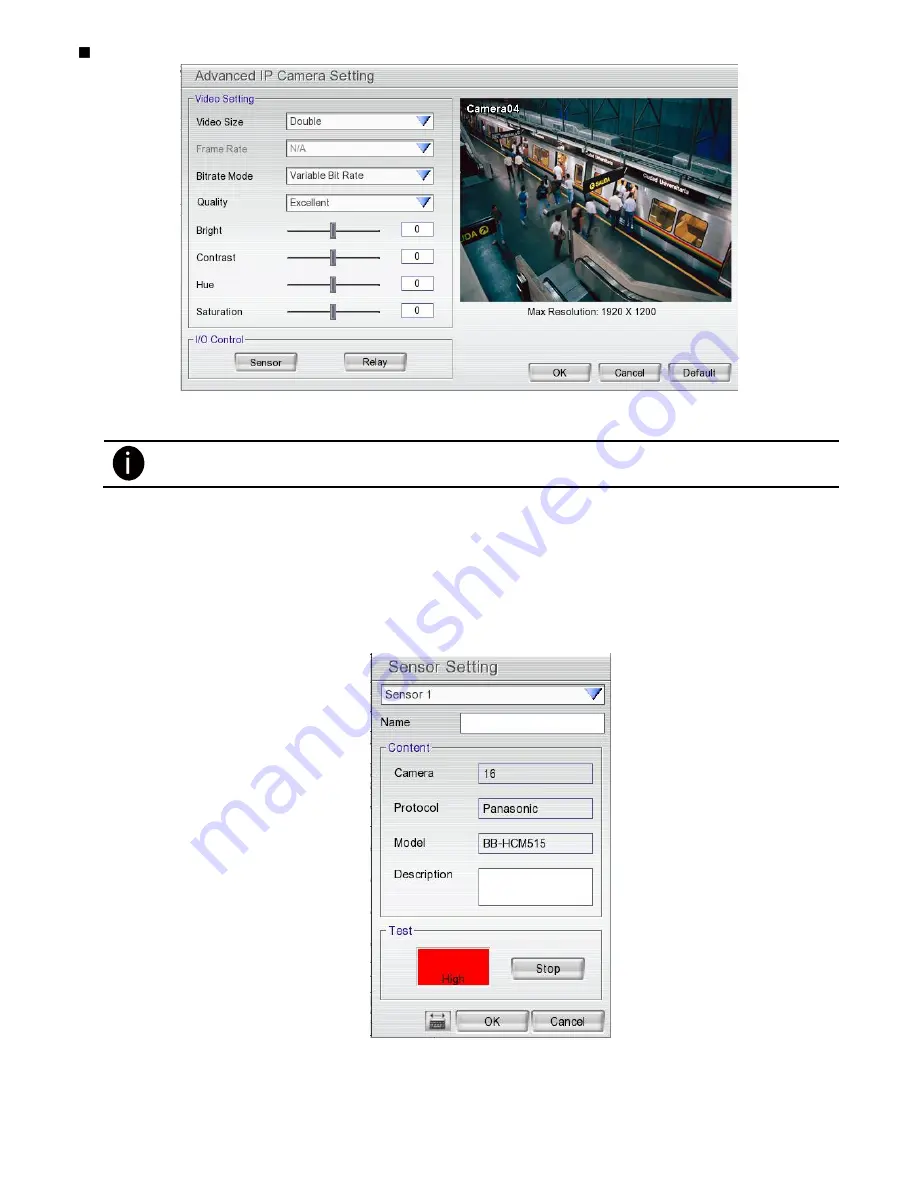
To adjust IP camera parameters, click
Detail
. Click
Default
will back to the factory default value.
User can select
Video size
,
Frame rate
,
Bitrate mode
and
Quality
of camera. Also, user can adjust
Bright
,
Contrast
,
Hue
,
Saturation
, and
I/O Control
of the camera.
The selection and adjustment items may vary by the camera supported.
I/O Control: Setup the sensor and relay that is embedded on the IP camera.
Sensor Setting
1. Click
Sensor
button.
2. Click the drop-down list and select the sensor ID number.
3. Enter sensor name in
Name
column
4. The system automatically detects the camera and input relates information. In the Content section,
enter sensor
Description
.
5. In the test section, click
Test
to check the sensor status.
Red
is high and
Green
is low.
6. Click
OK
to exit and accept the setting and
Cancel
to exit without saving the setting.
Relay Setting
1. Click
Relay
button.
2. Click the drop-down list and select the relay ID number.
3. Enter relay name in
Name
column
4. The system automatically detects the camera and input relates information. In the Content section,
enter relay
Description
.
Содержание AVerDiGi EH5108
Страница 1: ...Jan 2011...
Страница 8: ......
Страница 66: ...58...
Страница 144: ...136 7 After installation completed the iBBViewer application is installed on your BlackBerry phone and is ready for use...
Страница 152: ...144 8 After installation has completed click Open or go to Application to select and run the AVerDiGi AndroidViewer...
Страница 179: ...171 8 For manually backup click file select button and select the DVR to backup...


