43
3.2.2
To Setup Analog Camera
Click
Default
will back to the factory default value.
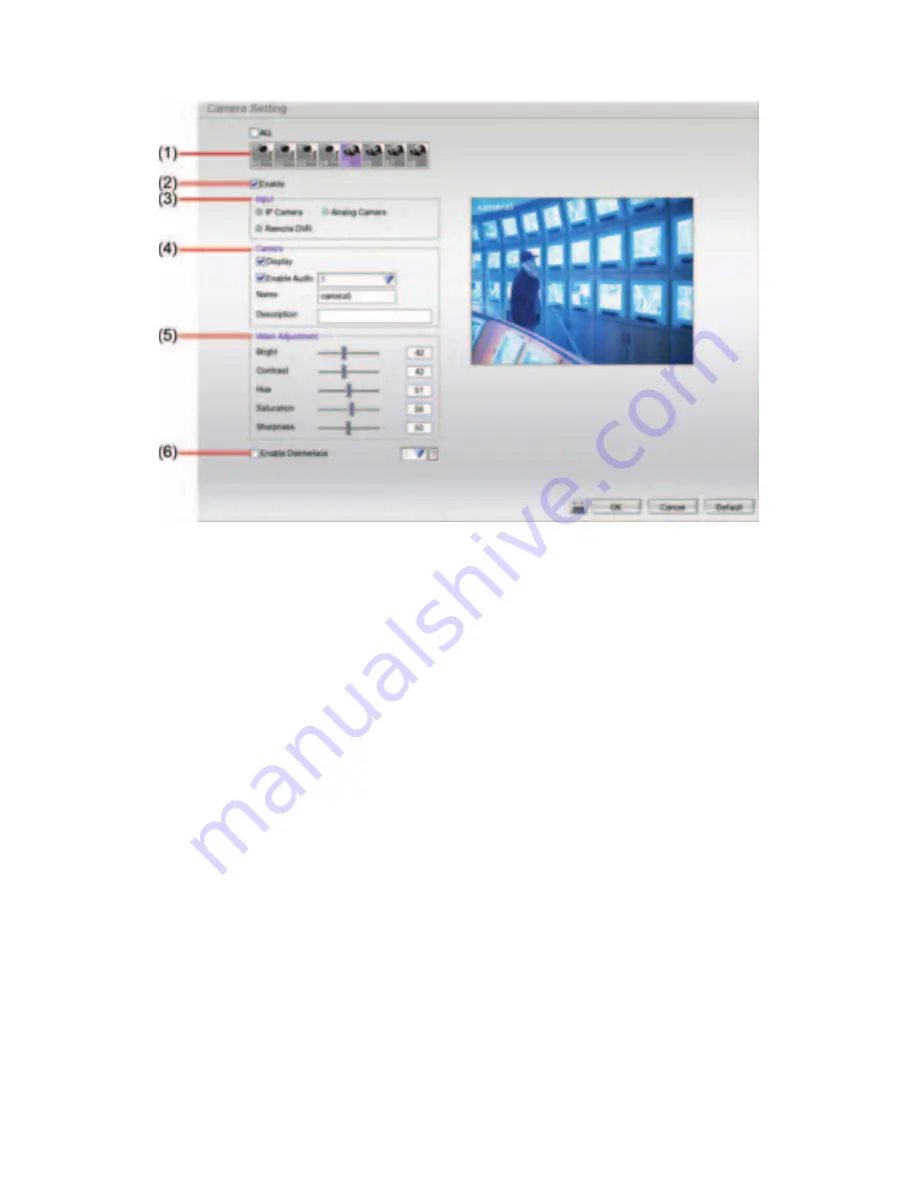
(1) Camera Icons
Select the camera number you want to view. To enable/disable all cameras, click
ALL
check box.
(2) Enable
Set to enable/disable the selected camera. When there is no video source on the camera, we suggest disabling
it so tha
t the system won’t detect it as video loss error.
(3) Input
Select the camera type as
Analog Camera
.
(4) Camera
-
Display
Enable/disable to show the video. Even if the video of the selected camera is hidden you can still record
the video and preview it in playback mode.
-
Enable Audio
Mark
Enable Audio
will allow recording the sound that received from selected audio input channel (audio
input channel located on back panel of DVR). For example: user has enabled audio and select audio
input channel 1 on the camera 4. Therefore, DVR will record the video of camera 4 and sound that
received from audio input channel 1 together. While playback, user will hear sound that received by audio
input channel 1 on camera 4.
-
Name
Change the camera name
-
Description
Add a short comment
(5) Video Adjustment
Adjust the Brightness, Contrast, Hue, Saturation, and Sharpness of the camera.
(6) Enable Deinterlace
To enhance the video quality. Set the de-interlace mode to #1, if you are capturing motionless picture and #2, if
it captures lots of movement.


