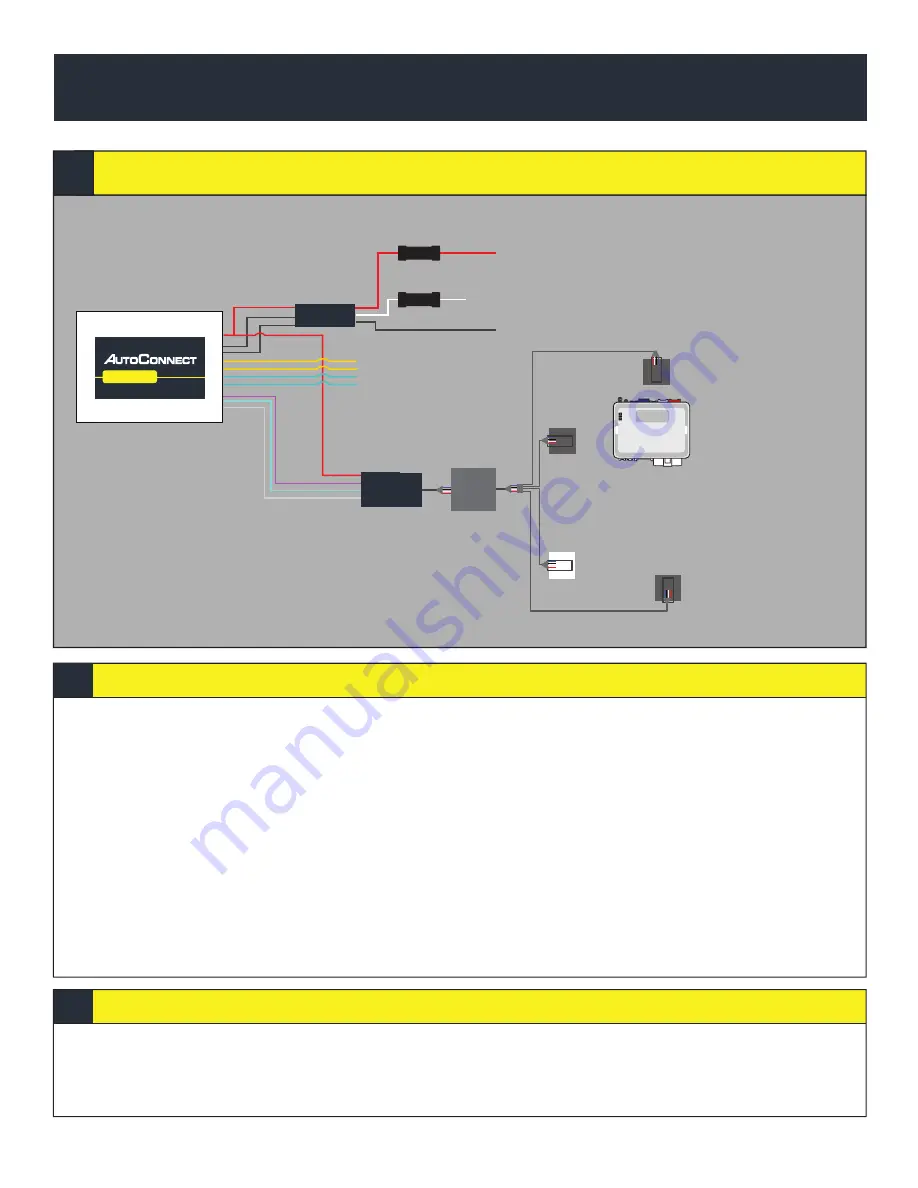
1. Program EVO-ONE as per Fortin installation instructions for vehicle (Ensuring to select option H2 in Flashlink Manager) or visit
http://fortin.ca/download/26701/autoconnect_evo-one.pdf
2. Complete installation as per Fortin installation diagram.
3. Connect Data link cable to the Bypass Module. You will need the extension cable “Starter Connection Cable” available from CTS
Tracking.
4. Connect Power, Ground and Ignition from AC202 if you want to use true voltage.
5. Scroll to the bottom of the commands and send the required Installer Protocol.
6. For Fortin EVO-ONE select “Set Fortin Protocol”.
7. Program the Autoconnect to Fortin module by performing the following:
-Turn Ignition On.
-Press and hold the Valet switch until LED flashes then release. Then press Valet switch 5x.
-Press and release the brake pedal.
-Send the Lock command from the Autoconnect. The park lights will flash once to confirm.
-Press and release the brake pedal then turn igntion OFF.
8. Mount the Autoconnect module as described in the Autoconnect Install guide Step 3.
1. Open the Autoconnect App or Dashboard
2. Log in to the Autoconnect device installed using the SID # as both username and password.
3. Go to the command tab on the bottom of the app, or the remote function of dashboard
4. Test all the application functions (Start, Stop, Lock, Unlock, Auxiliaries, ETC. GPS).
5. We recommend affixing the SID Sticker to the door jamb of the vehicle.
pg
6
Fortin EVO-ONE
Installation Steps
Programming and Testing
INSTALLATION TYPE 4
AC202
AC202
White - Key Ignition Source (+)
Red 12V +
Black Ground
Fuse
Fuse
RF CONN 3
RF CONN 1
RF CONN 2
RF CONN
Yellow/Black: Input 1 (Optional (-), Can be used for hardwired alarm)
Yellow/Brown: Input 2 (Optional (-))
Blue/Green: Output 1 (Optional (-))
Green: Output 2 (Starterkill (-))
External Connector: Not used
Starter
Connection
Cable


