


Configuring Client Settings
Configuring Service Access Settings
136
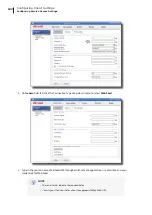
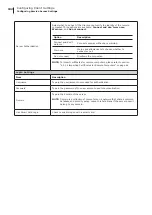
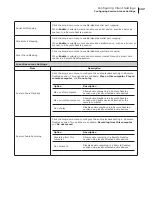
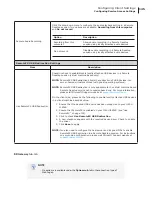
Optimization Settings
Item
Description
Connection Quality
Select the option that best describes the quality of your network connection.
Three options are available:
LAN (Very Fast)
,
Broadband (Fast)
, and
Modem (Slow)
.
NOTE:
Selection here will determine the defaults of items in this section as
listed below.
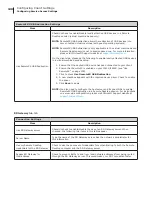
Desktop background
Check to use the desktop background.
Font smoothing
Check to use ClearType
®
technology to make fonts clear and smooth.
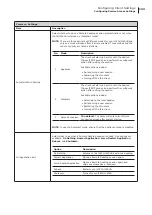
Show window contents while
dragging
Check to show window contents while dragging a window.
Menu and window animation
Check to show menu and window animation.
Visual styles
Check to allow non-classic themes.
Persistent bitmap caching
Check to allow client-side cache of bitmaps for a session.
Connection Settings
Item
Description
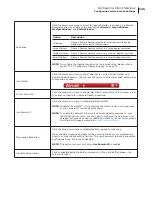
Multimedia Redirection
Click the drop-down menu to disable/enable multimedia redirection.
When enabled, the client receives original compressed multimedia streams and
decodes locally for display. This feature increases the load on the client, but
saves server resources, decreases the bandwidth usage, and improves audio and
video playback experiences.
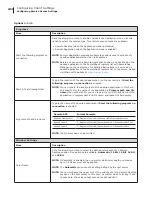
USB Storage Mapping
Click the drop-down menu to enable/disable USB storage mapping.
When
Enable
is selected, users can access the local USB storage devices, such
as a USB flash drive and memory card reader, in a Remote Desktop session.
NOTE:
Atrust Client Setup also allows you to enable or disable the use of locally
attached USB storage devices. You need to enable locally attached USB
storage devices first in order to use them in a Remote Desktop session.
The default is enabled.
NOTE:
To configure the use of USB storage devices, please refer to section
“4.4.3 Configuring Settings for USB Storage Devices” on page 82.
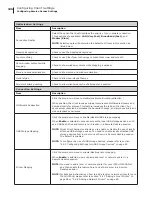
Printer Mapping
Click the drop-down menu to enable/disable printer mapping.
When
Enable
is selected, users can access a local or network printer in a
Remote Desktop session.
NOTE:
You need to add a local or network printer for your t180L/t180LB first,
and then enable this feature here to use that printer in a Remote
Desktop session.
NOTE:
For detailed instructions on how to add a local or network printer for your
t180L/t180LB, please refer to section “4.4.7 Adding a Local Printer” on
Содержание T180L
Страница 2: ...UM t180L LB EN 16050510...
Страница 8: ...vi...
Страница 12: ......
Страница 20: ......
Страница 28: ......
Страница 48: ......
Страница 220: ...Configuring Client Settings 210...
Страница 222: ......
Страница 230: ...220...
Страница 234: ...224...
Страница 235: ...UM t180L LB EN 16050510...
Страница 236: ......