background image

ATOS Worldline

 - 

Technologies & Products


Page:


36/55


DEP/T6 Owner's Manual

 (

04.01

)


Classification: 

Public


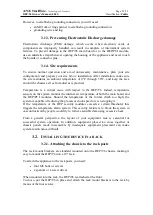
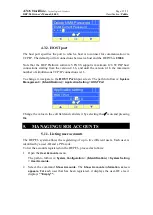
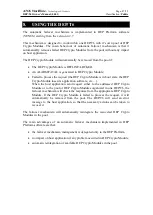
Show Accounts 


User 

   ge

n-a

dmin  

User 2    sec1 
User 3    *** Empty *** 


Ok 


5.1.2.


Adding a user account 

The procedure to create a new user is the following: 

1.


Open the 

User Accounts

 menu. 

The path to follow is: 

System Configuration

 > (Identification) > 

System Setting


User Accounts.


2.


Select the command 

Add User.

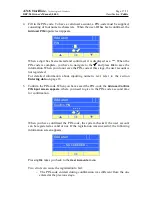
 The 

Add User


input 

screen 

ap

pear

s.


Add 

U

ser 


User  ID 


 . . . . . . . . . 


Ok 


3.


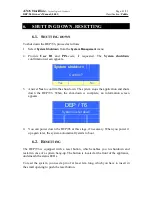
Fill in the 

User-ID.

 The user-ID 

can cons

ist of up to 

ten

 alphanumeric cha

rac

ters: 

a-z, 0-9 and "-". When the user

-ID is c

omplete, you 

hav

e to navigate to 

the


 and 

press 

Ok

 to save the information.  


Add User 


User  ID 

 gen-adm

 . 

. . 


Ok 


For detailed information about inputting alphanumeric text, refer to the section 

Entering data

 on page 16. 

Содержание DEP/T6

Страница 1: ...Version 04 01 Classification Public Haachtsesteenweg 1442 1130 Brussels Belgium DEP T6 Owner s Manual DEP Documentation ...

Страница 2: ...ldline S A N V has made every attempt to ensure that the information contained in this document is correct Atos Worldline S A N V does not provide any legal or commercial warranty on the document that is described in this specification The technology is thus provided as is without warranties of any kind expressed or implied included those of merchantability and fitness for a particular purpose Ato...

Страница 3: ... 01 00 Luc Braems 12 Jun 2006 Initial version Delivered to Deltate 01 01 Luc Braems 11 Jul 2006 Pictures added various corrections and improvements review comments 04 00 Anna Papayan 04 03 2011 Change the template into Atos Worldline minor changes 04 01 Anna Papayan 12 05 2011 Add the number of max host connections automatic failover from Venus 4 2 7 ...

Страница 4: ...gating through the screens 15 2 4 5 Entering data 16 2 4 6 Identification 17 2 4 7 Storing settings 19 2 4 8 Changing the LCD set up 19 3 INSTALLING THE DEP T6 21 3 1 PREPARING THE INSTALLATION 21 3 1 1 Dimensions 21 3 1 2 Required tools and parts 21 3 1 3 Preventing Electrostatic Discharge damage 22 3 1 4 Site requirements 22 3 2 INSTALLING THE DEVICE IN A RACK 22 3 2 1 Attaching the chassis to t...

Страница 5: ...ING DOWN RESETTING 41 6 1 SHUTTING DOWN 41 6 2 RESETTING 41 7 UPGRADING THE DEP T6 42 7 1 STARTING AN UPGRADE 42 7 1 1 Types of upgrades 42 7 1 2 Starting 43 7 1 3 Aborting 43 7 2 UPGRADING OS SOFTWARE 44 7 3 UPGRADING THE PLATFORM SOFTWARE 45 8 USING THE DEP T6 47 9 READING THE LOGGING INFORMATION 48 9 1 TYPES OF INFORMATION 48 9 1 1 System monitoring information 48 9 1 2 System management inform...

Страница 6: ...c DEP products and applications refer to the guides command references and other documents listed in the References section on page 7 1 2 DOCUMENT ORGANISATION The major sections of this Owner s Manual are the following 1 Scope of the document This chapter discusses the scope audience organization and conventions of this publication It also provides references to other resources 2 DEP T6 overview ...

Страница 7: ...ilable from an extensive set of documents accompanying these products This document contains references to other documents about the DEP This paragraph gives a list of all the documents referred to DEP NMS User s Manual DEP EM User s Manual DEP C ZAM DEP User s Manual People new to Atos Worldline DEP technology may find it beneficial to read these documents DEP Introduction to DEP DEP Glossary For...

Страница 8: ...ax spacing SMALL CAPS type Is used to refer to keys on the keyboard 1 5 ABBREVIATIONS AND ACRONYMS An extensive overview of acronyms abbreviations and terms is provided in the document DEP Glossary 1 6 CONTACTING ATOS WORLDLINE You can visit Atos Worldline on the World Wide Web to find out about new products and about various other fields of interest URL www atosworldline com For the documentation...

Страница 9: ...ort it possesses a high level of connectivity As to the security features the DEP T6 inherits from the DEP PCI very sophisticated and sensitive protection mechanisms against tampering As to the physical protection of the appliance itself the front panel lock allows a security officer to hermetically close the device Access to and management of the DEP PCI Hardware Security Modules HSM is only poss...

Страница 10: ...er s Manual 04 01 Classification Public 2 3 HARDWARE OVERVIEW 2 3 1 Front view Figure 1 DEP T6 front view Number Part 1 Rack mount brackets 2 Front panel lock 3 C ZAM DEP ports 4 LCD display 5 User interface buttons 6 Reset button 7 Status LEDs 8 Ethernet port ...

Страница 11: ...rt 9 Cooling ribs 2 4 UNDERSTANDING THE USER INTERFACE This section discusses the general principles and mechanisms of the user interface 2 4 1 Basic controls The user interface of the DEP T6 consists of a monochrome LCD display and three push buttons Together they provide all the necessary features to configure and manage the device The picture below shows the LCD display with a navigation menu E...

Страница 12: ...olour and their meaning LED Colour Status Bottom Green Normal operation Middle Orange OS busy booting shutting down upgrading Top Red Critical error In some circumstances such as when starting an upgrade while the system is in normal operation the green and the orange LED can light up together Note 2 4 3 Types of screens The user interface consists of four basic types of screens menu screens infor...

Страница 13: ...ing up a submenu In an options menu the items are preceded by a radio button which allows selecting or deselecting a certain value for a setting Below are examples of a commands menu and an options menu respectively System Management 1 Display Status 2 System Configuration 3 LCD Setup Ok Ethernet Connection 1 Front 2 Rear 3 Up Ok 2 4 3 2 Information screens Information screens can have different c...

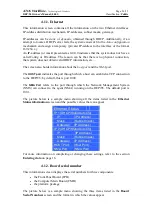
Страница 14: ...ed for both numeric and alphanumeric input and it presents a number of positions each of which needs to be filled individually with an alpha numeric character The latter is to increase or decrease a value as a whole by using the up or down key as appropriate Below are examples of both types of input screens Date and Time Date YY MM DD 06 03 14 Ok LCD Setup Contrast 056 Ok 2 4 3 4 Confirmation scre...

Страница 15: ...The active item is highlighted To validate an item selection you press the Ok button which corresponds to the middle push button The last item of each menu is always Up which is the command to return to a menu of a higher level 2 4 4 3 Display lines The DEP T6 display has five lines that it can use to display data Apart from the screen that is displayed during the start up of the host application ...

Страница 16: ...loop endlessly in both directions while browsing through the items of the menu When you have reached the last item of the list automatically the first item appears Adversely information screens displaying a list of items do not have this feature When you have reached the bottom you cannot but go up in the list again and vice versa They have however icons in the top right corner indicating in what ...

Страница 17: ...to fill in During alphanumeric data input a special character is available the DEL character In some input boxes it allows you to delete the input from the cursor position up to the end In this case all characters that follow the special DEL character are deleted In the PIN code and password entry box validated characters are replaced by the masking symbol 2 4 5 2 Changing values in a spin box To ...

Страница 18: ...ing the following to input screens Identification User ID gen Ok Identification PIN Ok For detailed information about entering alpha numeric data refer to the section Entering data on page 16 For information on how to register user accounts refer to the chapter Managing User accounts on page 35 The identification is required every time you have returned to the level of the System Management menu R...

Страница 19: ...tem Management 1 Save and Reboot 2 Exit without Saving 3 Cancel Changes Ok For the settings to be saved and to take effect select Save and Reboot If you select Exit without saving the system restarts and the settings are lost The settings as they were last saved in the flash memory are used If you select Cancel Changes you exit the System Management and the changes are discarded 2 4 8 Changing the...

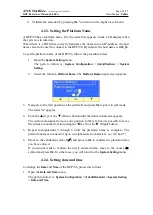
Страница 20: ...ge 17 2 4 8 2 Setting the backlight power saving feature To maximize the lifetime of the LCD display you can enable the Backlight Power Saving feature This feature has the display fade away after a certain period of inactivity You can switch the feature on or off and when it is enabled you can determine the duration of the inactivity period To switch the Backlight Power Saving feature on or off ca...

Страница 21: ...he function LCD Setup 3 Select the function Backlight Pwr Sav Time The LCD Setup Backlight Pwr Sav Time input screen appears LCD Setup Backlight Pwr Sav Time 060 sec Ok 4 Adjust the value in the input spin box to the desired number of seconds This value must be in the range 05 to 60 seconds 5 Press Ok to validate the new setting 3 INSTALLING THE DEP T6 3 1 PREPARING THE INSTALLATION 3 1 1 Dimensio...

Страница 22: ...ture sensors on the system monitor the internal air temperature of both the main board and the DEP PCI modules Should the temperature of the former climb too high the system is capable of reducing the processor clock speed or even stopping it If the temperature of the DEP security modules exceeds a certain threshold this triggers the temperature alarm system This security feature is to block the s...

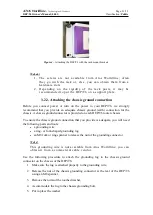
Страница 23: ...ssis ground connector is provided on each DEP T6 router chassis To ensure the chassis ground connection that you provide is adequate you will need the following parts and tools a grounding wire a ring or fork shaped grounding lug an M8 fork or ring spanner to release the nut of the grounding connector This grounding wire is not available from Atos Worldline you can obtain it from a commercial cabl...

Страница 24: ...d to connect the DEP T6 to LAN or to establish a connection to a PC which can be used for instance to manage the DEP T6 using the NMS Network Management System The cables used in the former case are straight through 10 100 Ethernet cables equipped with RJ 45 connectors In the latter case a cross cable is to be used The Ethernet cables are not available from Atos Worldline You can obtain them from ...

Страница 25: ...e appliance 3 Place the AC power cable in the cable retention clip and close it to keep the plug of the power cable in place 4 Plug the AC power supply cable into the AC power source Figure 6 The DEP T6 power cord with retention clip 4 STARTING AND CONFIGURING 4 1 CHECKING STATUS To check the status of the DEP T6 take the following path through the user interface menu system System Management Disp...

Страница 26: ...ates the port through which a host can establish a TCP connection to the DEP T6 by default this is port 1000 The NMA Port refers to the port through which the Network Management System NMS can connect to the agent NMA running on the DEP T6 The default port is 1001 The picture below is a sample menu showing all the items listed in the Ethernet Status information screen and the possible values that ...

Страница 27: ... is a sample menu showing the five items listed in the Software Revisions screen Software Revision FPB Firmware v01 00 CMB Bios v01 00 CMB Firmware v01 00 CMB API v01 00 Host Application v01 00 4 1 4 System status This information screen provides information about the temperature of the crucial components in the DEP T6 the front panel board the computer main board the CPU Additionally it shows the...

Страница 28: ...ed Ethernet Connection 1 Front 2 Rear 3 Up Ok 3 Navigate to the option Front 4 Validate the selection by pressing Ok You return to the higher level menu For additional information on configuring the IP interfaces refer to the section Setting the IP addresses on page 30 4 2 2 Managing the watchdog The DEP T6 is equipped with a watchdog mechanism to prevent system hang ups By default the watchdog is...

Страница 29: ...orm Name dt6 1 27 Ok 3 Navigate to the first position of the edit field and press Ok to put it in edit mode The letter a appears 4 Push the Up or the Down button until the desired character appears The cursor automatically moves one position to the left but it is possible to move the cursor to another location using the Left or the Right button 5 Repeat manipulations 3 through 4 until the platform...

Страница 30: ...e to move the cursor to another location using the Left or the Right button 5 Repeat manipulations 3 through 4 until the correct date has been specified in compliance with the format shown on the line above 6 Move to the validation symbol and press to Ok to validate the Date you have entered If you do not want to validate the newly entered date time move to the cancel symbol and press Ok In either...

Страница 31: ...nterface Select the Ethernet interface for which you want to provide or change the set up Press Ok to confirm Since the settings are identical for both ports the procedure to set the IP related parameters is also identical The picture below shows a sample menu containing all the settings for the IP set up IP x Setup 1 DHCP 2 IP Address 3 Subnet Mask 4 Gateway 5 Up 4 2 5 2 Setting up DHCP DHCP is e...

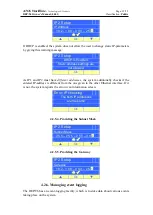
Страница 32: ...fferent addresses the system additionally checks if the entered IP address is different from the one given to the other Ethernet interface If it is not the system reports the error in an information screen Error IP checking The both IP addresses are the same Ok 4 2 5 4 Providing the Subnet Mask IP 2 Setup Subnet Mask 2 5 5 2 5 5 2 5 5 0 0 0 Ok 4 2 5 5 Providing the Gateway IP 2 Setup Gateway 1 9 2...

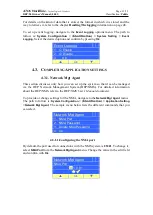
Страница 33: ...tion discusses only how you can set up the system so that it can be managed via the DEP Network Management System DEP NMS For detailed information about the DEP NMS refer to the DEP NMS User s Manual document To provide or change settings for the NMA navigate to the Network Mgt Agent menu The path to follow is System Configuration Identification Application Setting Network Mgt Agent The sample men...

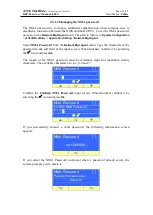
Страница 34: ...he characters of the password in the edit field of the input screen When finished validate it by selecting the icon and press Ok The length of the NMA password must be minimum eight and maximum twenty characters The available characters are a z 0 9 and NMA Password Ok Confirm the Confirm NMA Password input screen When finished validate it by selecting the icon and press Ok NMA Password Confirm NMA...

Страница 35: ...OST Port input screen The path to follow is System Management Identification Application Setting HOST Port Application setting HOST Port 0 1 0 0 0 Ok Change the value in the edit field and validate it by selecting the icon and pressing Ok 5 MANAGING USER ACCOUNTS 5 1 1 Listing user accounts The DEP T6 system allows the registering of up to five different users Each user is identified by a user ID ...

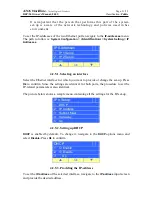
Страница 36: ...follow is System Configuration Identification System Setting User Accounts 2 Select the command Add User The Add User input screen appears Add User User ID Ok 3 Fill in the User ID The user ID can consist of up to ten alphanumeric characters a z 0 9 and When the user ID is complete you have to navigate to the and press Ok to save the information Add User User ID gen adm Ok For detailed information...

Страница 37: ...account is not registered For detailed information about inputting numeric text refer to the section Entering data on page 16 5 Confirm the PIN code When you have saved the PIN code the Add user Confirm PIN input screen appears where you need to give in the PIN code a second time for confirmation Add user Confirm PIN Ok When you have confirmed the PIN code the system checks if the user account can...

Страница 38: ...ollow is System Configuration Identification System Setting User Accounts 2 Select the command Change PIN The Change PIN menu appears presenting the list of user accounts Change PIN 1 gen admin 2 sec 1 3 sec 2 Ok If no user accounts have been registered the following information screen appears Change PIN No Users Ok 3 Select the user account for which you want to change the PIN code Browse the lis...

Страница 39: ...vigate to the and press Ok to save the information 6 Confirm the new PIN Give in the 4 digits of the PIN code navigate to the and press Ok to save the information If at this stage you type a PIN code that differs from the entered just before the PIN mismatch error message will appear 5 1 4 Removing a user account If user IDs have been registered you need to log in before you can remove a user acco...

Страница 40: ...lect the user account to remove Browse the list of user accounts and select the one you wish to remove by pressing Ok when it is highlighted The Remove user confirmation screen appears Remove user User ID sec1 Confirm Yes No 4 Press Yes to confirm the removal The system returns to the User Accounts menu ...

Страница 41: ... system stops the application and shuts down the DEP T6 When the shut down is complete an information screen appears DEP T6 System is shut down 4 You can power down the DEP T6 at this stage if necessary When you power it up again later the system automatically starts to boot 6 2 RESETTING The DEP T6 is equipped with a reset button which enables you to shutdown and restart in case of a system hang ...

Страница 42: ...k your Atos Worldline contact Note The procedure discussed in this chapter allows two types of upgrade OS operating system software platform software VENUS 1 Before starting an upgrade it is recommended to stop any communication on the host with the DEP T6 Warnings 2 An upgrade of the platform software can be performed independently An upgrade of the OS software however must always be followed by ...

Страница 43: ...tem busy LED lights up Depending on the type of upgrade that is to be performed either of the following two confirmation screens is displayed 7 1 3 Aborting If you answer No the upgrade is aborted and the following information screen appears Upgrade aborted Error Code ffffffffh Please remove the stick When you remove the USB key the system displays a screen prompting for confirmation to restart th...

Страница 44: ...ftware is plugged in and the question to proceed has been answered with Yes the upgrade starts An upgrade of the OS may take a few minutes After an upgrade of the OS the system settings as they have been entered before are preserved Note The pictures below illustrate the flow of the upgrade OS Upgrade Process Yes No OS Upgrade Downloading OS Upgrade Restarting OS Upgrade SUCCEEDED Remove Stick ...

Страница 45: ...n you press Ok an information box with the System Information appears System Information Platform Name FPB Serial Number CMB Serial Number PKG Package Number IP 1 DHCP Static AutoCfg IP IP Address Mask Subnet mask Gateway IP Address IP 2 DHCP Static AutoCfg IP IP Address Mask Subnet mask Gateway IP Address HOST Port Host Port NMA Port NMA Port OK At this stage you can replace the USB key with the ...

Страница 46: ...P T6 Owner s Manual 04 01 Classification Public Application Upgrade Downloading Application Upgrade Installing Application Upgrade Restarting Application Upgrade SUCCEEDED Remove Stick After you have removed the USB key the DEP T6 automatically reboots ...

Страница 47: ...EP Crypto Module loses its application software etc When the host application send request either to the addressed DEP Crypto Module or to the pool of DEP Crypto Modules organized in one DEP T6 the failover mechanism will check the response from the appropriate DEP Crypto Module If the DEP Crypto Module is failed to process the request it will automatically be removed from the pool The DEP T6 will...

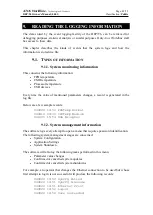
Страница 48: ...ges a record is generated in the log file Below are a few sample records 040820 10 50 FPBTemp Normal 040910 09 30 CPUTemp Medium 041005 15 54 USB WrongDev 9 1 2 System management information The software logs every attempt to open a menu that requires password identification The following system management stages are concerned System Configuration Application Settings System Shutdown The software ...

Страница 49: ...o the following records 040914 20 10 SysSht B Daniels 9 2 LOGGING DATA FORMAT The logging data is stored in a file called SYSTEM LOG which is located in the disc on chip memory with which the DEP T6 is equipped All the information is stored in ASCII format to be readable easily with a standard text editor Every record starts with a date and time stamp ...

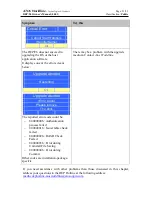
Страница 50: ...the one currently in use may not be supplying power If the problem persists contact Atos Worldline The DEP T6 display is working but the appliance does not react to any key manipulation Check if the red status LED critical error is lit Reset the DEP T6 by pressing the reset button and wait for the system to reboot Switch the power of and on again wait for the DEP T6 to restart If the problem persi...

Страница 51: ...e Please remove The stick The reported error code could be 80000000h Authentication process failed 80000001h Issuer table check failed 80000002h HASH Check Failed 80000003h Error during Uninstall File Saving 80000004h Error during Commit Other codes are installation package specific There may be a problem with the upgrade medium Contact Atos Worldline If you need assistance with other problems tha...

Страница 52: ...or consultation on the www banksys com website Go to Products solutions HSM and choose Certificates 11 2 SAFETY RECOMMENDATIONS 11 2 1 Operating the DEP T6 Keep the DEP T6 away from heat fire cold moisture or oil electricity radiation water humidity shocks vibrations chemicals or any other product that may affect electronic devices Do not drop the DEP T6 throw it or slam it do not put any heavy eq...

Страница 53: ...e performed by Atos Worldline or approved service staff 11 2 3 Disposal of the appliance At the end of the life of your DEP T6 contact Atos Worldline for information on how to dispose of your unit Do not throw away give away or sell your DEP T6 as it contains environmentally hazardous materials that have to be treated by a professional party Do not throw it out with the household waste ...

Страница 54: ...o 10 100 RJ 45 ports with TCP IP multi session capability DEP HSM management Two C ZAM DEP RJ 45 ports Approvals Certifications DEP T6 tamper evident housing Compliant with Security requirements for cryptographic Modules FIPS 140 2 Level 2 DEP PCI Compliant with Security requirements for cryptographic Modules FIPS 140 2 Level 4 Common Criteria EAL3 certification MEPS approved Cryptographic algorit...

Страница 55: ... Users Accounts 5 Event Logging IB Plateforn Name CM Date and Time 1 Date 2 Time DIB Date DIB Time CM IP Addresses 1 IP 1 Setup 2 IP 2 Setup CM IP x Setup 1 DHCP 2 IP Address 3 Subnet Mask 4 Gateway CM Display Status 1 Ethernet Status 2 Board Serial Numbers 3 Software Revision 4 System Status IB Ethernet Status IB Board Serial Numbers IB Software Revision IB System Status OM DHCP DIB IP Address DI...

Отзывы: