9
PAGE
Repair Instructions No.178.06/97
PN 6000 S
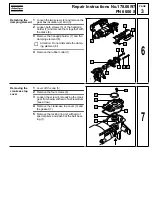
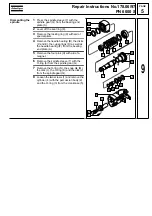
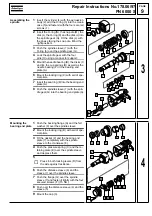
Assembling the
spindle
1
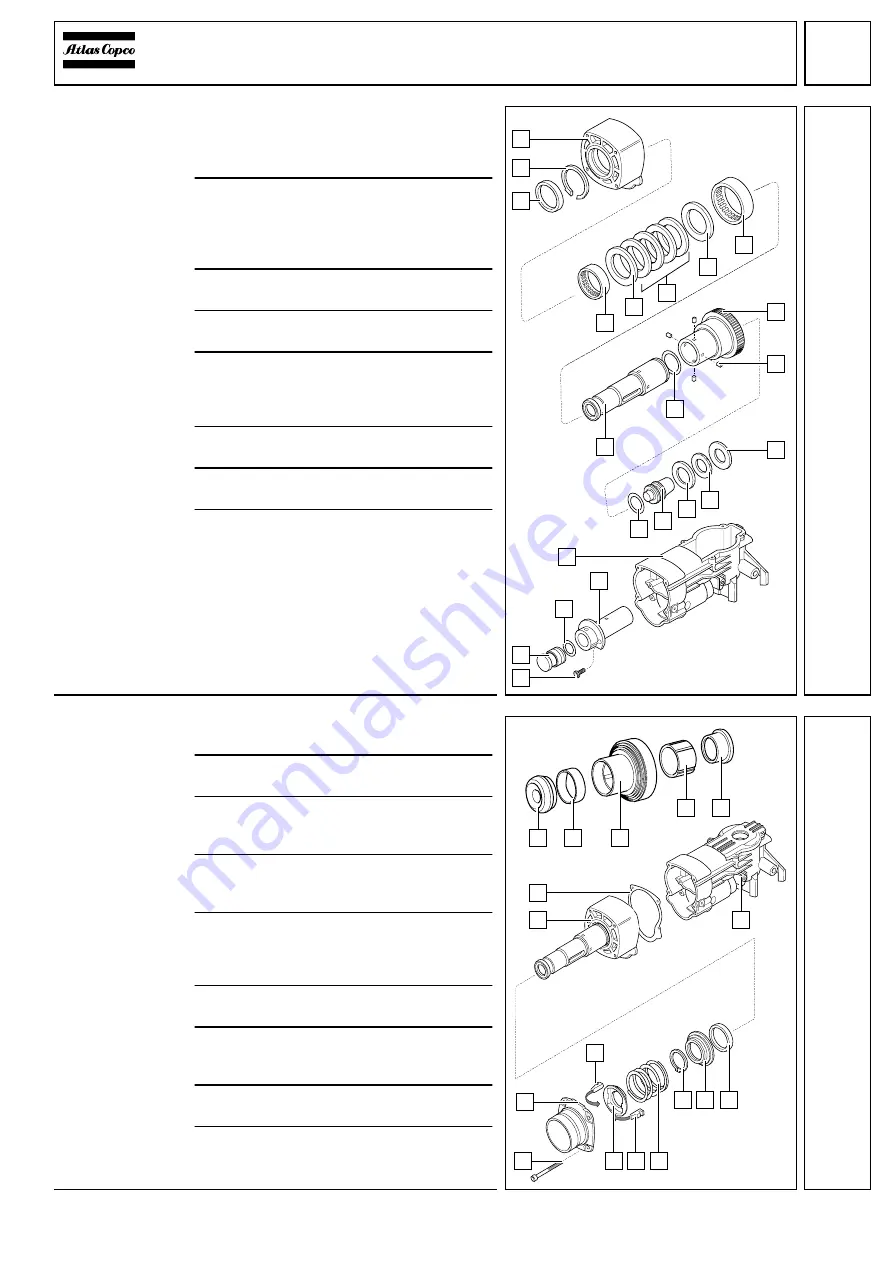
Insert the cylinder (4) with the percussion
body (2) and the O-ring (3) into the crank-
case (5) and fasten it with the four secured
screws (1).
2
Insert the O-ring (N), the snap die (M), the
disk (L), the O-ring (K) and the disk (J) into
the spindle gear (G). Fit the disk (L) with
the phase facing the snap die. Mind the
right position!
3
Push the spindle sleeve (7) with the
O-ring (6) over the spindle gear (G).
4
Lock the spindle gear with the four
pins (H) using a magnet for support.
5
Mount the needle bearing (B), the disks (C
and E), the cup springs (D) as well as the
needle bearing (F) in the bearing end
plate (A).
6
Mount the locking ring (9) with aid of spe-
cial pliers.
7
Insert the seal ring (8) into the bearing end
plate (A).
8
Push the spindle sleeve (7) with the spin-
dle gear (G) into the bearing end plate (A).
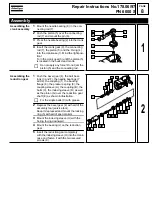
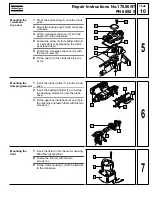
Mounting the
bearing end plate
1
Push the backing flange (A) and the felt
washer (9) over the spindle sleeve.
2
Mount the locking ring (B) with aid of spe-
cial pliers.
3
Fit the gasket (2) and the bearing end
plate (1) completely with the spindle
sleeve to the crankcase (8).
4
Push the pressure spring (C) and the re-
taining plate (E) over the spindle sleeve
and depress them.
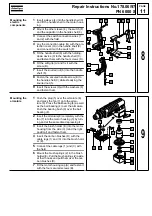
5
☞
Press in both locking levers (D) from
the side against resilience.
6
Push the distance sleeve (6) and the
sleeve (7) over the spindle sleeve.
7
Push the flange (G) over the spindle
sleeve (7) and fasten it tightly with the four
secured screws (F) (15 Nm).
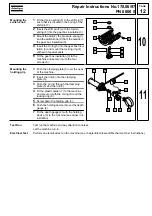
8
Push over the distance sleeve (4) and the
sleeve (5).
9
Mount the cap (3).
D
1
6
5
4
3
2
7
8
9
A
B
C
E
G
H
F
J
K
L
M
N
3
1
6
5
4
3
2
7
8
9
A
B
C
D
E
F
G
D
4
Содержание PN 6000 S
Страница 1: ......

