2920 1257 04
37
Instruction book
LE15/55
LE75 60 Hz Operation sequence
LE75 50 Hz HP cylinder
LF15/40
LE110/150
LE75 60 Hz HP cylinder
LP cylinder LT15/110
LE110/150
HP cylinder
LP cylinder LF55/75
LT15/110
HP cylinder
LP cylinder
LF55/75
LP cylinder
•
•
Remove spring (4), outlet valve
guard (5) and outlet valve disc
(6).
•
•
Lift off valve seat (7) and remove
inlet valve disc (8). Do not
remove guide pins (9).
•
•
Remove and discard all O-rings
and rubber joints.
•
•
If necessary, remove the carbon
deposits from the inlet valve
guard at the cylinder top. Take
care that no dirt drops into the
cylinder.
•
•
Clean and inspect all parts.
•
•
Fit a new joint (10). Do not
stretch the cord while inserting it
in its groove; the ends should
meet.
•
•
Put a new inlet valve disc (8) into
place and install valve seat (7).
•
•
Fit a new O-ring (3) and joint (2).
•
•
Install a new outlet valve disc (6),
guard (5) and spring (4).
•
Install cylinder head cover (12).
Use new flange gaskets, if
necessary. Fit the flange and
cylinder head bolts and tighten
them alternately.
•
Reinstall head (13). Fit a new
joint (14). Install cylinder head
cover (12). Fit the flange and
cylinder head bolts and tighten
them alternately.
•
•
Reinstall the fan guard, cover of
the air inlet silencer, air filter,
cover (1-Fig. 1.1) and cap.
Torque values
M6:
10 Nm +/- 2
M8:
23 Nm +/- 2
M10: 46 Nm +/- 5
5.3 Air filter
1. Stop the compressor.
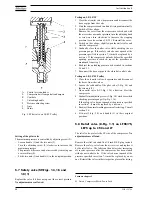
2. On LE/LF/LT 15 up to -55 and LE/LT75 50 Hz: unscrew
the cap on top of cover (1-Fig. 1.1). Lift off the cover and
filter element. Take care that no dirt drops inside the
suction silencer.
On LE/LT75 60 Hz, LF75, LT110 and LE110/150:
unscrew cap (1-Fig. 1.7) and take out the air filter. Take
care that no dirt drops inside the suction silencer.
3. Using a damp cloth, clean the filter chamber and cover.
Discard damaged elements.
4. Install the new element, cover and cap.
5.4 Adjustment MDR4 pressure switch
(Figs. 5.3 up to 5.5)
The adjustment of the maximum or stopping pressure of the
compressor is effected by means of the air pressure switch.
The switch also controls the pressure difference between the
maximum pressure (stopping pressure) and that at which
compression is resumed (starting pressure).
Caution
-
Adjust the air pressure switch while it is pressurized.
-
Switch off the voltage before removing the cover of the
switch; reinstall it after an adjustment has been made and
before the voltage is switched on again.
Adjustment
The maximum pressure is controlled by adjusting screw (4).
Turn the screw clockwise to raise the maximum or stopping
pressure, anti-clockwise to lower it.
The pressure difference is adjusted by means of screw (5).
To reduce the difference between the stopping and starting
pressures, i.e. increase the starting pressure, turn the screw
anti-clockwise. To increase the pressure difference, turn the
screw clockwise. The adjustment range is shown on the
diagrams (Fig. 5.5).
Содержание LE110
Страница 11: ...2920 1257 04 11 Instruction book Fig 2 2 Dimension drawing LE LT55 75 and LF40 55 Power Pack ...
Страница 13: ...2920 1257 04 13 Instruction book Fig 2 4 Dimension drawing LT15 up to 40 Complete Unit vertical 250 l receiver ...
Страница 14: ...2920 1257 04 14 Instruction book Fig 2 5 Dimension drawing LE LT40 Complete Unit horizontal 250 475 l receiver ...
Страница 18: ...2920 1257 04 18 Instruction book Fig 2 9 Dimension drawing LE LF LT Pack with optional silencing hood ...
Страница 19: ...2920 1257 04 19 Instruction book Fig 2 10 Dimension drawing LE LT15 up to 40 Unsilenced Pack ...
Страница 20: ...2920 1257 04 20 Instruction book Fig 2 11 Dimension drawing LE LT55 75 and LF40 55 Unsilenced Pack ...
Страница 21: ...2920 1257 04 21 Instruction book Fig 2 12 Dimension drawing LE LT15 up to 150 with CD dryer ...
Страница 22: ...2920 1257 04 22 Instruction book Fig 2 13 Dimension drawing LE LF LT Trolley with electrical motor ...
Страница 23: ...2920 1257 04 23 Instruction book Fig 2 14 Dimension drawing LE LT75 up to 150 and LF75 Power Pack ...


