2-2
Chapter 2: Basic Installation
Chapter 2
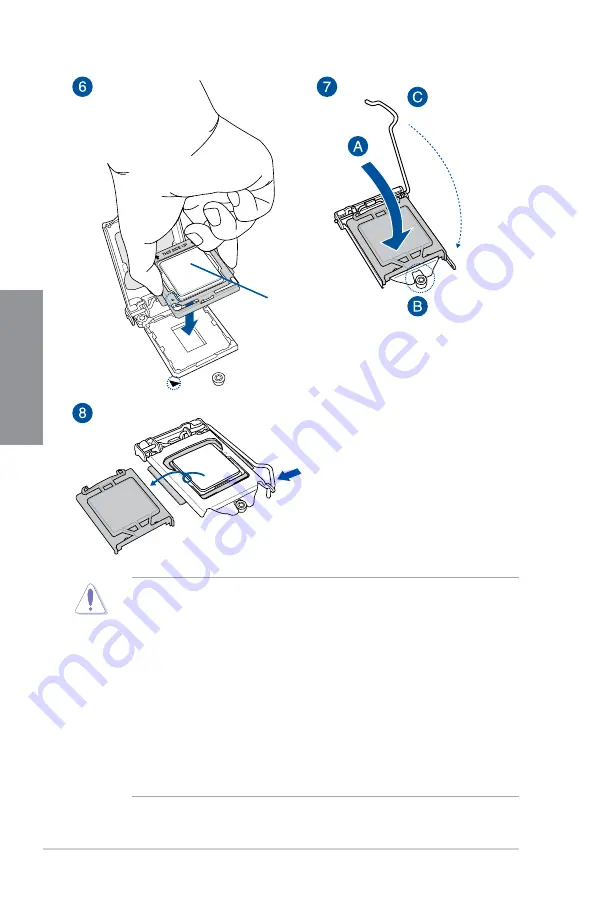
Top of CPU
•
The CPU Installation Tool is only compatible on ASUS motherboards with a Intel
®
LGA1151 socket.
•
Ensure that the CPU is firmly clicked into place before installing it onto the CPU socket
on the motherboard.
•
Use the CPU Installation Tool for installing the CPU only. DO NOT damage or bend
the CPU Installation Tool.
•
Always firmly hold both sides of the CPU Installation Tool when installing, removing, or
picking up the CPU Installation Tool.
•
Ensure to use a soft stable surface when installing the CPU to the CPU Installation
Tool to prevent CPU damage.
•
ASUS will not cover damages resulting from incorrect CPU installation/removal,
incorrect CPU orientation/placement, or other damages resulting from negligence by
the user.
Содержание MAXIMUS X HERO
Страница 1: ...Motherboard MAXIMUS X HERO WI FI AC ...
Страница 46: ...2 4 Chapter 2 Basic Installation Chapter 2 To uninstall the CPU heatsink and fan assembly ...
Страница 48: ...2 6 Chapter 2 Basic Installation Chapter 2 2 1 4 DIMM installation To remove a DIMM ...
Страница 52: ...2 10 Chapter 2 Basic Installation Chapter 2 To install Hyper M 2 x4 card ...
Страница 53: ...ROG MAXIMUS X HERO WI FI AC 2 11 Chapter 2 2 1 9 M 2 installation Supported M 2 type varies per motherboard ...
Страница 60: ...2 18 Chapter 2 Basic Installation Chapter 2 Connect to 4 Speakers Connect to 6 Speakers Connect to 8 Speakers ...
Страница 62: ...2 20 Chapter 2 Basic Installation Chapter 2 ...
Страница 116: ...A 14 Appendix Appendix ...


