

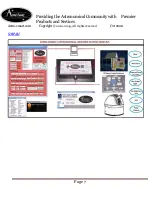


Providing the Astronomical Community with Premier
Products and Services
Astro-smart.com Copyright
© 2010-2049, All rights reserved
Oct 2020
Page 11
E.
Hardware Installation and Operation Warnings
1.
Start by determining an appropriate location to mount the R2 full sensor fusion module outdoor
unit. Choose a location with a clear view of the sky. The outdoor unit can be mounted on the
side of your observatory or on a 4x4 pressure treated post. When mounting the outdoor unit
ensure you allow air flow to the underside of the outdoor unit for proper temperature, humidity
and pressure readings.
2.
If the wind option is purchased with pre drilled PVC kit, the PVC mounting package ensures
enough space between the anemometer (wind speed and direction unit) and the outdoor unit. When
using the wind option, mount the outdoor unit and wind unit with enough height and clearance to
get clean air flow.
3.
with chosen single data/control cable between your
controller and R2 Full Sensor Fusion module. Cable length vary between 6 and 50 feet but can be
custom. The R2 Full Sensor Fusion module has all sensors installed. If the wind option is
purchased, the R2 has a wind plug port that can be used for connection to your wind mount.
These cable lengths are standard 6 feet in length. Use the mounting clips to secure your R2
enclosure and wind sensor to the PVC mounting package or to your desired platform. After all
connections are made to your R2 enclosure, plug in your power connection followed by your
controller near your computer location. Then turn
on the unit with power on switch. Other options are available for
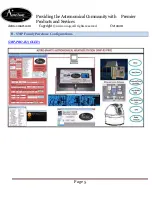
R2 family
such as GPS(internal
to unit), rain sensor heating, wind and direction sensors and wireless option. In the
R2 family
instance the GPS, rain sensor heating and wireless options are installed in the
SMP-R2 family
controller
. The rain sensor heating option comes with an additional power supply plugged in to
the
R2
enclosure when heating of the rain sensor is desired. You are now ready for communicate
to your system via GUI or ASCOM driver interface.
4.
unit.
a)
Relay Output Option 1 and 2:
Mount inside. Connect from SMP-R2-PRO Relay output
with 3.5mm jack 12ft cable to Relay 2 box. The relay 2 box can have any length AC run
to operate an AC source such as an alarm, light, or operation of observatory door triggered
by cloudy or raining conditions settable by the user.
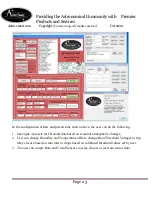
Once, R2 enclosure is installed, then plug in USB cable to computer. Then turn on 12VDC power.


