background image

ClassNet Terminal User Manual 


11

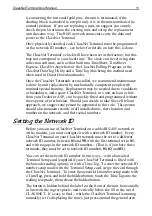
is connecting the two small gold pins, the unit is terminated; if the 
shorting block is attached to one pin only it is in the non-terminated (ie 
normal) position.  If you are replacing a unit, we suggest you simply 
check the pin location on the existing unit, and set up the replacement 
unit the same way.  The RJ45 network connectors carry the data and 
power to the ClassNet Terminal. 

Once physically installed, each ClassNet Terminal must be programmed 
with a network ID number – see below for details on how this is done. 

The ClassNet Terminal’s clock will have been set at the factory, but this 
may not correspond to your local time.  The clock can be set using data 
collection software, such as that built into TimeSheet, TimeSheet 
Express, ClassNet Anywhere or the ClassNet Polling Program, or the 
ClassNet DataTag Utility and a TimeTag (this being the method used 
when used in Direct Download mode). 

Once the ClassNet Terminals are installed, we recommend maintenance 
is done by unit replacement by mechanically competent people with 
minimal special training.  Replacement may be needed due to vandalism 
or breakdown, and a spare ClassNet Terminal, or a unit on loan or hire 
from your Dealer or ASP, can be quickly fitted and programmed without 
the expense of a technician.  Should you decide to take this self reliant 
approach, we suggest one person be appointed to this role.  This person 
should also maintain records of all installed units, their location and 
number on the network, and their serial numbers. 

Setting the Network ID 

Before you can use a ClassNet Terminal on a cabled RS-485 network or 
with a modem, you must configure it with a network ID number.  Every 
ClassNet Terminal on your ClassNet network must be set to a different 
network ID number, between 

01

 and 

98

, with the first terminal set to 

01

and with no gaps in the network ID numbers.  (That is, if you have three 
terminals, they must be set to network ID numbers 

01

02

 and 

03

.) 

You can set the network ID number in two ways – with a barcoded 
Terminal Setup card (supplied if your ClassNet Terminal is fitted with 
the barcode reading option), or with a TimeTag.  To enter the network ID 
number setup mode with the Terminal Setup card, swipe the card through 
the ClassNet Terminal.  To enter the network ID number setup mode with 
a TimeTag, press and hold the hidden button, touch the TimeTag onto the 
reading receptacle, then release the hidden button. 

The button is hidden behind the label on the front of the unit, horizontally 
in line with the tag receptacle, and vertically below the SS in the word 
CLASSNET.  It’s easy to find – while the ClassNet Terminal is running 
normally (ie it’s displaying the time), just press around the general area 

Содержание ClassNet

Страница 1: ...s 14 Business Park Drive Notting Hill Victoria 3168 Australia Telephone 03 9578 7600 Fax 03 9578 7727 Email solutions asp com au www asp com au ASP Microcomputers is a division of Grayline Holdings Pt...

Страница 2: ......

Страница 3: ...a IDTag 7 Collecting Data from your ClassNet Terminals 7 ClassNet Anywhere 7 ClassNet Polling Program 7 ClassNet DataTag Utility 8 Installation 10 Setting the Network ID 11 RS 485 Network Cabling 12...

Страница 4: ...like a lithium battery and is fitted to a key tag or card The ClassNet Terminal is normally powered by a low voltage plug pack and connected on a simple two wire daisy chained RS 485 network cable to...

Страница 5: ...ck to a computer where an Intelligent RS 485 Adaptor is installed Software running on the computer such as ASP s Polling Program automatically downloads the collected data over the cable on a schedule...

Страница 6: ...TimeTag which is configured using the ClassNet DataTag Utility See the section later in the manual for details on how to use the ClassNet Terminal with DataTags Barcodes or IDTags The ClassNet Termin...

Страница 7: ...the fixed location of the slot reading mechanism The centre of the barcode must be 9 5mm from the outside edge of the card and if the card is laminated remember to include this in the calculation of t...

Страница 8: ...DTags are normally supplied as part of a key tag but they can optionally be attached to cards or other devices by adhesive or press fit stainless steel retainers If you have any special requirements p...

Страница 9: ...e polled according to a Schedule Units are individual ClassNet Terminals One or more units are connected by RS 485 cabling to an Intelligent RS 485 Adaptor which is connected to the serial port of a P...

Страница 10: ...column shows the number of items downloaded from the terminal If for some reason a terminal does not respond to a poll a dark blue question mark is displayed to the left of the Unit Number column and...

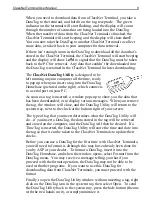
Страница 11: ...show you the data that has been downloaded or to display various messages When you remove the tag the window will close and the DataTag Utility will return to the system tray next to the clock at the...

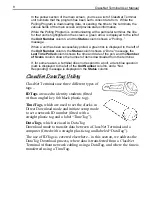
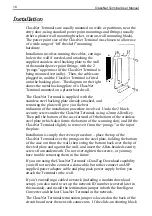
Страница 12: ...l using a 2mm Allen Key Then pull the bottom of the case forward off the bottom of the stainless steel plate which also forms the bottom of the scanning slot and lift the ClassNet Terminal slightly to...

Страница 13: ...d without the expense of a technician Should you decide to take this self reliant approach we suggest one person be appointed to this role This person should also maintain records of all installed uni...

Страница 14: ...network ID number for a short time and it will sound a beep to signal that the network ID number has been set If you make a mistake while setting the network ID number you should continue setting it t...

Страница 15: ...Net Terminal to the next ClassNet Terminal and so on as shown in the diagram on the right Because of the low data rate used by the ClassNet Terminal it is acceptable to use a small number no more than...

Страница 16: ...pplied over the CAT5 network cable The Intelligent RS 485 Adaptor requires 9 to 18 volts DC at 100mA which is normally supplied by a 9v DC 300mA plug pack power supply via a centre positive 2 5mm DC c...

Страница 17: ...The two RJ 45 connectors are wired in parallel to facilitate the daisy chain wiring scheme that the ClassNet Terminal network requires As noted above the ClassNet Terminal CANNOT be connected to an Et...

Страница 18: ...read since the last download and therefore has not been stored again POLL Data is being retrieved from the ClassNet Terminal Wait until the time display returns before using the terminal CLR The down...

Страница 19: ...or example with 8 character barcodes 1875 scans would fit in memory ie 30000 8 8 1875 while 1304 IDTags would fit ie 30000 16 7 1304 Network Up to 31 ClassNet Terminals can be attached to a single RS...

Страница 20: ...e required to correct the interference at his or her expense Warranty To the extent permitted by law ASP s warranty in respect of the ClassNet Terminal and the Intelligent RS 485 Adaptor and their use...

Отзывы: