ClassNet Terminal User Manual
10
Installation
ClassNet Terminals are usually mounted on walls or partitions, near the
entry door, using standard power point mountings and fittings (usually
either a plaster wall mounting bracket, or an on-wall mounting block).
The power point size of the ClassNet Terminal was chosen to allow use
of a wide range of “off the shelf” mounting
hardware.
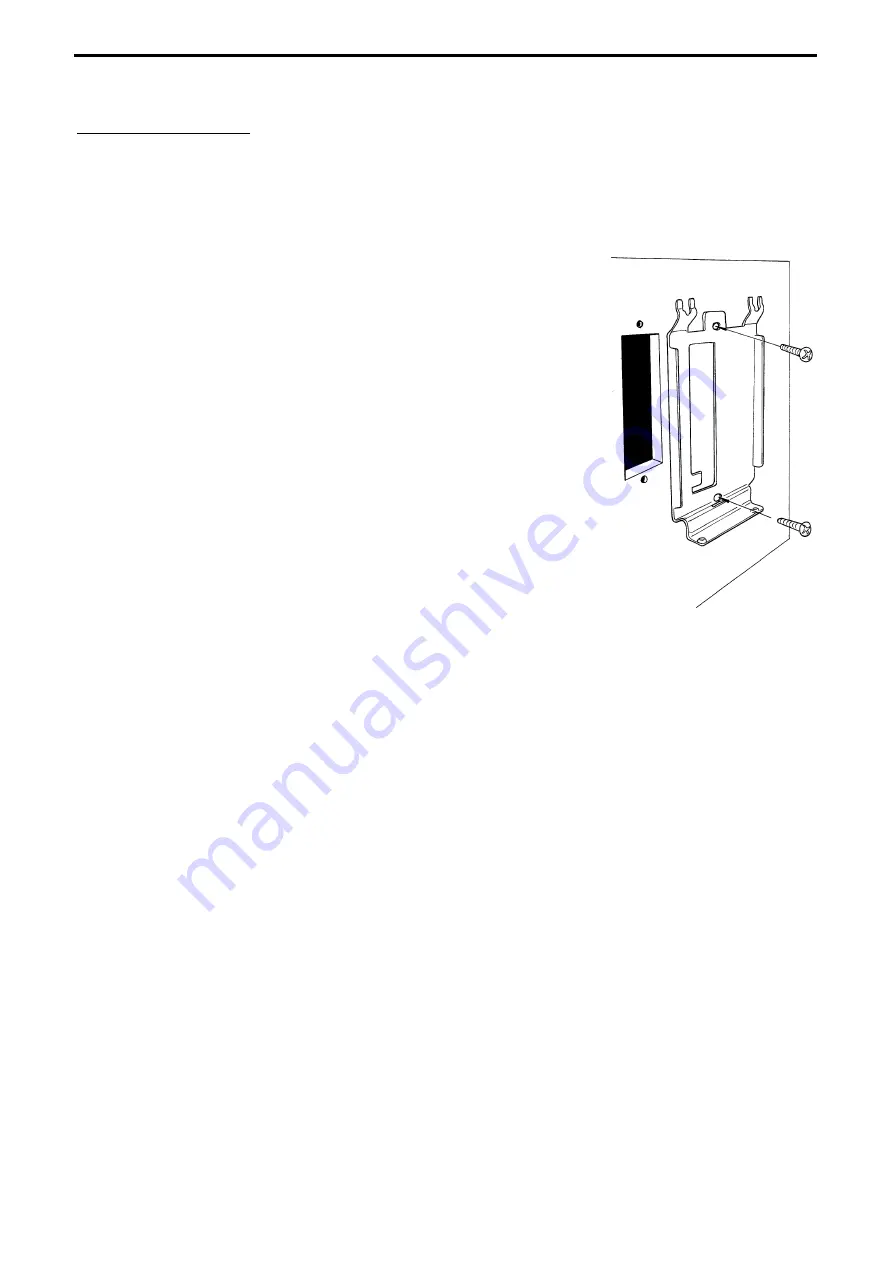
Installation involves running the cables, cutting a
hole in the wall if needed, and attaching the
supplied stainless steel backing plate to the wall
with standard power point fittings, with the 2
“prongs” uppermost (if the ClassNet Terminal is
being mounted vertically). Then, the cables are
plugged in, and the ClassNet Terminal is fitted
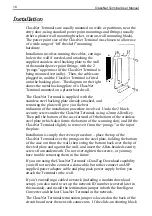
onto the backing plate. The diagram on the right
shows the metal backing plate of a ClassNet
Terminal mounted on a plasterboard wall.
The ClassNet Terminal is supplied with the
stainless steel backing plate already attached, and
removing the plate will give you the best
indication of the installation procedure involved. Undo the 2 black
security screws under the ClassNet Terminal, using a 2mm Allen Key.
Then pull the bottom of the case forward off the bottom of the stainless
steel plate (which also forms the bottom of the scanning slot), and lift the
ClassNet Terminal slightly to remove it from the “prongs” at the top of
the plate.
Installation is simply the reverse procedure – place the top of the
ClassNet Terminal over the prongs on the steel plate, holding the bottom
of the case out from the wall, then swing the bottom back over the lip of
the steel plate and against the wall, and insert the Allen-headed security
screws from underneath. Do not over-tighten the screws, or you may
have trouble removing them in the future.
If you are using the ClassNet Terminal’s DataTag Download capability
you will not need to connect a data cable, but rather connect an ASP
supplied power adaptor cable and plug pack power supply before you
attach the Terminal to the wall.
If you’re installing a cabled network (including a modem download
setup), you also need to set up the network ID number (covered later in
this manual), and install the termination jumper in both the Intelligent
Converter and the last ClassNet Terminal in the network.
The ClassNet Terminal termination jumper is located on the back of the
circuit board near the network connectors. If the slide-on shorting block
Содержание ClassNet
Страница 2: ......


