4.5. The rear panel
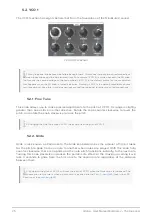
There are several types of connectors on the rear panel. When viewed left to right:
4.5.1. Kensington lock
The small hole over the product name is a security feature called a
. We
want to be sure that your creativity takes flight only when you want it to.
4.5.2. Outputs
Connect headphones to the headphone jack for personal monitoring and connect a 1/4" TS
(tip-sleeve) cable to the Master jack to run the audio into a mixer or external amplifier.
4.5.3. MIDI
Connect a pair of the classic 5-pin DIN cables to the MIDI In and Out ports to interface with
other MIDI devices. Clock, control, and note data can be sent and received. The reception of
MIDI clock signals is dependent on the
setting.
4.5.4. USB
Connect a standard type-B USB cable to the USB port to interface with a computer. Clock,
control, and note data can be sent and received. The reception of USB/MIDI clock signals is
dependent on the
setting.
In addition, the USB port is used to connect the MiniBrute 2 to Arturia's MIDI Control Center.
This software is used to configure various settings of the MiniBrute 2.
♪
: Synchronization with non-MIDI devices is done through a connector on the patch bay. For a full
description of the CLK setting and the connector types to use, see the
section.
4.5.5. Power
Connect only the included power adapter to this jack. It will supply the necessary voltage
and current to power the analog circuitry of the MiniBrute 2: 12V DC (center pin positive) and
2A (for Amperes).
21
Arturia - User Manual MiniBrute 2 - Hardware overview
Содержание minibrute 2 series
Страница 1: ...USER MANUAL...


