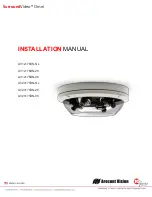


Arecont Vision
Surround
Video
®
Omni Installation Manual
Page | 11 [email protected]
Surround
Video® Omni
Focusing the Cameras
1.
Open a live view of the camera from your web browser or the AV Software provided (AV200).
2.
Loosen the lens lock screw using a phillips head screwdriver (if necessary). Only do so if lens seems very
tight when turning. Lock screw should be tightened enough to provide some friction against the lens to
avoid focusing problems.
3.
Manually rotate the lens to adjust the focus until the desired image is obtained.
4.
For some lenses a focus shift will occur once the bubble is in place. Hold the bubble up to the lens when
focusing to account for the focus shift or see the “Focusing Alternate Lenses” section below for further
instruction.
5.
Retighten the lock screw if necessary.
6.
Install the Dome Cover by aligning the captive fasteners with the mating threaded holes on the camera
housing.
7.
When mounting the Dome Cover to the Camera Housing ensure that the gasket is properly seating and
not folded. Failure to do so may result in water and dust ingress.
Changing the Lens
1.
Remove the Dome Cover by loosening the captive fasteners.
2.
Loosen the lens lock screw using a phillips head screwdriver (if necessary). Only do so if lens seems very
tight when turning.
3.
Manually unscrew the lens, this may take several seconds.
4.
Replace lens.
5.
Retighten the lock screw if necessary.
6.
Reinstall Dome Cover per instructions outlined above.
Tech
Tip