


106
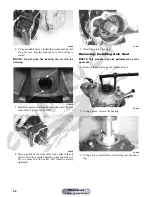
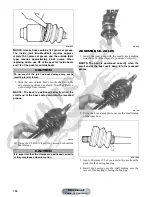
PR238
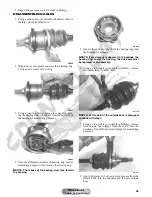
PR239
6. Place the brake caliper assembly into position and
secure with new “patch-lock” cap screws. Tighten
the caliper to 20 ft-lb.
7. Place a new crush washer on each side of the brake
hose fitting and install it on the caliper. Tighten to 20
ft-lb.
8. Fill the reservoir; then bleed the brake system (see
Periodic Maintenance).
9. Install the wheel. Tighten to 40 ft-lb.
10. Remove the ATV from the support stand and verify
brake operation.
Troubleshooting Drive
System
! WARNING
Never use brake fluid from an open container or reuse
brake fluid. Moisture-contaminated brake fluid could
cause vapor build-up (expansion) during hard braking
resulting in greatly increased stopping distance or loss
of control leading to injury or death.
Problem: Power not transmitted from engine to wheels
Condition
Remedy
1.
Rear axle shafts serration
worn - broken
1. Replace shaft
Problem: Power not transmitted from engine to either front wheel
Condition
Remedy
1.
Secondary drive - driven gear teeth
broken
2.
Propeller shaft serration
worn - broken
3.
Coupling
damaged
4.
Coupling joint serration
worn - damaged
5.
Front drive - driven bevel gears
broken - damaged
6.
Front differential gears/pinions
broken - damaged
7.
Sliding dogs/shaft fork
worn - damaged
8.
Front drive axle
worn - damaged
9.
Front drive axle serration
worn - damaged
1. Replace gear(s)
2. Replace shaft
3. Replace coupling
4. Replace joint
5. Replace gear(s)
6. Replace gears - pinions
7. Replace gear(s)
8. Replace axle
9. Replace axle
Manual
Table of Contents