


103
KC283
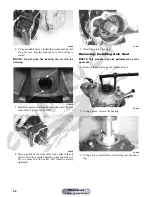
5. Remove the hub assembly.
6. Remove the four cap screws securing the brake disc.
CLEANING AND INSPECTING
NOTE: Whenever a part is worn excessively,
cracked, or damaged in any way, replacement is nec-
essary.
1. Clean all hub components.
2. Inspect all threads for stripping or damage.
3. Inspect the brake disc for cracks or warping.
4. Inspect the hub for pits, cracks, loose studs, or spline
wear.
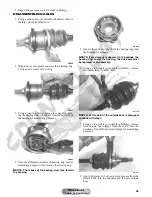
INSTALLING
1. Secure the brake disc to the hub with the four cap
screws coated with blue Loctite #243. Tighten to 15
ft-lb.
2. Apply grease to the splines in the hub.
3. Install the hub assembly onto the shaft.
4. Secure the hub assembly with the nut. Tighten only
until snug.
5. Secure the brake caliper to the knuckle with the two
cap screws. Tighten the caliper to 20 ft-lb.
KC283
6. Tighten the hub nut (from step 4) to 200 ft-lb; then
install and spread a new cotter pin making sure each
side of the pin is flush to the hub nut.
KC305
7. Install the wheel and tighten to 40 ft-lb.
8. Remove the ATV from the support stand.
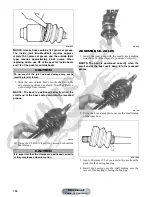
Hydraulic Brake Caliper
REMOVING/DISASSEMBLING
1. Secure the ATV on a support stand to elevate the
wheel; then remove the wheel.
2. Drain the brake fluid from the caliper, hose, and mas-
ter cylinder through the bleed screw by pumping the
brake lever/pedal.
PR235
! WARNING
Arctic Cat recommends that only authorized Arctic Cat
ATV dealers perform hydraulic brake service. Failure to
properly repair brake systems can result in loss of con-
trol causing severe injury or death.
! WARNING
Make sure the ATV is solidly supported on the support
stand to avoid injury.
! WARNING
Never let brake fluid contact the eyes. Damage to the eyes
will occur. Always wear appropriate protective safety gog-
gles and latex gloves when handling brake fluid.
CAUTION
Brake fluid is highly corrosive. Do not spill brake fluid
on any surface of the ATV and do not reuse brake fluid.
Manual
Table of Contents


