12
NOTE: This ATV is equipped with an O-ring type
roller chain. Each link incorporates small O-rings to
seal out water and dirt. Care should be taken to
choose cleaning solutions and lubricants that are
suitable for O-ring type chains.
1. Using a suitable, nonflammable cleaning solution,
thoroughly wash the chain and sprockets.
2. Allow the chain to dry; then apply a dry, graphite-
based lubricant to the chain.
NOTE: The drive chain should be lubricated with a
dry, graphite-based chain lubricant. By using a dry,
graphite-based chain lubricant, dirt build-up on the
drive chain will be minimized.
ADJUSTING TENSION
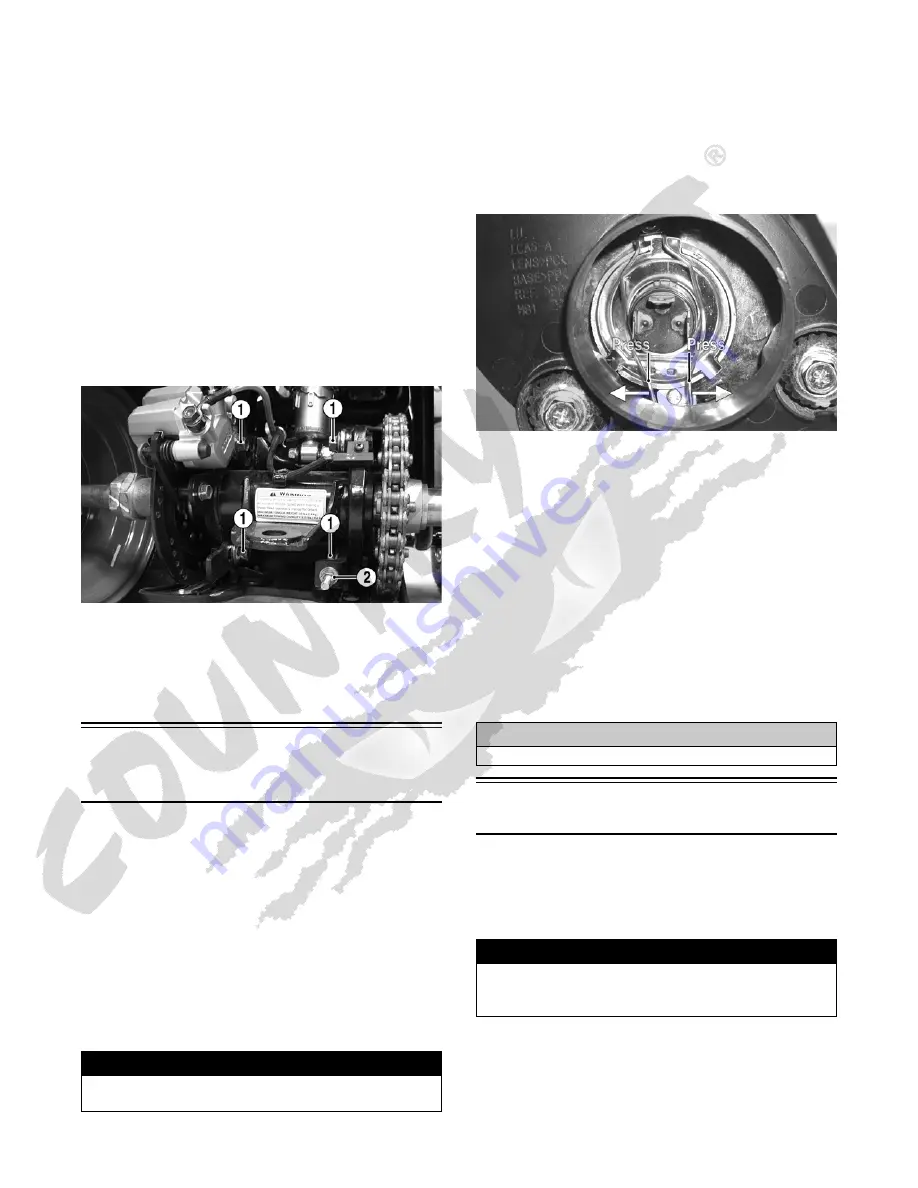
1. Loosen the four cap screws (1) on the axle housing;
then loosen the nuts (2) on the adjuster bolt.
TR018A
2. Adjust the chain slack using the nuts on the adjuster
bolt to obtain 10-20 mm movement at the mid-point
of the chain.
3. Tighten the four cap screws to 50 ft-lb and the nuts
on the adjuster bolt securely.
Headlight/Taillight-
Brakelight
Each time the ATV is used, lights should be checked for
proper function. Turn the ignition switch to the LIGHTS
position; the headlights and taillight should illuminate.
Test the brakelight by compressing the brake lever. The
brakelight should illuminate.
HEADLIGHT
NOTE: The bulb portion of the headlight is fragile.
HANDLE WITH CARE. When replacing the headlight
bulb, do not touch the glass portion of the bulb. If the
glass is touched, it must be cleaned with a dry cloth
before installing. Skin oil residue on the bulb will
shorten the life of the bulb.
To replace the headlight bulb, use the following procedure.
1. Remove the boot from the back of the headlight
housing; then remove the three-wire connector from
the bulb.
2. Using care not to bend or deform the spring clip,
release the two ends of the spring clip from the light
housing; then remove the bulb from the headlight
housing.
KM192A
3. Install the new bulb into the headlight housing; then
secure with the spring clip.
4. Connect the three-wire connector to the bulb; then
install the boot.
TAILLIGHT-BRAKELIGHT
To replace the taillight-brakelight bulb, use the following
procedure.
1. Remove the two screws and remove the lens cover.
2. Push the bulb in and turn it counterclockwise.
3. Install the new bulb by turning it clockwise while
pushing in.
4. Install the lens cover.
Shift Lever
CHECKING ADJUSTMENT
Stop the ATV completely and shift the transmission into
the R position. The reverse gear indicator light should be
illuminated.
If the reverse gear indicator light does not illuminate when
shifted to the reverse position, the switch may be faulty,
the fuse may be blown, the bulb may be faulty, a connec-
tion may be loose or corroded, or the lever may need
adjusting. To adjust, proceed to Adjusting Shift Lever.
! WARNING
Do not attempt to remove the bulb when it is hot. Severe
burns may result.
CAUTION
Tighten the lens cover screws only until they are snug.
! WARNING
Never shift the ATV into reverse gear when the ATV is
moving as it could cause the ATV to stop suddenly
throwing the operator from the ATV.


