5
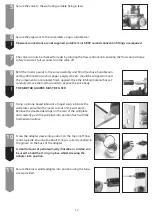
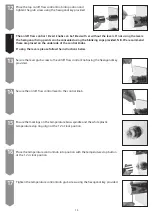
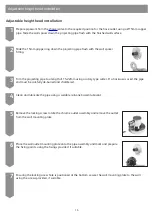
Secure the valve to the wall using suitable fixing screws.
6
Secure the pipe work to the valve inlets using a suitable tool.
!
Pipework connections are not supplied, suitable ¾ inch BSP unions/connection fittings are required.
7
The valve can now be checked for leaks by rotating the flow control knob, ensuring the flow can discharge
safely to waste. If all is sound, turn the valve off.
8
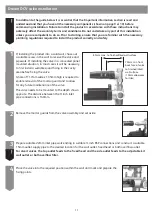
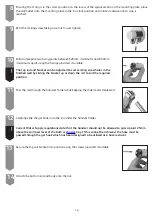
Refit the mortar guards to the valve assembly and fill in the chase. Suitable non-
setting infill material such as paper, polystyrene etc. should be wrapped around
the components and a plaster finish applied. Once the infilling material has set,
carefully remove the mortar guards to expose the valve body.
!
THE MORTAR GUARDS MUST BE USED
9
Using a silicone based lubricant or liquid soap, lubricate the
wall plate seal within the round cut out of the wall plate.
Remove the double sided tape on the rear of the wall plate
and carefully push the wall plate into position flush with the
finished wall surface.
10
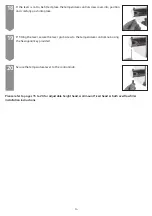
Screw the adapter sleeve into position on the top on/off flow
control spindle, ensuring the black O-ring is correctly aligned in
the groove on the back of the adapter.
!
A small amount of petroleum jelly (Vaseline or similar) can
be used to hold the O-ring in place whilst screwing the
adapter into position.
11
Secure the brass spindle adapter into position using the brass
screw provided.
12


