background image

VISION

ing list. All available data is displayed in a tree diagram, click the arrow symbols to
access individual items. 
Confirm your selection by clicking the check symbol in the bottom right corner.
The new element will be displayed in the upper left corner and the configuration
window is displayed. Configure the element as described in the next chapters.

6.4.

6.4.

6.4.

6.4. Editing existing elements

Editing existing elements

Editing existing elements

Editing existing elements

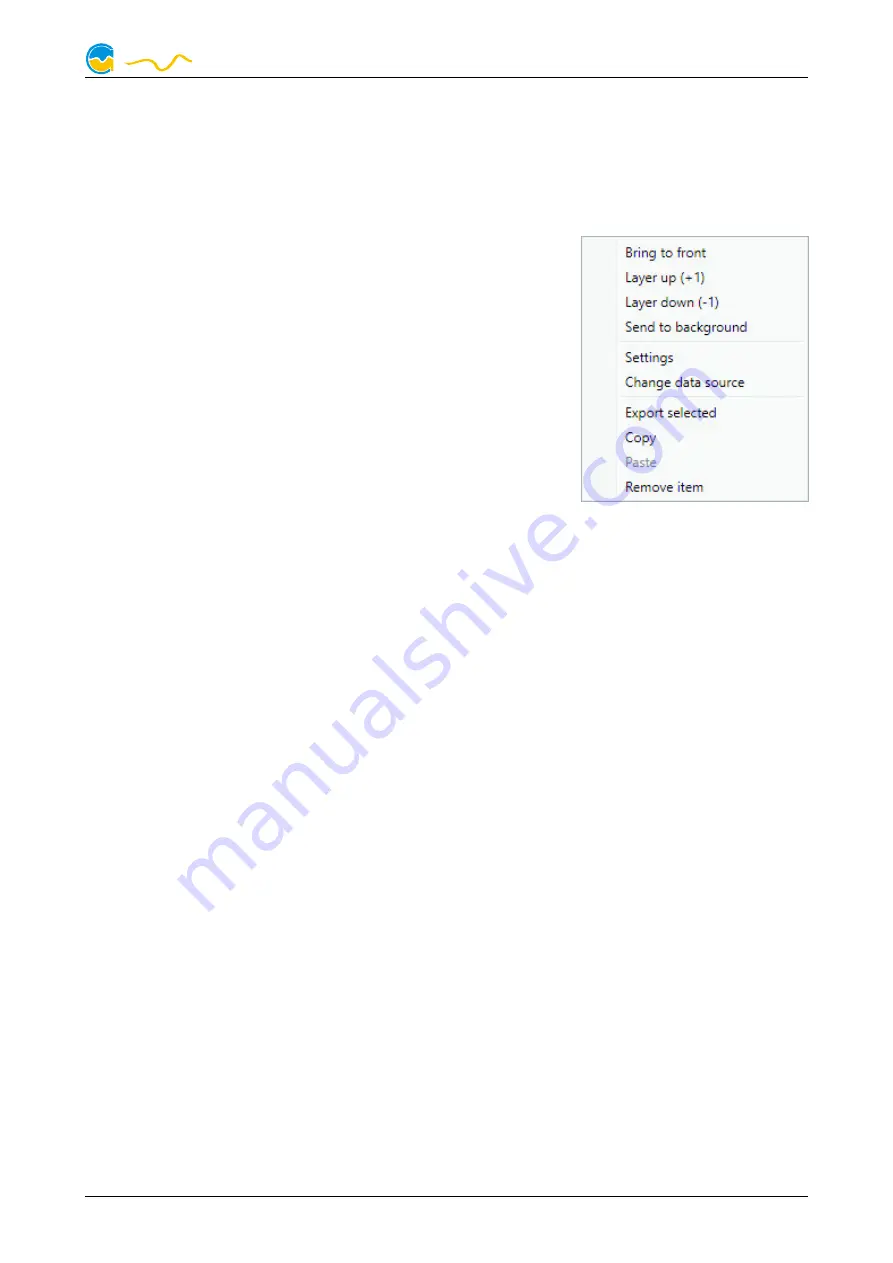
If the currently selected overview page is unlocked for
editing, right-clicking an element will access a context
menu.
To access the settings of an element, select “Settings”
in the context menu or simply double click the element.
If you want to move an element, “drag” this element
while   holding   down   the   mouse   button.   Release   the
mouse button when the element is at the desired posi-
tion. 

6.5.

6.5.

6.5.

6.5. Values and names

Values and names

Values and names

Values and names

If the currently selected overview page is unlocked for editing, right-click an ele-
ment and select “Settings”. You may also double click the element.
Font face, size and color as well as position, decimal places and unit can be con-
figured for individual values.

6.6.

6.6.

6.6.

6.6. Detailed data elements

Detailed data elements

Detailed data elements

Detailed data elements

If the currently selected overview page is unlocked for editing, right-click an ele-
ment and select “Settings”. You may also double click the element. Apart from po-
sition, size and color, the style of the element can be selected and configured. The
following styles are available:

Headline only: Compact display as a headline.

Text: Displays the numerical value in a box with a headline.

Bar graph: Displays numerical value as well as bar graph.

Chart: Displays the value in chronological sequence as a chart.

Gauge: Displays the value as a analog gauge.

All display styles offer extensive configuration options, additionally statistical data
such as minimum, maximum and average can be displayed. 

6.7.

6.7.

6.7.

6.7. Log data chart

Log data chart

Log data chart

Log data chart

This element can be used to display charts on overview pages. The charts have to
be created using the data log functionality of the aquasuite before they become
available for overview pages. Please refer to the next chapter for details. Once a
chart has been configured, it can be selected from the “Chart selection” list on the
“Display” tab of the settings dialog.

© 2020

Aqua Computer GmbH & Co. KG

- 7 -

Gelliehäuser Str. 1, 37130 Gleichen

computer

aqua

Содержание VISION RGBpx

Страница 1: ...and installation manual VISION RGBpx aquasuite version X 24 Current as of July 2020 All information contained in this manual is subject to change without prior notice All rights reserved 2020 Aqua Com...

Страница 2: ...chart 7 6 8 User defined Images text drawing elements 8 6 9 Export and import of overview pages 8 7 Data quick view and data log aquasuite 9 7 1 Log settings 9 7 2 Analyze data 9 7 3 Manual data expor...

Страница 3: ...eorder menu items 19 16 3 Units 20 16 4 Application start up 20 16 5 Service administration 20 16 6 Audio and video 20 16 7 Updates and update service 20 17 Technical details and care instructions 21...

Страница 4: ...RGBpx 21822 cuplex kryos sTRX4 with VISION RGBpx 21822 cuplex kryos sTRX4 with VISION RGBpx 21822 The cuplex kryos NEXT ships with a separate installation manual Install the water block according to t...

Страница 5: ...llation For installation and update service vali dation an internet connection is required The latest aquasuite version may also be installed if no suitable update service pe riod has been found in a...

Страница 6: ...desktop mode for an overview page by clicking the monitor symbol in the list of overview pages Desktop mode can only be enabled for one overview page at a time With desktop mode enabled elements of t...

Страница 7: ...unit can be con figured for individual values 6 6 6 6 6 6 6 6 Detailed data elements Detailed data elements Detailed data elements Detailed data elements If the currently selected overview page is un...

Страница 8: ...will require some programming experience for configuration 6 9 6 9 6 9 6 9 Export and import of overview pages Export and import of overview pages Export and import of overview pages Export and import...

Страница 9: ...umber of data sources to each log data set the total number of log data sets is also unlimited 7 2 7 2 7 2 7 2 Analyze data Analyze data Analyze data Analyze data Logged data can be visually evaluated...

Страница 10: ...elect the position to be displayed then release the button This function can be used to zoom in and out Use the mouse wheel or select the area to be displayed You can reset the zoom settings by dou bl...

Страница 11: ...the time difference between sensor data continuously stored in memory and thereby the time period displayed in charts If necessary each temperature sensor can be calibrated by adding an offset of 15...

Страница 12: ...ion Display configuration Select Display from the device list below the VISION RGBpx entry In the upper area the ten configurable display screens are displayed In the lower area the selected screen ca...

Страница 13: ...ault as well Confirm you se lection by clicking the check symbol in the lower right corner The configuration of the newly added LED controller can be modified in the lower area of the window Most effe...

Страница 14: ...will notify you if audio analysis has been disabled in the aquasuite In this case please enable the feature in the general aquasuite configuration The general aquasuite configuration can also be used...

Страница 15: ...nagement can be used to to save four configurations as profiles and activate them manually or automatically Profile manage ment is a software feature of the aquasuite and requires a USB connection to...

Страница 16: ...USB port is explicitly specified for a current of at least 1 Amp by the manufacturer If the maximum per specified for a current of at least 1 Amp by the manufacturer If the maximum per specified for...

Страница 17: ...block with the Out element The resulting virtual sensor can be used within the aquasuite software for example for overview pages additionally it may be transmitted via USB connection to con nected de...

Страница 18: ...se with the aquasuite without warranty for error free operation or perma nent availability Aqua Computer reserves the right to limit or cancel this service at any time 15 1 15 1 15 1 15 1 Data export...

Страница 19: ...ta sets each containing up to 30 values can be configured In order to verify that data is being imported use the Data quick view feature in the aquasuite Navigate to Data from Aqua Computer service th...

Страница 20: ...s configured for variable refresh rate or a modified refresh rate video analysis may fail please deactivate this func tion in the graphics settings of the operating system if necessary 16 7 16 7 16 7...

Страница 21: ...and software activation device serial numbers and a calculated computer ID are transmitted to and stored on the update server No further personal information such as IP addresses are stored 17 17 17 1...

Страница 22: ...a computer de You might also want to visit our forums and discuss our products with experienced moderators and thousands of members available 24 7 To get in direct contact with our customer support te...

Отзывы: