4
Safety Announcement
1.
Please read the manual carefully before the installation;
2.
Shall be subject to all the warnings
;
3.
Shall comply with all instructions and the manual;
4.
To avoid failure, please use the recommended accessories;
5.
Use the indicated power supply line and voltage
;
if the location of
power and voltage is not clear, please contact with the dealer
;
6.
To prevent electric shocks, do not separate screws or housing. The
professionals must prepare all the component of the machine. As
for the maintenance, qualified experts should carry it out.
7.
Do not use it as you like, to avoid striking and shocking, be sure to
use or store it appropriately.
8.
Please use dry and soft cloth to clean it when it is dirty. If seriously
dirty, please use moderate detergent. Pay more attention to its
appearance while cleaning and erase the remains.
9.
Please contact with the sales on the bellow conditions:
a)
Power, control line damaged
b)
Dropped or cover damaged
c)
Abnormal performance
d)
Can’t work according to the manual instruction
e)
Damp or fall into water
f)
Camera image interference
g)
Out-cover damaged
10. Please use the same function parts or components provided by the
sale while replacing to prevent damage
;
10
Installation Steps
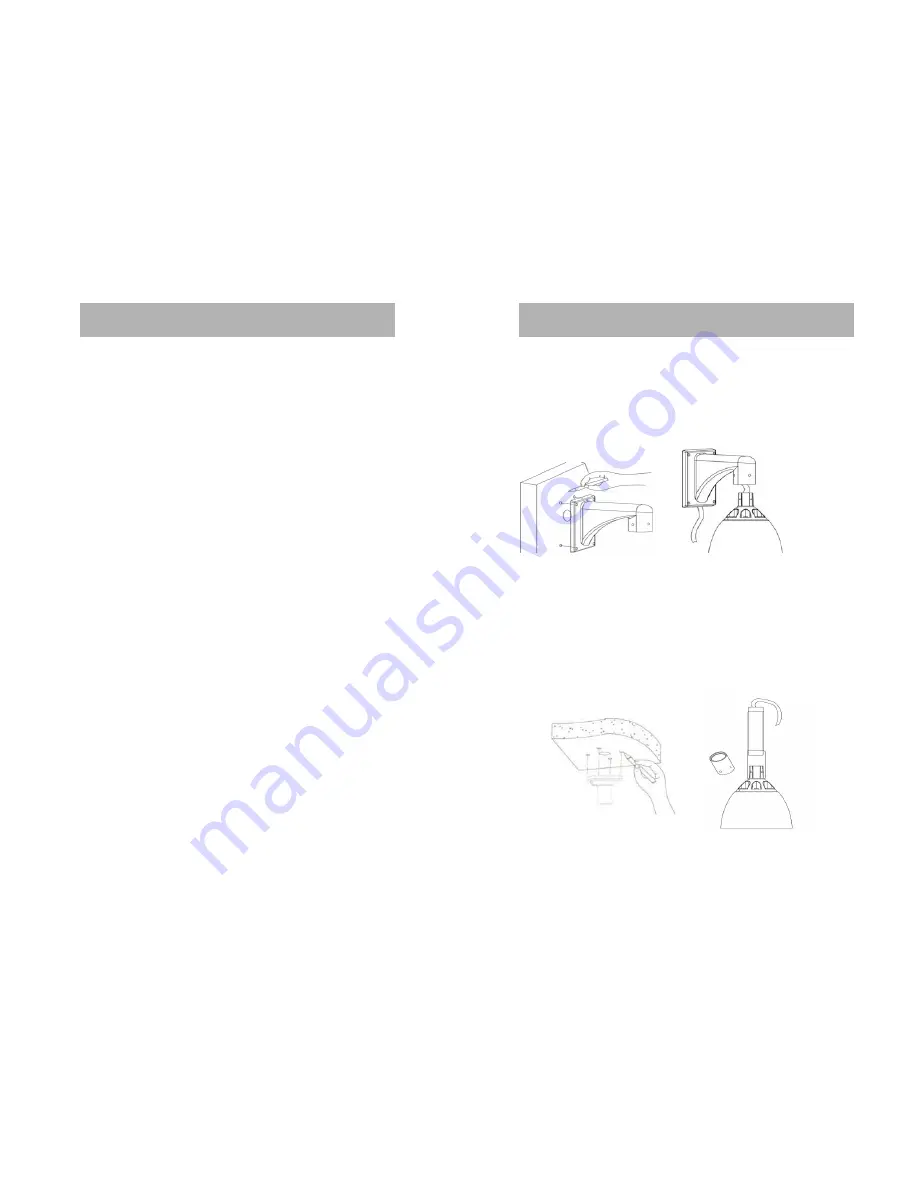
1. Wall Mount Installation Steps:
1
)
position for digging hole on the wall, and install expansion screw.
Make the cover parts guide line through the bracket to the wall bracket,
and fix the M6*16 screw. (as picture 3)
Picture 3
2. Pendant Mount Installation steps:
2
)
position for digging hole on the wall, and install expansion screw. Fix
connector with M6*16 screw, make the cover parts guide line through
the bracket to the pendant bracket, fix the whole set to the ceiling. (as
picture 4)
Picture 4


