1
2
MENU
POP
AUDIO
REWIND
PLAY
PAUSE
STOP
CAM1
CAM2
CAM3
CAM4
QUAD
ZOOM SEQUENCE
COPY
ENTER
3
AngelTrax
| 20
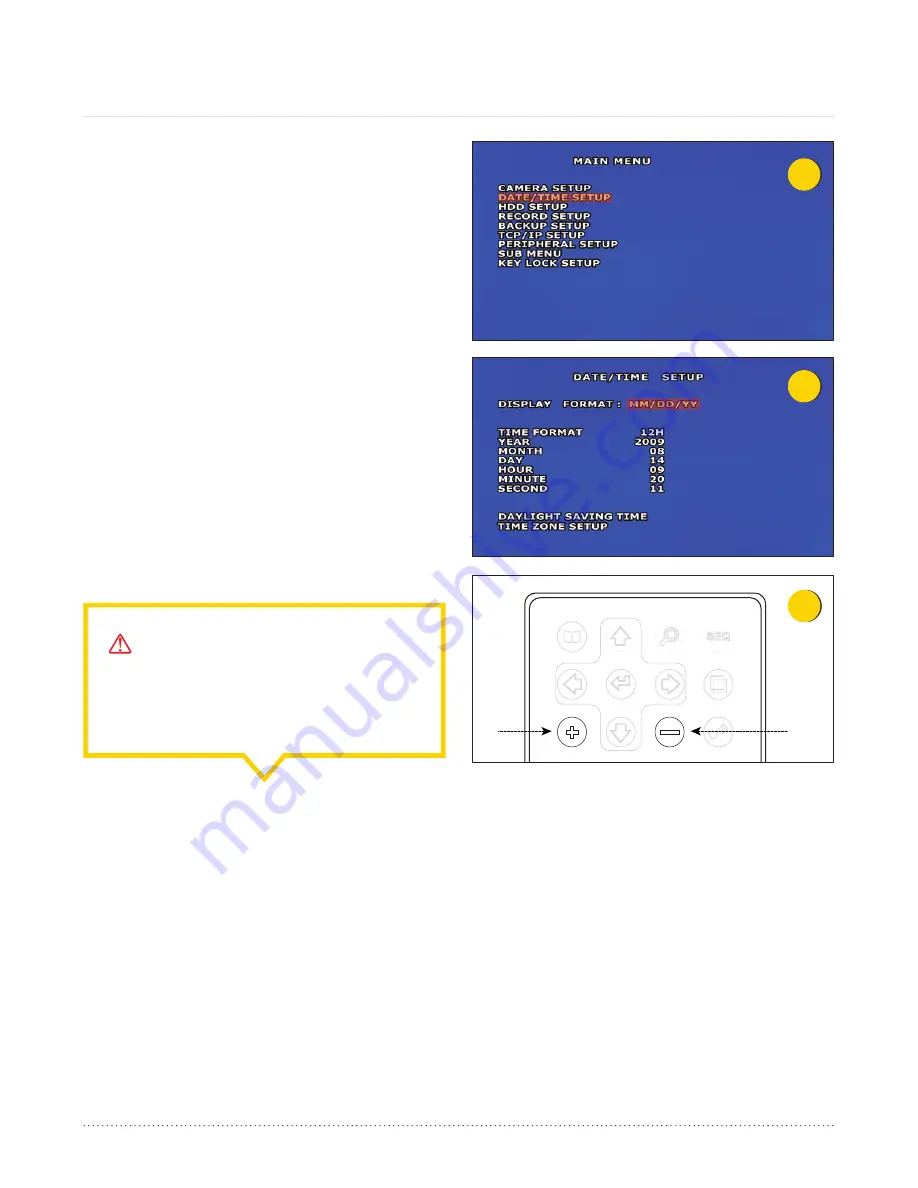
1. At the live camera view, press the Menu button on the
remote to go the Main Menu. Use the arrow buttons on the
remote to select the Date/Time Setup feature, and press
ENTER (see Figure 1).
2. The Date/Time Setup menu has the following options:
Display Format, Time Format, Year, Month, Day, Hour,
Minute, Second, Daylight-saving Time and Time Zone
Setup (see Figure 2).
3. The Year, Month, Day, Hour, Minute and Second settings
may be adjusted using the plus and minus buttons on the
remote (see Figure 3).
4. Select the Display Format Month, Day and Year (MM/DD/
YY), and press the plus and minus buttons on the remote to
adjust the Display Format order.
5. Under the Date/Time Setup menu, the Time Format can be
set for 12-hour (AM-PM) or 24-hour (13:00) by pressing the
plus or minus buttons on the remote.
Date/Time Setup
NOTICE - TIME FORMAT SETTING:
Always program the hour as 24-hour (13:00) so the
MDVR can distinguish between AM and PM, and
display it accordingly.


