background image

                                                                62 

98-0155 Rev. C

SPARE PARTS ITEMS 

PART # 

DESCRIPTION 

21675175 

FLTR,HOUS,4.5X20,1,I/O,DOE 

21675187 

FLTR,WRENCH,4.5"X10"-20" 

69932109 

Wire Harness for Solenoid Valves 

0185-0153 

PAA BOTTLE ASSY 

0167-0014 

SIDE ENTRY HOOD 

04-7001 

Q-CON,.25MPTxCOUP,W/SHUTOFF,PP 

16-0074 

CPC,INSERT,0.38TXCOUP,NO SHUTOFF 

R65-0014 

SWITCH,PRESSURE,.25MPT,3-40PSI,SET AT 8  

R69446010 

CONTROLLER W/ COND SENSORS,ASSY, % REJECTION,2.15 CHIP 

R59-0015 

0.75,FPT,120V,N.C. SOLENOID

59-0019 

VAL,SOL,.75,FPT,120V,N.O.,DIN 

59-0027 

VAL,SOL,1,120V,NC,3-WIRE,DIN,SS316 

59-0046 

VAL,SOL,1.5,120V,NC,3-WIRE,DIN,SS316 

41-0032 

FLOW METER,PANEL MOUNT,2-20 GPM,1"MPT,NO VALVE 

41-0025 

FLOW METER,PANEL MOUNT,2-20 GPM,1"MPT,WITH VALVE 

60760445 

MOTOR STARTER/OL ASSY,3PH,120V COIL 

60-0042 

MOTOR STARTER/OL ASSY,3HP,3PH,120V COIL 

R188-0048 

KIT,REPLACEMENT,PUMP,1HP,208V/3PH,10GPM,FOR MRO3Z402 

R188-0049 

KIT,REPLACEMENT,PUMP,1HP,230V/3PH,10GPM,FOR MRO3Z403 

R188-0050 

KIT,REPLACEMENT,PUMP,1HP,460V/3PH,10GPM,FOR MRO3Z404 

R188-0051 

KIT,REPLACEMENT,PUMP,2HP,208V/3PH,15GPM,FOR MRO4Z402 

R188-0052 

KIT,REPLACEMENT,PUMP,2HP,230V/3PH,15GPM,FOR MRO4Z403 

R188-0053 

KIT,REPLACEMENT,PUMP,2HP,460V/3PH,15GPM,FOR MRO4Z404 

R188-0054 

KIT,REPLACEMENT,PUMP,2HP,208V/3PH,15GPM,FOR MRO5Z402 

R188-0055 

KIT,REPLACEMENT,PUMP,2HP,230V/3PH,15GPM,FOR MRO5Z403 

R188-0056 

KIT,REPLACEMENT,PUMP,2HP,460V/3PH,15GPM,FOR MRO5Z404 

R188-0057 

KIT,REPLACEMENT,PUMP,3HP,208V/3PH,20GPM,FOR MRO6Z402 

R188-0058 

KIT,REPLACEMENT,PUMP,3HP,230V/3PH,20GPM,FOR MRO6Z403 

R188-0059 

KIT,REPLACEMENT,PUMP,3HP,460V/3PH,20GPM,FOR MRO6Z404 

R188-0065 

KIT,REPLACEMENT,PUMP,3HP,208V/3PH,30GPM, FOR MRO7Z402 & 
MRO8Z402 

R188-0066 

KIT,REPLACEMENT,PUMP,3HP,230V/3PH,30GPM, FOR MRO7Z403 & 
MRO8Z403 

R188-0067 

KIT,REPLACEMENT,PUMP,3HP,460V/3PH,30GPM, FOR MRO7Z404 & 
MRO8Z404 

*Call AmeriWater or your AmeriWater distributor for pricing. 

Содержание MRO3Z

Страница 1: ...98 0155 Rev C MROZ OPERATION MAINTENANCE MANUAL Manufactured With Pride In The USA www ameriwater com 800 535 5585 AmeriWater 3345 Stop 8 Rd Dayton OH 45414 ...

Страница 2: ...98 0155 Rev C ...

Страница 3: ...ctions et mesures de sécurité Caution risk of danger Attention danger potential For service by qualified service personnel only Entretien par le personnel qualifié seulement Replace only with 120Vac 15amp time delay fuse Remplacer avec 120Vac 15 amp fusible à retardement seulement Earth Ground terminal Borne de mise à la terre This product has been tested to the requirements of CAN CSA C22 2 No 61...

Страница 4: ... ABOUT HYDROGEN PEROXIDE PEROXYACETIC ACID 33 5 3 MEMBRANE FLUSH FEATURE AUTO FLUSH 34 6 0 MROZ CONTROLLER 35 6 1 FRONT PANEL CONTROLS AND INDICATORS 35 6 2 CONTROLLER OPERATION 36 6 3 CONTROLLER ADJUSTMENTS 39 6 4 STANDARD SETPOINTS 42 6 5 TO DISPLAY OR CHANGE SETPOINTS 44 6 6 CHANGING RESISTORS ON THE RO CONTROL BOARD FOR C2 RANGE 44 7 0 EXTERNAL WIRE INSTALLATION 46 8 0 MAINTENANCE 47 8 1 MAINT...

Страница 5: ...98 0155 Rev C ...

Страница 6: ...o be used for disinfection Peracidin is an example of this solution The caution on the front panel of the MROZ that states Use only PAA Use no substitutes means that any of these products are acceptable Do not attempt to use anything other than hydrogen peroxide peroxyacetic acid disinfecting solution Please read the Operations Manual before using the system Contact AmeriWater Customer Service wit...

Страница 7: ...y need to be followed by post treatment devices as well to meet current AAMI and Federal U S standards FLOW RATE TABLE MROZ Model Storage Tank Flow Rate GPD Gallon Per Day Direct Feed Flow Rate GPD Gallon Per Day MRO3Z 5513 TO 8 750 GPD 4788 TO 7 600 GPD MRO4Z 7245 TO 11 500 GPD 6300 TO 10 000 GPD MRO5Z 7560 TO 12 000 GPD 6577 TO 10 440 GPD MRO6Z 9374 TO 14 880 GPD 8155 TO 12 945 GPD MRO7Z 10773 T...

Страница 8: ...I MRO7Z Pump pressure Minimum Maximum 100 PSI 180 PSI MRO8Z Pump pressure Minimum Maximum 100 PSI 200 PSI Water pressure to dialysis machine Controlled by Loop return relief valve Maximum output of product water 77 F 25 C TDS 1000 ppm of NaCl pump pressure of 200 psi These flows are based on storage tank flows and direct feed flows are 87 of the storage tank setup flows MRO3Z 5513 TO 8 750 GPD 20 ...

Страница 9: ...able of 240VAC 30AMP 31 18kVA For the 208 230V models and 600VAC 30AMP 31 18kVA For the 460V models Pump Electrical Ratings Pump Model Voltage Frequency Hz Phase Ø Max Amp Draw 3Z402 Pump 208 60 3 5 5 3Z403 Pump 230 60 3 4 7 3Z404 Pump 460 60 3 2 5 4Z 5Z402 Pump 208 60 3 8 8 4Z 5Z403 Pump 230 60 3 7 6 4Z 5Z404 Pump 460 60 3 3 8 6Z402 Pump 208 60 3 12 0 6Z403 Pump 230 60 3 10 1 6Z404 Pump 460 60 3 ...

Страница 10: ...ts Polyamide Thin Film Composite Membrane PT401 Antiscalant Scale Inhibitor Contaminants Chemical Feed System Membrane Scale Control Not to exceed 40 ppm Contaminants Percentage Removal Calcium Magnesium Sodium Potassium Fluoride Nitrate NO3 Sulfate Copper Barium Zinc Aluminum Arsenic Lead Silver Cadmium Chromium Selenium Mercury Antimony Beryllium Thallium 99 5 99 5 98 0 97 0 87 0 93 0 60 0 75 0 ...

Страница 11: ...for temperatures up to 31 C 87 8 F decreasing linearly to 50 relative humidity at 40 C 104 F MAINS supply voltage fluctuations up to 10 of the nominal voltage Transient overvoltages present on MAINS supply CATEGORY II Applicable RATED POLLUTION degree 2 TRANSPORT CONDITIONS ANTICIPATED Altitude up to 2000 m 6562 feet Temperature between 5 C and 40 C 41 F and 104 F Maximum relative humidity 80 for ...

Страница 12: ...7 98 0155 Rev C 3 0 COMPONENTS AND SCHEMATICS 3 1 EXTERNAL FRONT VIEW MRO3Z THRU MRO6Z CONFIGURATION SHOWN MRO7Z MRO8Z MODELS HAVE AN EXTERNALLY MOUNTED PRE FILTER CARTRIDGE ASSEMBLY Figure 3 1 ...

Страница 13: ...8 98 0155 Rev C MRO7Z and MRO8Z CONFIGURATION SHOWN BELOW Figure 3 2 ...

Страница 14: ... the prefilter inlet 7 PREFILTER OUTLET PSI Gauge that measures the pressure in pounds per square Inch of the prefilter outlet 8 PRODUCT WATER FOR DIALYSIS Connection carrying Product Water for Dialysis 9 REJECT WATER TO DRAIN Connection carrying Reject to the drain 10 INCOMING TAP WATER Hose carrying Incoming Tap Water that is to be treated by the RO 11 PAA JUG Plastic jug to mix hydrogen peroxid...

Страница 15: ...10 98 0155 Rev C 3 2 INTERNAL CABINET TOP AND SIDE VIEW Figure 3 3 ...

Страница 16: ...11 98 0155 Rev C 3 3 INTERNAL CABINET TOP AND SIDE VIEW CONT Figure 3 4 ...

Страница 17: ... the membranes to the flow meter 21 INCOMING CONDUCTIVITY SENSOR Cell that reads the quality of the feed water 22 PRODUCT TO DRAIN SOLENOID Opens when water quality is above set point 23 PRODUCT TO USE SOLENOID Closes when water quality is above set point 24 DISINFECT SOLENOID Opens to allow the hydrogen peroxide Peroxyacetic acid mixture to draw into the system to soak for the sanitize cycle 25 F...

Страница 18: ...13 98 0155 Rev C 3 4 ELECTRICAL DIAGRAM AND FIELD WIRING Figure 3 5 ...

Страница 19: ...14 98 0155 Rev C Fig Figure 3 6 ...

Страница 20: ...15 98 0155 Rev C Figure 3 7 ...

Страница 21: ...16 98 0155 Rev C 3 5 FLOW DIAGRAMS Figure 3 8 ...

Страница 22: ...17 98 0155 Rev C Figure 3 9 ...

Страница 23: ...18 98 0155 Rev C Figure 3 10 ...

Страница 24: ...19 98 0155 Rev C Figure 3 11 ...

Страница 25: ...20 98 0155 Rev C Figure 3 12 ...

Страница 26: ...21 98 0155 Rev C Figure 3 13 ...

Страница 27: ...VAC Models i Electrical source for the pump 1 UL listed Lockable NEMA 4X 3 Phase Disconnect 2 Rated for 240VAC 30 AMP 31 18 KVA 60 Hz c 460VAC Models i Electrical source for the pump 1 UL listed Lockable NEMA 4X 3 Phase Disconnect 2 Rated for 600VAC 30 AMP 31 18 KVA 60 Hz The proper polarity and ground integrity must be initially checked and thereafter maintained Failure to do so may result in ele...

Страница 28: ... If the water changes drastically the membrane will be harder to clean Periodically check the pH of the incoming tap water to verify that it is within the specified range pH Water Bicarbonate Dialysate Test Strips P N 97PH20901 CAUTION Mixing chlorine and hydrogen peroxide peroxyacetic acid causes a toxic chemical reaction Never allow them to mix Do not use chlorine to disinfect the system 9 Use o...

Страница 29: ...ay result in reduced RO permeate flow in the direct feed loop WARNING The Clean in Place Switch located inside the cabinet on the back of the controller must be in the OFF position during normal operation If the Clean in Place Switch is left in the ON position during normal operation all MROZ fail safe modes will be disabled and damage to the MROZ or injury to the patient may occur 18 Minimize the...

Страница 30: ...ant information regarding the usage and handling of PAA is listed in Section 5 3 A WORD ABOUT HYDROGEN PEROXIDE PEROXYACETIC ACID and in PAA Materials Safety Data Sheet Please read them carefully 2 INCOMING TAP WATER PRODUCT WATER and REJECT WATER TO DRAIN hoses are labeled to prevent incorrect connections 3 Low pressure shutdown protects the pump if the feed pressure drops below 5 PSI 4 An audibl...

Страница 31: ...TAP WATER connect the MROZ INCOMING TAP WATER hose to the potable blended water supply If blending both warm and cold water to improve product flow rate do not exceed 90 F 33 C 6 Using the hose supplied for the REJECT WATER TO DRAIN connect the MROZ REJECT WATER to a drain location Leave at least a 2 air gap between the hose and the drain to prevent contamination or siphoning 7 Using the hose supp...

Страница 32: ...the On position 14 Turn the REJECT FLOW CONTROL KNOB located at the bottom of the Reject Flow meter counter clockwise to allow the MROZ to run in full flow Reject flush for about 15 minutes 15 After 15 minutes turn the REJECT FLOW CONTROL KNOB clockwise so that the Reject flow is approximately equal to the Product water flow Allow the product water to flow to drain for 2 hours to ensure that all p...

Страница 33: ...he MROZ to service samples for Microbiological LAL and AAMI need to be taken The samples need to pass before MROZ being used for patients 4 4 SYSTEM SHUTDOWN Ordinarily an MROZ is connected to a water use system that is used continually or very frequently Therefore frequent shut down is not necessary Most usually the MROZ is connected to a Direct Feed Loop or Storage Tank of a Central System If so...

Страница 34: ...ction procedure but be sure all dialysis machines are disconnected during the disinfection procedure WARNING The disinfection mode will allow PAA to flow through the PRODUCT WATER hose This is to allow disinfection of the hoses and the connected direct feed water loop 3 To disinfect only the MROZ that is connected to a Storage Tank disconnect the PRODUCT WATER hose from the tank and place along wi...

Страница 35: ...p PAA solution through the MROZ 13 Adjust the REJECT flow control knob so that the PAA will be drawn into the MROZ in approximately 2 minutes Figure 5 1 The REJECT flow amount will have to be determined the first time the PAA is drawn in and noted the flow that will empty the container in approximately 2 minutes 14 Continue holding the ENTER key until the PAA container is empty then immediately re...

Страница 36: ...on on the front of the MROZ b Press and hold the ENTER key to turn on the Disinfect Draw function and THE DISPLAY WILL READ DISINFECT ENABLED DRAW Continue to hold the ENTER key until all of the water is drawn in and you begin to see air bubbles in the draw tube This will flush out any residual PAA left in the injection plumbing c Disconnect the PAA Container and PAA tubing from the PAA connection...

Страница 37: ... ensure that there are NO traces of PAA disinfecting solution remaining in the entire water system AmeriWater recommends using Renal Check PX Test Strips P N 97PX20501 26 Record the Stop time on the Startup Log to have a record of how long it takes for the disinfecting solution to completely rinse out Place a checkmark on the log to verify that residual PAA tested negative 27 Disinfection is compl...

Страница 38: ...fecting solution down the drain taking care to avoid spills splashes or breathing the vapors CAUTION Splashing PAA concentrate may cause severe chemical burns 4 Rinse the emptied PAA container with tap water to remove all traces of the chemical Rinsing emptied containers is needed to protect waste handlers from accidental exposure to the chemical 5 Rinse the drain with tap water to remove residual...

Страница 39: ...PRODUCT WATER to the drain This minimizes bacterial growth and directs all the water to the drain rather than refill the storage tank FLUSH MODE 3 will cause all the water to be diverted to drain for each MEMBRANE AUTO FLUSH cycle On the other hand when an MROZ is connected to a Direct Feed Loop the PRODUCT water should be directed into the loop during the MEMBRANE AUTO FLUSH cycle to keep the wat...

Страница 40: ...IGHT ARROW KEY Scrolls through Set points starting with last Set point UP ARROW KEY Increases value of Set point DOWN ARROW KEY Decreases value of Set point ENTER KEY Confirms entry of new Set point value ALARM SILENCE RESET KEY Push once for alarm silence and twice to reset system after a shutdown has occurred ACCESSING DISINFECT MODE Push and hold the left arrow key and then push the right arrow...

Страница 41: ... Set point information can also be shown on this display OPERATING STATUS MESSAGES The operating status of the unit is shown on the top line of the display The following list describes the items shown for the operating status STANDBY The unit is in the STANDBY mode DELAY 99 The unit is in the RO start delay The number is the seconds remaining before the RO pump starts OPERATING The RO unit is oper...

Страница 42: ...nnected to the tank full high input When this switch has been active for 5 seconds the unit will shut down on tank full TANK FULL will show on the display When the tank full condition clears the display will show TANK FULL 99 The number is the tank full restart time and the unit will restart when this delay times out For 2 level switch operation the upper switch is connected to the tank full high ...

Страница 43: ...FAULT the alarm lamp will flash and the audible alarm will sound The pressure fault can be cleared by pressing the Alarm Silence Reset key twice AUTO RESET If a pressure fault shut down occurs and the Auto Reset Set point is programmed to 0 the unit will remain shut down until manually reset If the Auto Reset Set point is programmed to a value greater than 0 the unit will automatically clear the p...

Страница 44: ...as been calibrated prior to shipment and the conductivity set point has been preset based on an analysis of your water provided at the time of sale It may be necessary to periodically calibrate the Conductivity If the controller should require calibration follow the instructions below Please contact AmeriWater at 800 535 5585 or 937 461 8833 if you have any questions regarding the procedure CONDUC...

Страница 45: ...40 98 0155 Rev C FIGURE 6 2 Feed Water Adjustment Potentiometer Product Water Adjustment Potentiometer ...

Страница 46: ...41 98 0155 Rev C FIGURE 6 3 ...

Страница 47: ... Reset When a pressure fault shut down is active the system will attempt to restart after this delay If set to 0 system must be manually reset 0 99 minutes 0 Alarm Silence If the audible alarm is silenced after this delay the alarm will resound If set to 0 the alarm will remain silenced 0 99 minutes 3 TF Restart Delay When a tank full condition clears the system will restart after this delay 0 99 ...

Страница 48: ...is Set point is changed the unit must be recalibrated 0 6 1 C2 Range Selects range of TDS Conductivity monitor 0 50 1 100 2 250 3 500 4 1000 5 2500 6 5000 NOTE If this Set point is changed the unit must be recalibrated and range components may need to be changed 0 6 4 C2 Limit When this value is met or exceeded the alarm lamp will light and high TDS Cond will show on the display To disable set to ...

Страница 49: ... key is pressed and held for 1 second the Setpoint value will change at a fast rate When the key is released the fast rate will be reset Pressing both the UP and DOWN ARROW keys together will reset the set point value to 0 4 Pressing the ALARM SILENCE RESET key at any time will cancel the operation and return the display to the main screen 5 To accept the new set point value press the ENTER key 6 ...

Страница 50: ...he original resistor can be identified by its resistance value of 2 7 kΩ the replacement resistor s resistance value is 6 8 kΩ 5 Remove the R10 resistor with needle nose pliers 6 Move the replacement resistor to the R10 position 7 Save the R10 resistor somewhere safe 8 Close RO controller door 9 Re apply power to RO 10 Go into setpoints in the controller Ref Section 10 1 11 Change the C2 Range set...

Страница 51: ...shroud and remove inner terminals 3 Loosen the nut and run the float switch wires through the outer housing 4 Connect the High Tank float wires to contacts 1 6 Low Tank wires to contacts 2 7 Pretreatment Lockout wires to contacts 3 8 and RO Alarm Relay wires to contacts 4 9 5 Replace the inner terminals into the outer shroud 6 Tighten the nut replace the retaining screws and re install the side en...

Страница 52: ... Log for the MROZ system This must be filled out completely each time the system is used The MROZ must operate within the given parameters The recorded information may be useful in troubleshooting problems 8 2 MEMBRANE MAINTENANCE INSTRUCTIONS MEMBRANE REPLACEMENT PROCEDURE MRO3Z MRO8Z Turn off the incoming tap water supply to the MRO3Z MRO8Z and unplug the MRO3Z MRO8Z from the GFI receptacle The ...

Страница 53: ...ust insert membranes into the inlet end of the housing Inserting a membrane from the discharge end will damage the membrane s brine seal 8 Replace the end caps and secure with the clamps 9 Re install the membrane onto the skid and secure with the clamps 10 Connect all fittings back to their original positions 11 Replace any additional membranes at this time by following steps 2 10 12 With RO pump ...

Страница 54: ...d freezing Discard all product water for at least two hours of operation before placing the RO back into service again 4 Turn the knob on the Reject Flow Control Knob clockwise so that the Product Water flow and Reject Water flow are approximately equal Verify that the MROZ product conductivity is below the conductivity alarm setpoint 5 Disinfect the system per the instructions in section 5 1 6 Pu...

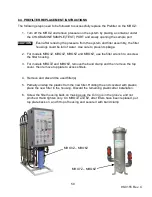
Страница 55: ...Z MRO4Z MRO5Z and MRO6Z use the filter wrench to unscrew the filter housing 3 For models MRO7Z and MRO8Z remove the band clamp and then remove the top cover then remove top plate to access filters 4 Remove and discard the used filter s 5 Partially unwrap the plastic from the new filter Holding the end covered with plastic place the new filter in the housing Discard the remaining plastic after inst...

Страница 56: ...CTIVE ACTION MROZ will not start MROZ not plugged in Plug into electrical outlet Circuit breaker blown Reset the breaker MROZ in a FAULT condition Check MROZ controller display for FAULT condition and correct the FAULT System has power but no water flow Feed source not open Open Incoming Tap Water valve Feed pressure 20 PSI Increase pressure to 20 PSI Incoming hose kinked Straighten kinks from the...

Страница 57: ... flowmeter 1 GPM Feed solenoid is not operating Test the solenoid see 9 5 Replace the valve if it is defective see 9 6 Pump motor or impeller failing Check PUMP PSI GAUGE to verify within operating parameters Replace the pump assembly if necessary see 9 3 and 9 4 Poor quality product water High Chlorine levels Backwash the carbon filter or rebed carbon filter MROZ not rinsed thoroughly Rinse membr...

Страница 58: ...estrictions in the PRODUCT WATER FOR DIALYSIS hose Check the feed pressure gauge on the dialysis machine If the dialysis machine does not have a pressure gauge install one inline Low temperature incoming tap water RO membrane performance is affected by water temperature The Product Water Flow Rate and Output decreases as the temperature of the Incoming Tap Water decreases Prefilter clogged Check t...

Страница 59: ... boards can be found in Section 6 PROBLEM INVESTIGATION CORRECTIVE ACTION System Inoperative Is the yellow CPU active LED blinking If no is the green power LED DS1 Lit If no is the fuse OK If no replace the fuse If yes with a voltmeter verify power is applied to the power terminals L1 and L2 If power is applied to the power terminals and the other checks are OK the pc board is defective and should...

Страница 60: ... the board If no replace the board If yes check the pump and wiring No or incorrect conductivity reading Is sensor wired correctly If yes is sensor installed inline as shown in the tubing diagram on page 14 If yes verify correct Conductivity range Range correct Does unit calibrate OK If no disconnect green and white wires of sensor Does reading show 0 If yes reconnect wires and remove sensor from ...

Страница 61: ...g the Write Protect chip in the controller to the off position Then change the value of C2 Range to either 5 or 6 Next remove the resistor in the controller in the R10 position note that it has not been soldered in place and place the resistor in the R9 position also not soldered in place into the now vacant R10 position Finally recalibrate the unit using a conductivity meter ...

Страница 62: ...ep the half of the wire harness that way connected to the motor starter in the RO3X cabinet for future use 4 Disconnect the suction and recirculation headers from pump by loosening the unions coming out of the suction and discharge of the pump Remove hose and fittings from top of pump going to first membrane inlet 5 Remove the clamps securing the pump assembly and remove the assembly from the fram...

Страница 63: ...ose barb tee 12 Connect the pump feed hose to the inlet of the pump by tightening the hose clamp 13 Take the saved half of the pump wire harness that was previously cut and butt splice it together with the wires from the replacement pump Slide supplied heatshrink over the butt spice location of the harness Using a heat gun heat the heatshrink around the wire harness 14 Connect the pump wires to th...

Страница 64: ...ons 3 Press and hold the LEFT ARROW KEY and press the RIGHT ARROW KEY to access the DISINFECT MODE 4 Hold in the ENTER KEY until water flows to the drain If there is no water flow to the drain the solenoid has failed closed 9 6 SOLENOID VALVE REPLACEMENT For all valves Feed Disinfect or Product Divert Solenoid Valves 1 Turn off the MROZ by pressing the POWER key the display will show STANDBY unplu...

Страница 65: ...nstall per the kit instructions 10 Reattach the hose tubing to the corresponding fittings on the valve 11 Reconnect the wire harness to the valve 12 To verify that the solenoid valve is installed correctly follow the Solenoid Test Procedures in Section 9 5 10 0 WARRANTY POLICY This product is covered under the standard AmeriWater warranty policy For specific terms and conditions please contact you...

Страница 66: ...Test Strips Peracid Test 6 Bottles of 100 Strips each For Measuring High Range Paracetic Acid 97PX20501 Test Strips Renal Check 6 Bottles of 100 Strips each For Measuring Residual Peroxide 97PH20901 Test Strips pH 6 Bottles of 100 Strips each For Measuring pH Water Acid Base Bicarbonate Dialysate 97RC22101 WaterCheck RC 6 Bottles of 100 Strips each For Measuring Residual Chlorine 97CM20201 WaterCh...

Страница 67: ...1HP 208V 3PH 10GPM FOR MRO3Z402 R188 0049 KIT REPLACEMENT PUMP 1HP 230V 3PH 10GPM FOR MRO3Z403 R188 0050 KIT REPLACEMENT PUMP 1HP 460V 3PH 10GPM FOR MRO3Z404 R188 0051 KIT REPLACEMENT PUMP 2HP 208V 3PH 15GPM FOR MRO4Z402 R188 0052 KIT REPLACEMENT PUMP 2HP 230V 3PH 15GPM FOR MRO4Z403 R188 0053 KIT REPLACEMENT PUMP 2HP 460V 3PH 15GPM FOR MRO4Z404 R188 0054 KIT REPLACEMENT PUMP 2HP 208V 3PH 15GPM FOR...

Отзывы: