17
Installation and Operation Manual
Cameras - Titles/Pseudos
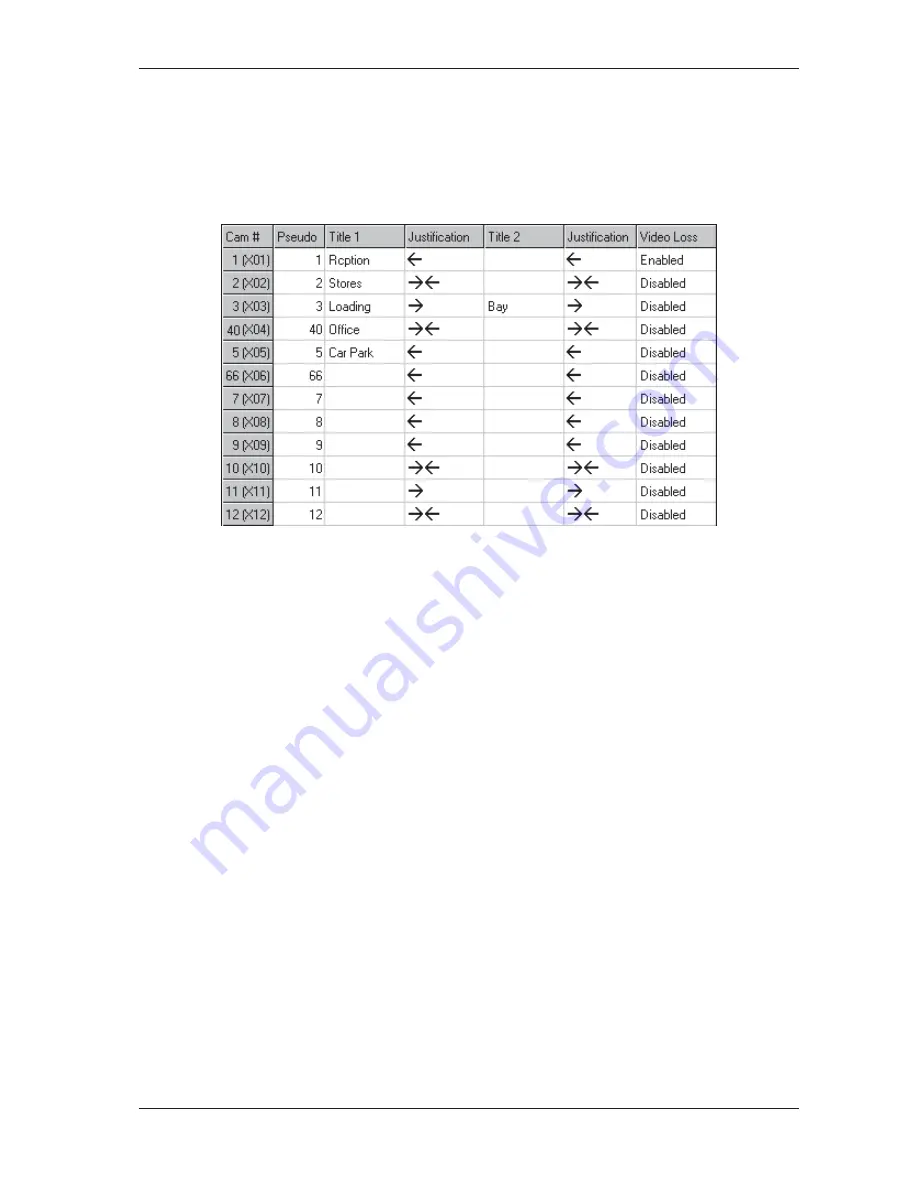
The
Titles/Pseudos
screen enabled the user to specify the identification number (
pseudo number) that will be used to
select each video input when using a system keyboard. The screen also enables each video input to be given 16
character alphanumeric titles, for the on-screen justification of titles to be specified and video-loss detection to be
enabled or disabled.
To display the
Titles/Pseudos
screen, expand the
Cameras
node on the left-hand side of the display area and then
click the
Titles/Pseudos
node.
The number of video inputs displayed in this screen depend on how the
Multi Matrix
screen (see page 12) was
completed. Video inputs are listed by their port reference, with the default camera identification number also shown. In
this reference, the first character is the matrix reference (X = primary unit, A-F = secondary units) and the second and
third characters are the video input port number (1-48) on that matrix.
For each video input, complete the following fields:
•
The
Pseudo
field should be used to specify the number that will be entered on a system keyboard in order to select
the video input. By default, the pseudo numbers are the same as the default camera identification numbers, but the
pseudo numbers can be changed to any numerical value from 1 to 9999. All pseudo numbers must be unique—if an
already assigned pseudo number is entered into a field, an error message will be displayed when the user attempts
to leave the screen.
Pseudo numbers enable camera to be identified by function or location. For example, if a two-story building has 10
cameras located on each floor, floor 1 cameras could be assigned the pseudo numbers 101 through 110 and floor
2 cameras could be assigned the pseudo numbers 201 through 210.
•
The
Title 1
field can be used to enter a eight-character alphanumeric title for the video input. Double-click in the field
and enter the required text. The first
Justification
field is used to specify the on-screen position of this title. Double-
click in the field and select from left (
←
←
←
←
←)
, centre
(→←
→←
→←
→←
→←
) and right (
→
→
→
→
→)
.
•
The
Title 2
field can be used to either enter a second eight-character alphanumeric title for the video input or to add
additional characters to the entry in the corresponding
Title 1
field. Double-click in the field and enter the required
text. The second
Justification
field is used to specify the on-screen position of that title. Double-click in the field and
select from left (
←
←
←
←
←)
, centre
(→←
→←
→←
→←
→←
) and right (
→
→
→
→
→)
. To append the characters entered in the
Title 2
field to those
entered in the
Title 1
field, select the same justification type in both fields.
•
If video loss detection has been enabled in the
Options
screen (see page 16), a
Video Loss
field is displayed for
each video input. This field is used to specify whether video loss detection should be enabled or disabled for the
individual input. Double-click in the field and select
Enabled
or
Disabled
.
Note
In this screen it is possible to use the drag down method to change multiple fields in a column to the same setting. Enter
the required text or select the required option in the uppermost field and then click and drag the cursor over the fields
below that are to be set the same. Press the
Enter
key to copy the setting to the highlighted fields.


