RBMS Plus Installation and Opera
RBMS Plus Installation and Operation Manual
Alpha Technologies Ltd. | www.alpha.ca
PAGE 20
0370260-J0 Rev B
4.6.2.
USB Port Selection
Identify which COM port is being used for the USB serial communications.
1.
Open the PC’s “Control Panel” and click on the “System” icon.
2.
Select the “Hardware” tab and click the “Device Manager”
button.
3.
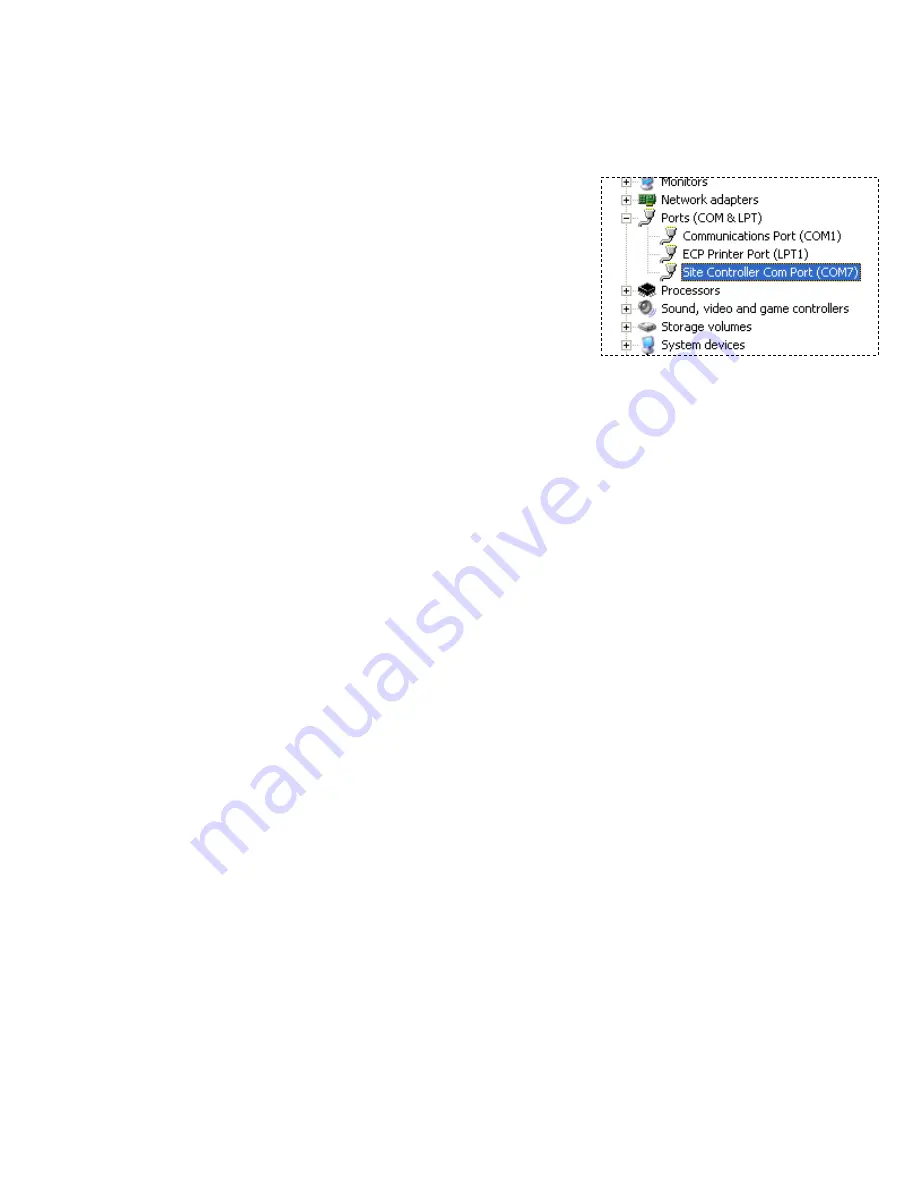
Navigate down the tree of Devices and expand the “Ports (COM
& LPT)” item.
4.
Find the item labeled “Site Controller Com Port (COM#)”. The
Com Port that was installed on is shown in the parenthesis
(COM7 in the example).
5.
To change the Port, right-click the Device and select
“Properties”. Select the “Port Settings” tab and click on the
“Advanced” button. A new Port # may now be selected and applied from the “Advanced Settings” Window.
When configuring your Serial Communications program use the COM port number identified above. If you program
only supports low number COM ports, change the port number as described in step 5.
4.6.3.
Accessing the Setup Menu
To access the RBMS Plus setup menu connect the serial communications program to the RBMS Plus using the USB
interface as described above. Open the serial communications program, select the COM port identified above and set
the data rate to 9600, 8 data bits, one stop bit, no parity and no flow control. Press the rear panel reset button while
holding down the x (lower case) for about 5 seconds. A message “-- Device Reset, hold ‘x’ key down until prompted. --“
will appear. Continue to hold the x key until the setup menu appears and then follow the setup instructions below.
To restore the default IP address, press and hold the reset button for five seconds until the 4 LEDs on the string port
light.
4.6.4.
Ethernet Crossover Cable Method
This method can be used when the RBMS Plus IP address is set to a known static IP address. Connect an Ethernet
crossover cable between the PC and the RBMS Plus. Set your PC IP address to the RBMS Plus a or – 1. Follow
the Telnet setup instructions below.
4.6.5.
Router Method
This method can be used when the RBMS Plus is set for DHCP operation (factory default). Connect the RBMS Plus to a
router that supports DHCP. This is generally done with a router designed for home use but this process can also be
used with most commercial routers and DHCP servers if the proper access is available. The DHCP server will
automatically assign an IP address to the RBMS Plus which will enable network access to the RBMS Plus for
configuration. Your router should have a built in web server or some other method of determining what IP address was
assigned to the RBMS Plus. (Refer to the router manual). Once the IP address is known, the RBMS Plus can be
configured through a Telnet connection as described below.


