ScoopTeam - User manual - Draft 0002
45
2.
Gain and routing for the sources that are assigned to knobs on the left side of the screen.
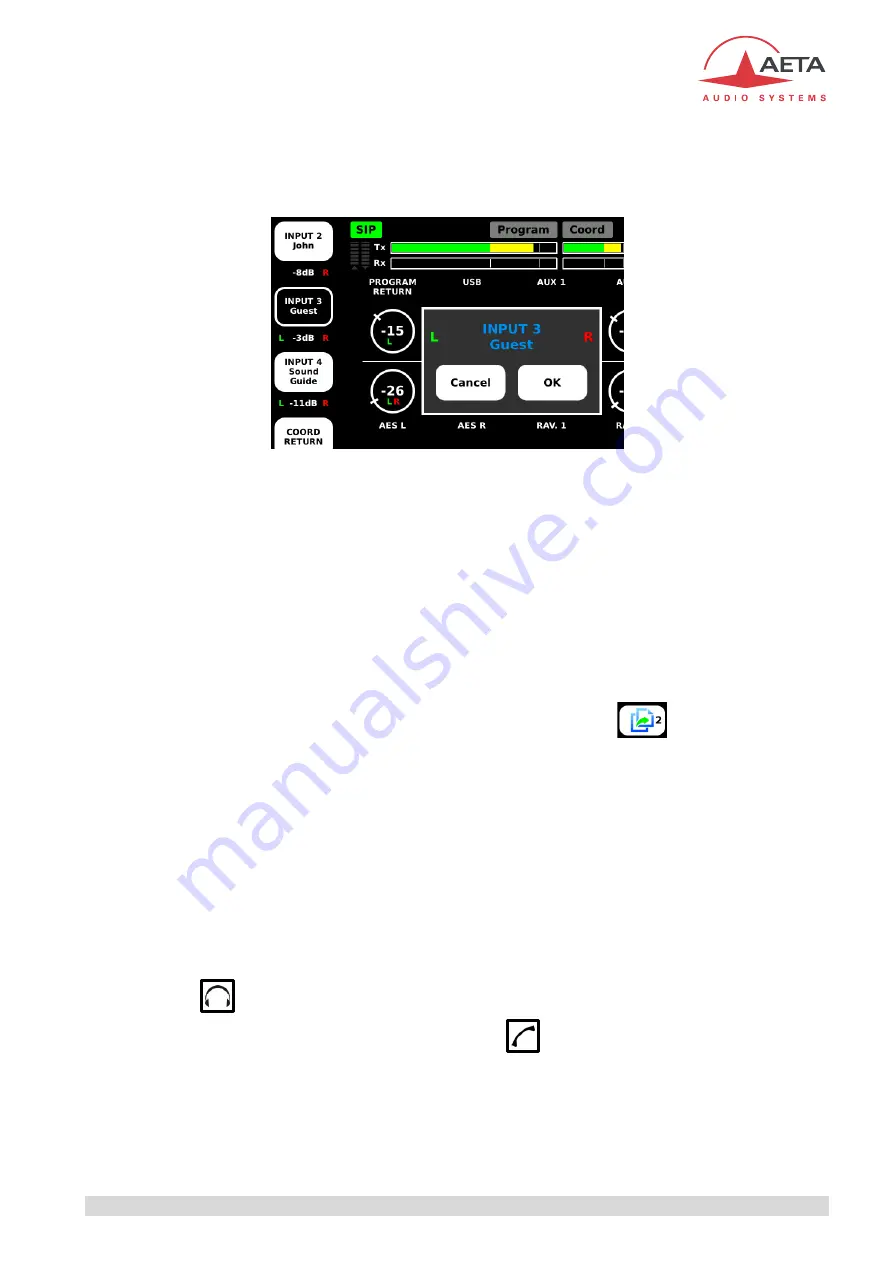
Besides each knob you can see a button showing the name of the assigned signal, its current
gain (in dB) and the routing to the ears (Left, or Right, or both). The gain is adjusted directly with
the knob. For the other settings, touch the button: a pop-up box appears as shown on the
picture below:
- The selected button is reminded by a black background.
- If you wish to change the assignment of the knob, rotate the rotary encoder and scroll through
the list of available sources.
This setting is not available for the Operator level.
- Push down the rotary encoder to change the routing, in the following sequence: L+R, L, R, etc.
- Touch OK to commit the changes, or touch anywhere else to cancel and stay with the existing
assignment and routing.
3.
Virtual knobs for the sources which are not assigned to the physical knobs on the side. For
adjusting a source, touch the virtual knob to select it: the knob turns blue.
- Rotate the rotary encoder to adjust the gain (value in dB) as desired.
- Push down the rotary encoder to change the routing, in the following sequence: L+R, L, R, etc.
The gain is locked whenever you touch another item or leave the page.
4.
“Copy” buttons (
NYA
) (
not displayed for the Operator level
), allowing to easily reuse the
monitoring mix for another commentator position. If you touch the
button, a pop-up
box asks for confirmation; touch
OK
to confirm. The gain and routing settings are all copied onto
the monitoring mix for position 2 (except the gain for Mic 2, because it is controlled by the
dedicated “side tone” knob on the front panel).
The other copy buttons have similar function, for copying the settings onto respectively position
3 and position 4.
5.
“Monitoring 1” button: black background to remind that this is the current page.
6.
“Monitoring 3” button: touch the button to go to the settings for position 3, described further.
7.
“Home” button: touch the button to go to the “Home” page.
8.
“Monitoring 4” button: touch the button to go to the settings for position 4, described further.
9.
“Monitoring 2” button: touch the button to go to the settings for position 2, described further.
If you hit the
shortcut key on the front panel, the display goes back to the page or menu that was
active before entering the monitoring pages. If you hit the
shortcut key, the unit directly jumps to
the “Connection” page.


