9
Computer systems
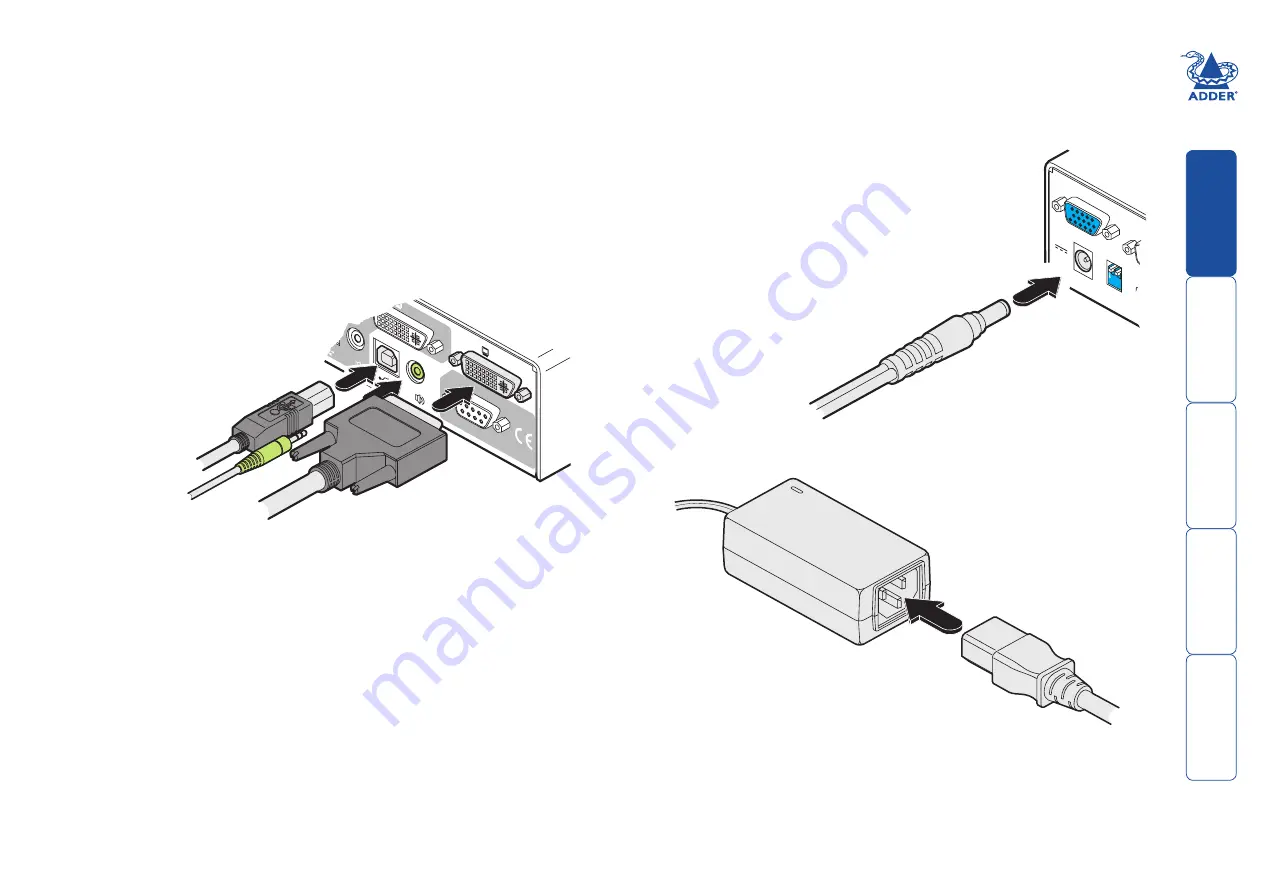
Each computer system is connected to the AdderView Pro 8 DVI unit using up to
three cables.
To connect a computer system
1 Ensure that power is disconnected from the AdderView Pro 8 DVI unit and
the system to be connected.
2 Use a DVI cable or a VGA to DVI/I conversion cable (if using analogue
signals) to link the video output of the computer’s graphic port to the DVI/I
port of the required channel on the rear of the unit.
Note: A combined DVI/I and USB (type A to B) cable is also available for
linking computers to the AdderView Pro 8 DVI (Part numbers: VSCD3 for a
2m cable and VSCD4 for a 5m cable).
3 Use a USB cable (type-A to type-B) to link a USB port on the computer
system to the USB port of the required channel on the rear of the unit.
4 If required, use a stereo audio link cable (3.5mm jacks at either end) to link
the speaker port on the computer system to the audio port of the required
channel on the rear of the unit.
US
U
VGA
5V
4A
INDOOR
USE
ONL
Y
1
2
ON
OPTIONS
DVI-I
DVI-I
1
2
From the USB port
on the computer
From the video port
on the computer
From the speaker port
on the computer
Power in connection
The AdderView Pro 8 DVI unit is supplied with a standard 20W power adapter.
There is no on/off switch on the unit, so operation begins as soon as a power
adapter is connected.
2 Connect the IEC connector of the supplied country-specific power lead to
the socket of the power adapter.
To connect the power supply
1 Attach the output lead from the power
adapter to the
5V
socket on the rear panel
of the unit.
3 Connect the power lead to a nearby main supply socket.
Note: Both the unit and its power supply generate heat when in operation and
will become warm to the touch. Do not enclose them or place them locations
where air cannot circulate to cool the equipment. Do not operate the equipment
in ambient temperatures exceeding 40 degrees Centigrade. Do not place the
products in contact with equipment whose surface temperature exceeds 40
degrees Centigrade.


