General configuration
Changing hotkeys
AdderView Pro 8 DVI units use
and
as their standard hotkeys. These can
be changed if they clash with other software or hardware within the installation.
To change the hotkeys
2 Highlight ‘Setup Options’ and press
.
3 Highlight ‘Hotkeys’ and press
to select the required hotkey
combination. The options are:
CRTL+ALT, CTRL+SHIFT, ALT+SHIFT, ALT GR,
LEFT ALT+RIGHT ALT, LEFT CTRL+LEFT ALT or RIGHT CTRL+RIGHT ALT.
4
Press to return to the ‘Configuration Menu’.
Choosing a default channel
You can determine what the unit should do when it is first powered on, either
switch to a particular channel or display the on-screen menu.
To choose a default channel
2 Highlight ‘Setup Options’ and press
.
3 Highlight ‘Default Channel’ and press
to select either the required
channel number (1 to 8) or ‘OSD’ if you would prefer the on-screen menu to
be displayed
.
4
Press to return to the ‘Configuration Menu’.
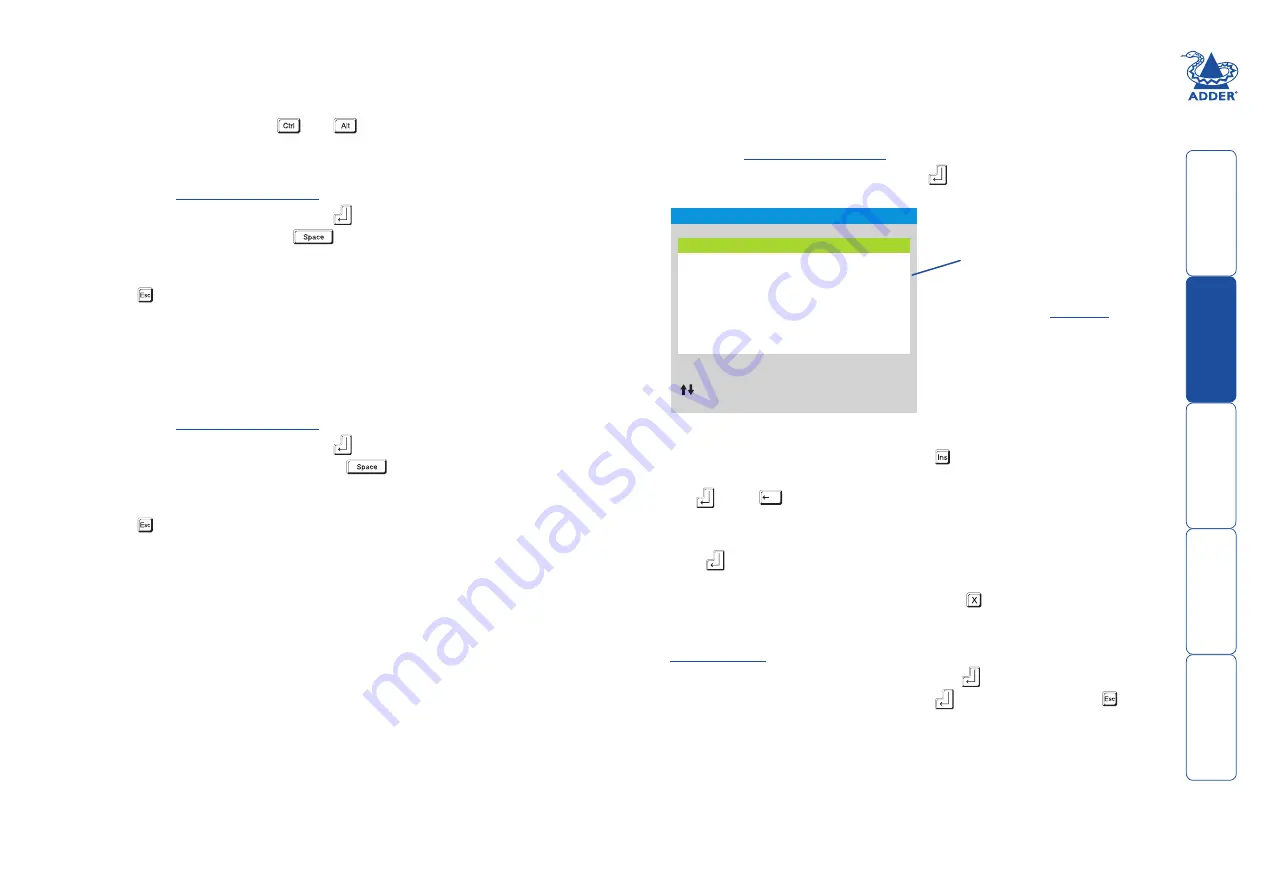
Editing the computer list
To create/edit computer entries
1 Display the
Display the
.
2 Highlight ‘Edit Computer List’ and press
. The ‘Edit Computer List’ menu
will be displayed.
3 Either:
•
Create a new computer entry
– Press and enter a new name, or
•
Edit an existing computer entry
– Highlight a computer name and press
. Press
(Backspace) to delete existing characters and enter the
required new name (up to 16 characters).
Note: Avoid creating two names for the same computer channel.
Avoid creating two names for the same computer channel.
4 Press
and the cursor will move to the computer channel column. Change
or enter the channel address of the computer as required.
5 Optional: While the entry is highlighted, press to add/remove the
‘x’ marker at the right side - this will determine whether or not the
corresponding computer will be included autoscanning scan list - see
for more details.
6 When the channel address is complete, press
.
7 When all settings have been made, press
to save and exit. Press to
return to the ‘Configuration Menu’.
ADDERVIEW PRO
Edit Computer List
Computer 01
01
x
Computer 02
02
x
Computer 03
03
x
Computer 04
04
x
Computer 05
05
x
Computer 06
06
x
Computer 07
07
x
Computer 08
08
x
Ins–Add
Esc–Quit
Enter–Edit
X–Autoscan
F3–Find
Del–Delete
–Select
When an entry is marked with a
‘x’, the corresponding computer
will be included within an
autoscanning operation when
‘SCAN LIST’ is chosen as the
autoscan mode. See Autoscanning
for more details.


