Field Service Documentation
1
Snap Server 700i Series
Copyright © 2007, Adaptec, Inc. All rights reserved. Information in this document is subject to change without notice and does not represent
a commitment on the part of Adaptec or any of its subsidiaries.
Installing the Snap Server in a Rack
Note
The Snap Server 700i Series can only be mounted in a four-post, 32-inch
depth, EIA-compliant rack. A two-post telco-style rack or a rack less than 32-inches
in depth will not support the server.
The Snap Server ships with two slide rail assemblies consisting of inner rails to
attach to the chassis, outer rails to attach to the rack, and a packet of screws for
mounting the rails to the chassis and to the rack. The rails are not universal. They
are stamped
Left
and
Right
and must be mounted correctly. You will need a Phillips
screwdriver to mount the rails and a second person to help position the Snap Server
into the rack.
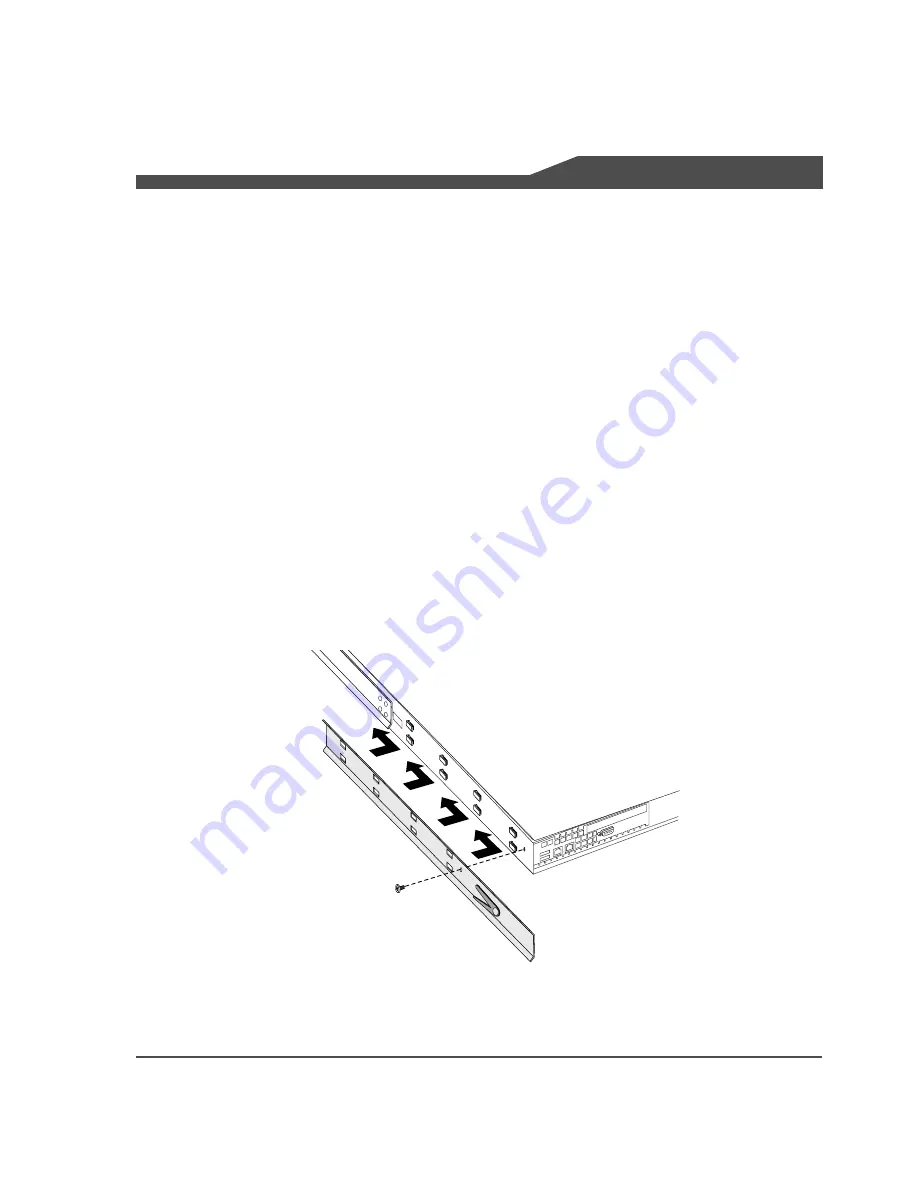
Attach the Sliders to the Chassis
1
Facing the rear of the chassis, take the left-branded inner slider and position it on
the left side toward the rear of the chassis. The tongues on the chassis should fit
through the rectangular holes on the rail, and the release mechanism should be
facing out.
2
Slide the rail forward, and continue to slide until you can feel that it’s attached
securely.
3
Fasten with the rail attachment Phillips screw.
4
Repeat Steps 1 through 3 for the right-branded inner slider.


