background image

User Manual of Network Zoom camera


85


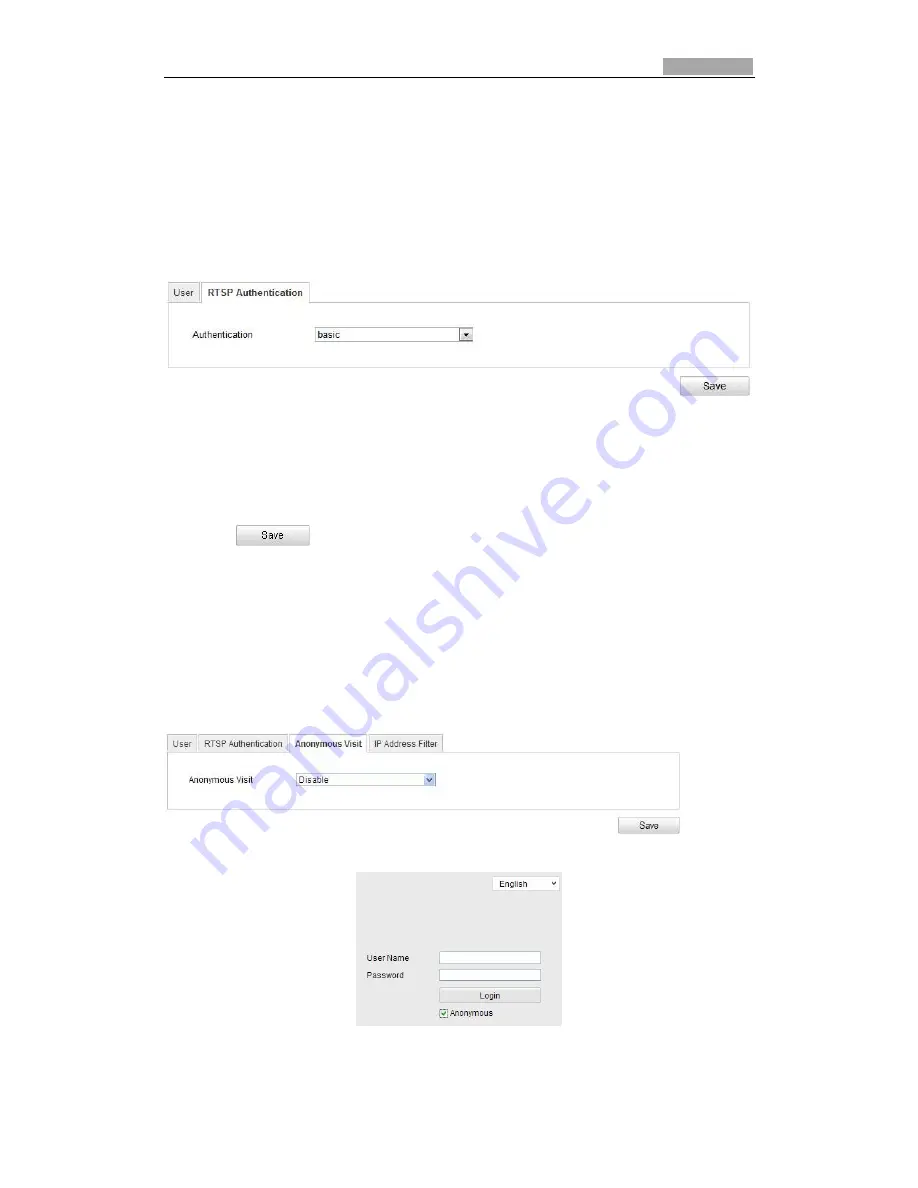
10.2 Configuring RTSP Authentication


Purpose:


You can specifically secure the stream data of live view.


Steps:


1.


Enter the RTSP Authentication interface

:


Configuration

>

 Advanced Configuration

>

 Security > RTSP Authentication 


Figure 10-5 RTSP Authentication


2.


Select the 

Authentication

 type 

basic

 or 

disable

 in the drop-down list to enable 

or disable the RTSP authentication.  

 
3.


Click  

 to save the settings.  


10.3 Configuring Anonymous Visit


When you enable this function, you can log into the camera without a username and 

password.


In login interface, check the 

Anonymous

 checkbox and click 

Login

 to enter the 

camera as shown in  Figure 10-7.


Figure 10-6 Anonymous Login


Figure 10-7 Login Interface


Содержание AcuHawk-EX

Страница 1: ...AcuHawk EX Network Zoom Camera User Manual Acura Embedded Systems Inc ...

Страница 2: ... Live View 24 5 1 Live View Page 24 5 2 Starting Live View 25 5 3 Recording and Capturing Pictures Manually 26 5 4 Operating PTZ Control 26 5 4 1 PTZ Control Panel 26 5 4 2 Setting Calling a Preset 27 5 4 3 Setting Calling a Patrol 28 5 4 4 Setting Calling a Pattern 30 5 4 5 Configuring Power Off Memory 30 5 4 6 Configuring Park Actions 30 5 5 Configuring Live View Parameters 31 Chapter 6 Camera C...

Страница 3: ...per proof Alarm 63 6 6 3 Configuring External Alarm Input 64 6 6 4 Configuring Alarm Output 66 6 6 5 Handling Exception 67 Chapter 7 Record Settings 69 7 1 Configuring NAS Settings 69 7 2 Configuring Recording Schedule 70 7 3 Configuring Snapshot Settings 74 Chapter 8 Playback 76 Chapter 9 Log Searching 80 Chapter 10 Others 82 10 1 Managing User Accounts82 10 2 Configuring RTSP Authentication85 10...

Страница 4: ...ct It combines the functions of analog camera and network video server With embedded operating system and high performance hardware the camera performs high efficiency stability and reliability Integrated with a megapixel zoom lens the camera can monitor large scale area and get high definition images Auto focus function Auto switch IR cut filter Advanced video compression with high compression ra...

Страница 5: ...nterfaces 5 D D RS 485 interfaces Used to control an external PTZ 6 VIDEO GND Analog video output interface 7 POWER The indicator is on when the power is up 8 Grounding Screw Used for grounding 9 12V DC 12V DC power interface 10 MICRO SD Micro SD card slot 11 AUDIO OUT Audio output interface 12 MIC IN Audio input interface 13 LAN PoE 10M 100M self adaptive Ethernet interface with PoE function ...

Страница 6: ... to connect the network zoom camera in the same subnet with your computer and install the SADP or iVMS 4200 software to search and change the IP of the network zoom camera Note For the detailed introduction of SADP please refer to Appendix 1 3 1 1 Wiring over the LAN The following figures show the two ways of cable connection of a network zoom camera and a computer Purpose To test the network zoom...

Страница 7: ...se the client software to list the online devices Please refer to the user manual of client software for detailed information 2 Change the IP address and subnet mask to the same subnet as that of your computer 3 Enter the IP address of network zoom camera in the address field of the web browser to view the live video Notes The default IP address is 192 0 0 64 The default user name is admin and pas...

Страница 8: ...detailed IP address configuration of the zoom camera 3 Save the static IP in the router 4 Set port mapping E g 80 8000 and 554 ports The steps for port mapping vary depending on different routers Please call the router manufacturer for assistance with port mapping Note Refer to Appendix 2 for detailed information about port mapping 5 Visit the network zoom camera through a web browser or the clien...

Страница 9: ...information about port mapping 5 Apply a domain name from a domain name provider 6 Configure the DDNS settings in the setting interface of the router 7 Visit the zoom camera via the applied domain name Connecting the network zoom camera via a modem Purpose This zoom camera supports the PPPoE auto dial up function The zoom camera gets a public IP address by ADSL dial up after the zoom camera is con...

Страница 10: ...Configuring DDNS Settings for detailed configuration 3 Visit the zoom camera via the applied domain name Private Domain Name Resolution Figure 3 8 Private Domain Name Resolution Steps 1 Install and run the IP Server software in a computer with a static IP 2 Access the network zoom camera through the LAN with a web browser or the client software 3 Enable DDNS and select IP Server as the protocol ty...

Страница 11: ... address of the network zoom camera e g 192 0 0 64 and press the Enter key to enter the login interface 3 Input the user name and password and click Note The default user name is admin and password is 12345 Figure 4 1 Login Interface 4 Install the plug in before viewing the live video and operating the zoom camera Please follow the installation prompts to install the plug in ...

Страница 12: ...User Manual of Network Zoom camera 21 Figure 4 2 Download and Install Plug in Figure 4 3 Install Plug in 1 Figure 4 4 Install Plug in 2 ...

Страница 13: ...fter installing the plug in 4 2 Accessing by Client Software The product CD contains the client software You can view the live video and manage the zoom camera with the client software Follow the installation prompts to install the client software and WinPcap The configuration interface and live view interface of client software are shown bellow Figure 4 6 iVMS 4200 Control Panel ...

Страница 14: ...ou use third party VMS software please contact technical support of our branch for camera firmware For detailed information about client software of our company please refer to the user manual of the software This manual mainly introduces accessing to the network zoom camera by web browser ...

Страница 15: ...e Descriptions of the live view page Menu Bar Live View Parameters Live view window Toolbar Click to show or hide PTZ control panel PTZ control Preset Figure 5 1 Live View Page Menu Bar Click each tab to enter Live View Playback Log and Configuration page respectively Live View Window Display the live video Toolbar Operations on the live view page e g live view capture record audio on off two way ...

Страница 16: ... Manual recording on Audio on and adjust volume Mute Two way audio off Two way audio on Manually capture the pictures 3D zoom Note Before using the two way audio or recording with audio functions please set the Stream Type to Video Audio referring to Section 6 4 1 Configuring Video Settings Full screen Mode You can double click on the live video to switch the current live view into full screen or ...

Страница 17: ...gure remote automatic recording please refer to Section 7 2 Configuring Recording Schedule Note The captured image will be saved as a JPEG file in your computer 5 4 Operating PTZ Control Purpose In the live view interface you can use the PTZ control buttons to control panning tilting and zooming The panning and tilting functions are available only when the zoom camera is installed to a panning and...

Страница 18: ...teps 1 In the PTZ control panel select a preset number from the preset list Figure 5 4 Setting a Preset 2 Use the PTZ control buttons to move the lens to the desired position Panzoomthecamera to the right or left Tiltzoom cameratheup or down Zoom in or out Refocus the lens 3 Click to finish the setting of the current preset 4 You can click to delete the preset Note You can configure up to 255 pres...

Страница 19: ...terface There are up to 8 patrols for customizing A patrol can be configured with 32 presets Before you start Please make sure that the presets you want to add into a patrol have been defined Setting a Patrol Steps 1 In the PTZ control panel click to enter the patrol settings interface 2 Select a patrol number from 3 Click to enter the adding interface of preset as shown in Figure 5 6 Figure 5 6 A...

Страница 20: ... to another 5 Click to save a preset into the patrol 6 Repeat the steps from 3 to 5 to add more presets 7 Click to save all the patrol settings Calling a Patrol In the PTZ control panel select a defined patrol from and click to call the patrol as shown in Figure 5 7 Figure 5 7 Calling a Preset Buttons on the Patrols interface Buttons Description Save a patrol Call a patrol Stop a patrol Enter the ...

Страница 21: ...r off You can set the time point of which the camera resumes its PTZ status 1 Enter the Basic PTZ Parameter Configuration interface Configuration Advanced Configuration PTZ Basic Figure 5 8 Basic PTZ Configuration Interface 2 Set the resume time as 30 seconds 60 seconds 300 seconds or 600 seconds before power off 3 Click to save the settings 5 4 6 Configuring Park Actions Purpose This feature allo...

Страница 22: ...meters Mainstream Sub stream You can select or as the stream type of live viewing The main stream is with a relatively high resolution and needs much bandwidth The sub stream is with a low resolution and needs less bandwidth The default setting of stream type is Note Please refer to Section 6 4 1 Configuring Video Settings for more detailed parameter settings of the main stream and sub stream resp...

Страница 23: ...ettings Live View Parameters Set the protocol type stream type image size and live view performance Protocol Type TCP UDP MULTICAST and HTTP are selectable TCP Ensures complete delivery of streaming data and better video quality yet the real time transmission will be affected UDP Provides real time audio and video streams HTTP Allows the same quality as of TCP without setting specific ports for st...

Страница 24: ...in live view to Set the saving path of the manually captured pictures in interface Save snapshots when playback to Set the saving path of the captured pictures in interface Save clips to Set the saving path of the clipped video files in interface Note You can click to change the directory for saving video files clips and pictures 3 Click to save the settings 6 2 Configuring Time Settings Purpose Y...

Страница 25: ...It can be set from 1 to 10080 minutes Figure 6 3 Time Sync by NTP Server You can click Test to make sure that the NTP server is connected Note If the zoom camera is connected to a public network you should use a NTP server that has a time synchronization function such as the server at the National Time Center IP Address 210 72 145 44 If the zoom camera is set in a customized network NTP software c...

Страница 26: ... to the original time and the time difference between the two time zones From the Time Zone drop down menu as shown in Figure 6 5 select the Time Zone in which the zoom camera locates Figure 6 5 Time Zone Settings Configuring Daylight Saving Time summer time Purpose If there is the habit of adjusting clocks forward in your country in certain time period of a year you can turn this function on The ...

Страница 27: ...1 Configuring TCP IP Settings Purpose TCP IP settings must be properly configured before you operate the zoom camera over network Steps 1 Enter TCP IP Settings interface Configuration Basic Configuration Network TCP IP Or Configuration Advanced Configuration Network TCP IP Figure 6 7 TCP IP Settings ...

Страница 28: ... router and configure the gateway of the network zoom camera If the DNS server settings are required for some applications e g sending email you should properly configure the Preferred DNS Server and Alternate DNS server Note The router must support the route advertisement function if you select Route Advertisement as the IPv6 mode 6 3 2 Configuring Port Settings Purpose If there is a router conne...

Страница 29: ...x to enable this feature 3 Enter User Name Password and Confirm password for PPPoE access Note The User Name and Password should be assigned by your ISP 4 Click to save and exit the interface 6 3 4 Configuring DDNS Settings Purpose If your zoom camera is set to use PPPoE as its default network connection you can use the Dynamic DNS DDNS for network access Before you start Registration on the DDNS ...

Страница 30: ... domain name obtained from the DynDNS website 3 Enter the Port of DynDNS server 4 Enter the User Name and Password registered on the DynDNS website 5 Click to save the settings Figure 6 11 DynDNS Settings IP Server Steps 1 Enter the Server Address of the IP Server 2 Click to save the settings Note The Server Address should be entered with the static IP address of the computer that runs the IP Serv...

Страница 31: ... Address of NO IP 2 In the Domain text field enter the domain name obtained from the NO IP website 3 Enter the Port of NO IP server 4 Enter the User Name and Password registered on the NO IP website 5 Click to save the settings 6 3 5 Configuring SNMP Settings Purpose You can use SNMP to get zoom camera status and parameters related information Before you start Before setting the SNMP please use th...

Страница 32: ...ould be the same as that of the SNMP software Steps 1 Enter the SNMP Settings interface Configuration Advanced Configuration Network SNMP Figure 6 14 SNMP Settings 2 Check the corresponding version checkbox to enable the feature 3 Configure the SNMP settings Note The configuration of the SNMP software should be the same as the settings you configure here ...

Страница 33: ... with 802 1X standard is shown as follows Network Dome Authenticator etwork Switch Net Authentication Server PC PC RADIUS Server Figure 6 15 Protected LAN Before connecting the network camera to the protected LAN please apply a digital certificate from a Certificate Authority The network camera requests access to the protected LAN via the authenticator a switch The switch forwards the identity and...

Страница 34: ...r or the switch 5 Enter the user name and password issued by the CA to access the server 6 Click to finish the settings Notes The camera reboots when you save the settings 7 After the configuration connect the camera to the protected network 6 3 7 Configuring QoS Settings Purpose QoS Quality of Service can help solve the network delay and network congestion by configuring the priority of data send...

Страница 35: ...for uploading captured pictures Steps 1 Enter the FTP Settings interface Configuration Advanced Configuration Network FTP Figure 6 18 FTP Settings 2 Configure the FTP settings including server address port user name password directory and upload type Setting the directory in FTP server for saving files In the Directory Structure field you can select the root directory parent directory and child di...

Страница 36: ...Plug and Play UPnP is a networking architecture that provides compatibility among networking equipment software and other hardware devices The UPnP protocol allows devices to connect seamlessly and to simplify the implementation of networks in the house and corporate environments With the function enabled you don tneed to configure the port mapping for each port and the camera is connected to the ...

Страница 37: ... Click to save the settings 6 3 11 Configuring Email Settings Purpose The system can be configured to send an Email notification to all designated receivers if an alarm event is detected e g motion detection event video loss tamper proof etc Before you start Please configure the DNS Server settings under Basic Configuration Network TCP IP or Advanced Configuration Network TCP IP before using the E...

Страница 38: ...er The SMTP Server IP address or host name e g smtp 263xmail com SMTP Port The SMTP port The default TCP IP port for SMTP is 25 Enable SSL Check the checkbox to enable SSL if it is required by the SMTP server Attached Image Check the checkbox of Attached Image if you want to send emails with attached alarm images Interval The interval refers to the time between two actions of sending attached ...

Страница 39: ...e notified Optional click Test to make sure that the email server can send email out 3 Click to save the settings 6 4 Configuring Video and Audio Settings 6 4 1 Configuring Video Settings Steps 1 Enter the Video Settings interface Configuration Basic Configuration Video Audio Video Or Configuration Advanced Configuration Video Audio Video Figure 6 23 Configure Video Settings 2 Select the Stream Ty...

Страница 40: ...s measured by frames per second fps A higher frame rate is advantageous when there is movement in the video stream as it maintains image quality throughout Max Bitrate Set the max bitrate to 32 16384 Kbps The higher value corresponds to the higher video quality but the higher bandwidth is required Video Encoding The video encoding standard can be set to H 264 MPEG4 or MJPEG I Frame Interval Set th...

Страница 41: ... of Interest encoding is used to enhance the quality of images which are specified in advance Stream Type You can set the ROI function for main stream sub stream or third stream Select a stream type and then configure the ROI settings Fixed Region The fixed region encoding is the ROI encoding for the manually configured area And you can choose the Image Quality Enhancing level for ROI encoding and...

Страница 42: ...twork camera including brightness contrast saturation sharpness etc Note The parameters in Display Settings interface vary depending on the models of network zoom camera Steps 1 Enter the Display Settings interface Configuration Basic Configuration Image Display Settings Or Configuration Advanced Configuration Image Display Settings 2 Set the image parameters of the network camera ...

Страница 43: ...arts of an image The value ranges from 0 to 100 Saturation This feature is used to adjust color saturation of the image The value ranges from 0 to 100 Sharpness Sharpness function enhances the detail of the image by sharpening the edges in the image The value ranges from 0 to 100 Note This function varies depending on the models of zoom camera Exposure Settings Exposure Mode The Exposure Mode can ...

Страница 44: ...ou can adjust the values of Gain Shutter Iris manually Note This function varies depending on the models of zoom camera Limit Gain This feature is used to adjust gain of the image The value ranges from 0 to 100 Slow Shutter This function can be used in underexposure condition It lengthens the shutter time to ensure full exposure The slow shutter value can be set to Slow Shutter 2 3 4 6 and 8 Figur...

Страница 45: ...ase the sensitivity in low light conditions Note This function varies depending on the models of zoom camera Backlight Settings BLC If there sa bright backlight the subject in front of the backlight appears silhouetted or dark Enabling BLC back light compensation function can correct the exposure of the subject But the backlight environment is washed out to white WDR Wide Dynamic Range The wide dy...

Страница 46: ...tdoor environment Indoor You can select this mode when the zoom camera is installed in indoor environment Fluorescent Lamp You can select this mode when there are fluorescent lamps installed near the zoom camera Sodium Lamp You can select this mode when there are sodium lamps installed near the zoom camera Auto Track In Auto Track mode white balance is continuously being adjusted in real time acco...

Страница 47: ...deo Standard You can set the Video Standard to 50hz PAL or 60hz NTSC according to the video system in your country Note This function varies depending on the models of zoom camera Other Lens Initialization The lens operates the movements for initialization when you check the check box of Lens Initialization Zoom Limit You can set Zoom Limit value to limit the maximum value of zooming The value can...

Страница 48: ...r week if required 3 Edit the zoom camera name in the text field of Camera Name 4 Select from the drop down list to set the time format date format display mode and OSD size 5 You can use the mouse to click and drag the text frame in the live view window to adjust the OSD position Figure 6 35 Adjust OSD Location 6 Click to activate above settings ...

Страница 49: ... to click and drag the red text frame in the live view window to adjust the text overlay position 5 Click Note There are up to 4 text overlays configurable Figure 6 36 Text Overlay Settings 6 5 4 Configuring Privacy Mask Purpose Privacy mask enables you to cover certain areas on the live video to prevent certain spots in the surveillance area from being live viewed and recorded Steps 1 Enter the P...

Страница 50: ... section explains how to configure the network zoom camera to respond to alarm events including motion detection external alarm input tamper proof and exception These events can trigger the alarm actions such as Notify Surveillance Center Send Email Trigger Alarm Output etc For example when an external alarm is triggered the network zoom camera sends a notification to an e mail address 6 6 1 Confi...

Страница 51: ...6 38 Enable Motion Detection 3 Click Click and drag the mouse on the live video image to draw a motion detection area Note You can draw up to 8 motion detection areas on the same image 4 Click to finish drawing Note You can click to clear all of the areas 5 Move the slider to set the sensitivity of the detection 2 Set the Arming Schedule for Motion Detection Steps 1 To edit the arming schedule as ...

Страница 52: ...rming schedule as shown in Figure 6 40 3 Click to set the time period for the arming schedule 4 After you set the arming schedule you can click to copy the schedule to other days Optional 5 Click to save the settings Note The time of each period can t be Uoverlappedto4periodscanbe configured for each day ...

Страница 53: ...method Figure 6 41 Linkage Method Check the checkbox to select the linkage method Notify surveillance center send email upload to FTP trigger channel and trigger alarm output are selectable Notify Surveillance Center Send an exception or alarm signal to remote management software when an event occurs Send Email Send an email with alarm information to a user or users when an event occurs Note To se...

Страница 54: ...ule to realize this function Please refer to Section 7 2 Configuring Recording Schedule for settings the recording schedule Trigger Alarm Output Trigger one or more external alarm outputs when an event occurs Note To trigger an alarm output when an event occurs please refer to Section 6 6 5 Configuring Alarm Output to set the alarm output parameters 6 6 2 Configuring Tamper proof Alarm Purpose You...

Страница 55: ... Section 6 6 1 Configuring Motion Detection 5 Check the checkbox to select the linkage method taken for the tamper proof Notify surveillance center send email and trigger alarm output are selectable Please refer to Step 3 Set the Alarm Actions for Motion Detection in Section 6 6 1 Configuring Motion Detection 6 Click to save the settings 6 6 3 Configuring External Alarm Input Steps 1 Enter the Ala...

Страница 56: ...the Arming Schedule for Motion Detection in Section 6 6 1 Configuring Motion Detection 5 Check the checkbox to select the linkage method taken for the alarm input Refer to Step 3 Set the Alarm Actions for Motion Detection in Section 6 6 1 Configuring Motion Detection 6 You can copy your settings to other alarm inputs 7 Click to save the settings ...

Страница 57: ... The Delay time can be set to 5sec 10sec 30sec 1min 2min 5min 10min or Manual The delay time refers to the time duration that the alarm output remains in effect after alarm occurs 5 Click to enter the Edit Schedule Time interface The time schedule configuration is the same as the settings of the arming schedule for motion detection Refer to Step 2 Set the Arming Schedule for Motion Detection in Se...

Страница 58: ...ted and illegal login to the zoom cameras Steps 1 Enter the Exception Settings interface Configuration Advanced Configuration Events Exception 2 Check the checkbox to set the actions taken for the Exception alarm Refer to Step 3 Set the Alarm Actions Taken for Motion Detection in Section 6 6 1 Configuring Motion Detection Figure 6 46 Exception Settings 3 Click to save the settings ...

Страница 59: ...ect the NAS type as NFS or SMB CIFS If you select SMB CIFS you need to enter the User Name and Password Figure 7 1 Select NAS Type 3 Enter the IP address of the network disk The default NFS storage format of file path is dvr test as shown in Figure 7 2 And the default SMB CIFS storage format of file path is test 4 Click Test to make sure that the NAS is connected successfully Optional Figure 7 2 A...

Страница 60: ...in Figure 7 5 Figure 7 5 View Disk Status Notes Up to 8 NAS disks can be connected to the zoom camera To initialize and use the SD card after install it to the zoom camera please refer to the steps of NAS disk initialization 7 2 Configuring Recording Schedule Purpose There are two kinds of recording for the zoom cameras manual recording and scheduled recording For the manual recording refer to Sec...

Страница 61: ... and the pre record time is set as 5 seconds the zoom camera starts to record at 9 59 55 The Pre record time can be configured as No Pre record 5 s 10 s 15 s 20 s 25 s 30 s or not limited Note The pre record time changes according to the video bitrate Post record The time you set to stop recording after the scheduled time or the event For example if an alarm triggered recording ends at 11 00 and t...

Страница 62: ...t record If you want to configure the all day recording please check the All Day checkbox If you want to record in different time sections check the Customize checkbox Set the Start Time and End Time Note The time of each segmentUpto4segmentscan t be ov be configured 2 Select a Record Type The record type can be Normal Motion Detection Alarm Motion Alarm Motion Alarm Normal If you select Normal th...

Страница 63: ...ettings interface For detailed information please refer to Section 6 6 4 Configuring External Alarm Input Record Triggered by Motion Alarm If you select Motion Alarm the video will be recorded when the motion and alarm are triggered at the same time Besides configuring the recording schedule you have to configure the settings on the Motion Detection and Alarm Input Settings interfaces Please refer...

Страница 64: ...nable continuous snapshot Check the Enable Event triggered Snapshot checkbox to check event triggered snapshot 3 Select the quality of the snapshot 4 Set the time interval between two snapshots 5 Click to save the settings Uploading to FTP Note Please make sure that the FTP server is online You can follow below configuration instructions to upload the snapshots to FTP Upload continuous snapshots t...

Страница 65: ...ngs or Alarm Input interface Please refer to Step 3 Set the Alarm Actions Taken for Motion Detection in Section 6 6 1 Configuring Motion Detection or Step 4 Configuring External Alarm Input in Section 6 6 1 Configuring Motion Detection 3 Check the Enable Event triggered Snapshot checkbox Figure 7 10 Snapshot Settings ...

Страница 66: ...tion explains how to view the remotely recorded video files stored in the network disks or SD cards Task 1 To play back the video files Steps 1 Click on the menu bar to enter playback interface Figure 8 1 Playback Interface 2 Select the date and click Figure 8 2 Search Video ...

Страница 67: ...wnload captured pictures Display playback Playback by frame status Note You can choose the file paths locally for downloaded playback video files and pictures in Local Configuration interface Please refer to Section 6 1 Configuring Local Parameters for details Drag the progress bar with the mouse to locate the exact playback point You can also input the time and click to locate the playback point ...

Страница 68: ...u is shown in Figure 8 7 All the video files are listed Figure 8 7 Video Downloading interface 2 Check the checkbox on the left side of the video files that you need to download 3 Click to download the video files Notes The progress ratio displays the downloading ratio of the video file You can click to stop the downloading The total number displays the amount of the video files ...

Страница 69: ... playback interface The pop up menu is shown in Figure 8 8 2 Set the linkage type of capturing the pictures as timing alarm motion etc 3 Set the start time and end time Click Search The corresponding picture files are listed on the left 4 Check the checkbox in front of the files that you need to download 5 Click to download the files Figure 8 8 Picture Downloading interface ...

Страница 70: ...tart Please configure network storage for the zoom camera or install a SD card in the zoom camera Steps 1 Click on the menu bar to enter log searching interface Figure 9 1 Log Searching Interface 2 Set the log search conditions including the Major Type Minor Type Start Time and End Time as shown in Figure 9 2 3 Click to search log files The matched log files will be displayed on the Log interface ...

Страница 71: ...User Manual of Network Zoom camera 81 4 To export the log files click to save the log files in your computer ...

Страница 72: ... modify or delete other accounts Up to 31 user accounts can be created Figure 10 1 User Information Add a User Steps 1 Click to add a user 2 Input the new User Name select Level and input Password Note The level indicates the permissions you give to the user You can define the user as Operator or User 3 In the Basic Permission field and Camera Configuration field you can check or uncheck the permi...

Страница 73: ... Modify a User Steps 1 Left click to select the user from the list and click 2 Modify the User Name Level or Password 3 In the Basic Permission field and Camera Configuration field you can check or uncheck the permissions 4 Click to finish the user modification ...

Страница 74: ...al of Network Zoom camera 84 Figure 10 3 Modify a User Delete a User Steps 1 Left click the user name you want to delete and click 2 Click on the pop up dialogue box to delete the user Figure 10 4 Delete a User ...

Страница 75: ...re 10 5 RTSP Authentication 2 Select the Authentication type basic or disable in the drop down list to enable or disable the RTSP authentication 3 Click to save the settings 10 3 Configuring Anonymous Visit When you enable this function you can log into the camera without a username and password In login interface check the Anonymous checkbox and click Login to enter the camera as shown in Figure ...

Страница 76: ...Address Filter 10 5 Viewing Device Information Enter the Device Information interface Configuration Basic Configuration System Device Information Or Configuration Advanced Configuration System Device Information In the Device Information interface you can edit the Device Name Other information of the network zoom camera such as Model Serial No Firmware Version Encoding Version Number of Channels N...

Страница 77: ...uration System Maintenance Or Configuration Advanced Configuration System Maintenance 2 Click to reboot the network zoom camera Figure 10 10 Reboot the Device 10 6 2 Restoring Default Settings Steps 1 Enter the Maintenance interface Configuration Basic Configuration System Maintenance Or Configuration Advanced Configuration System Maintenance 2 Click or to restore the default settings ...

Страница 78: ...m Maintenance 2 Click to select the local configuration file and then click to start importing configuration file Note You need to reboot the zoom camera after importing configuration file 3 Click and set the saving path to save the configuration file in local storage Figure 10 12 Import Export Configuration File 10 6 4 Upgrading the System Steps 1 Enter the Maintenance interface Configuration Bas...

Страница 79: ...abling Telnet You can enable disable the Telnet function in the interface Configuration Advanced Configuration System Service Figure 10 14 Telnet Function 10 7 RS 232 Settings Purpose The RS 232 port can be used in two ways Parameters Configuration Connect a computer to the camera through the serial port Device parameters can be configured by using software such as HyperTerminal The serial port pa...

Страница 80: ...the PTZ of the camera The configuring of the PTZ parameters should be done before you control the PTZ unit Steps 1 Enter RS 485 Port Setting interface Configuration Advanced Configuration System RS485 Figure 10 16 RS 485 Settings 2 Set the RS 485 parameters and click to save the settings By default the Baud Rate is set as 9600 bps the Data Bit is 8 the stop bit is 1 and the Parity and Flow Control...

Страница 81: ...it automatically searches the online devices every 15 seconds from the subnet where your computer locates It displays the total number and information of the searched devices in the Online Devices interface Device information including the device type IP address and port number etc will be displayed Figure A 1 1 Searching Online Devices Note Device can be searched and displayed in the list in 15 s...

Страница 82: ...odify Network Parameters panel on the right side 2 Edit the modifiable network parameters e g IP address and port number 3 Enter the password of the admin account of the device in the Password field and click to save the changes Figure A 1 2 Modify Network Parameters Restore default password Steps 1 Contact our technical engineers to get the serial code Note Serial code is a series of characters c...

Страница 83: ... following figure including IP address and subnet mask settings Figure A 2 2 Set the LAN parameters 3 Set the port mapping in the virtual severs of Forwarding You need to forward ports 80 8000 8200 8210 and 554 for a zoom camera Notes You can change 80 8000 and 554 ports value in the zoom camera with web browser or client software In the zoom camera the 8200 8210 ports change with the 8000 port wi...

Страница 84: ...elow Steps 1 As the settings mentioned above forward the port 80 8000 8200 8210 and 554 for the network zoom camera at 192 168 1 23 2 Forward the port 81 8001 8201 8211 and 555 for the network zoom camera at 192 168 1 24 3 Enable ALL or TCP protocols 4 Check the Enable checkbox and click Figure A 2 3 Port Mapping Note The port of the network zoom camera cannot conflict with other ports For example...

Отзывы: