


19. CPU SCREW HOLES:
Four screw holes for fixed CPU Cooler assemble.
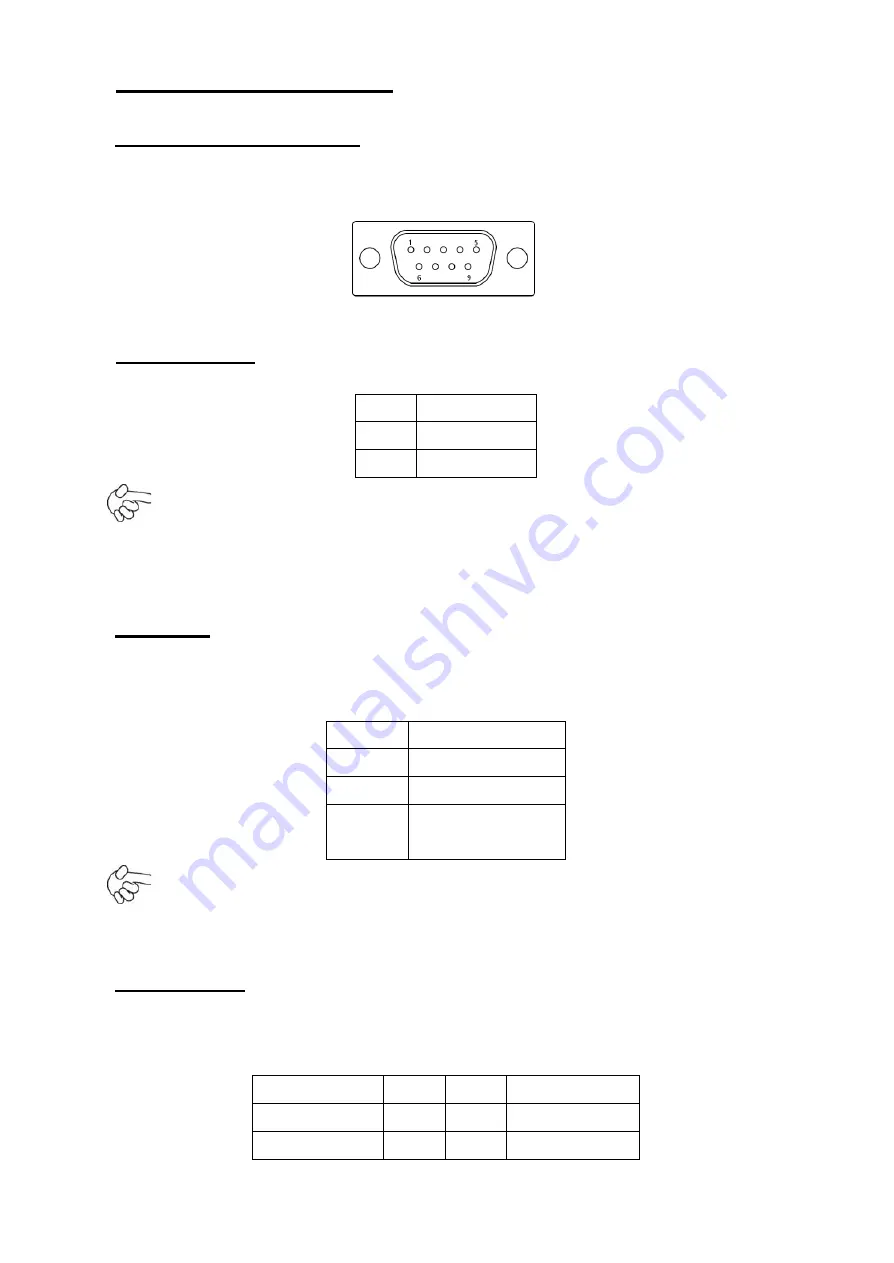
20. COM1: (Type DB9),
Rear serial port, standard DB9 serial port is provided to make
a direct connection to serial devices. COM1 port is controlled by pins No.1~6 of
JCOM
,
select output Signal RI or 5V or 12v, For details, please refer to description of JCOM.
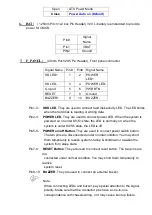
21. AT12V:
(5.0mm 1x2 Pin Connector),DC12V System power input connector
。
Pin#
Signal Name
1
+12V
2
Ground
Note:
Make sure that the voltage of power supply is DC(12±5%)V before power on, or
it may cause boot up failure and even system damage.
22. FAN:
(2.54mm Pitch 1x3 Pin Header), Fan connector, cooling fans can be
connected directly for use. You may set the rotation condition of cooling fan in menu of
BIOS CMOS Setup.
Pin#
Signal Name
1
Ground
2
VCC
3
Rotation
detection
Note:
Output power of cooling fan must be limited under 5W.
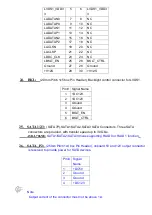
23. LVDS:
For 18 bit LVDS output connector, Fully supported by Intel Atom D525
chipset, the interface features single channel 18-bit output. Model name of the
interface connector is Hirose DF13-30DP-1.25V.
Signal Name
Pin#
Pin#
Signal Name
LVDS1_VDD5
1
2
LVDS1_VDD5
Ground
3
4
Ground
Содержание PCH3582
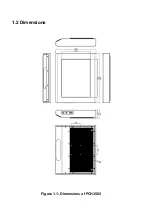
Страница 8: ...1 2 Dimensions Figure 1 1 Dimensions of PCH3582...
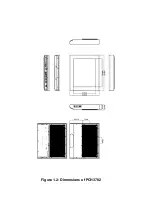
Страница 9: ...Figure 1 2 Dimensions of PCH3782...
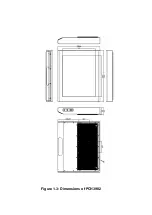
Страница 10: ...Figure 1 3 Dimensions of PCH3982...
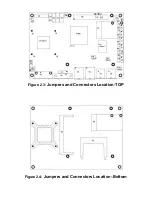
Страница 13: ...Figure 2 3 Jumpers and Connectors Location TOP Figure 2 4 Jumpers and Connectors Location Bottom...
Страница 33: ...1 4...
Страница 64: ...Step 5 Click Next Step 6 Click Next to continue...
Страница 68: ...Step 5 Click Install to begin the installation Step 6 Click Finish to compete the installation...
Страница 70: ...Step 3 Click Yes to continue the installation Step 4 Wait for installation...
Страница 71: ...Step 5 Select Yes I want to restart my computer now then click OK...
Страница 75: ...Step 6 Wait for installation Then click Next to continue Step 7 Click OK...
Страница 76: ...Step 8 Click Finish to compete installation...
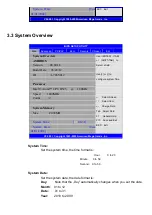
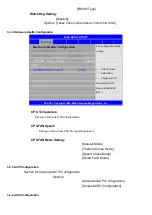
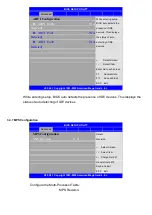
Страница 81: ...Setting...
Страница 82: ...About This panel displays information about the PenMount controller and driver version...


