39
8
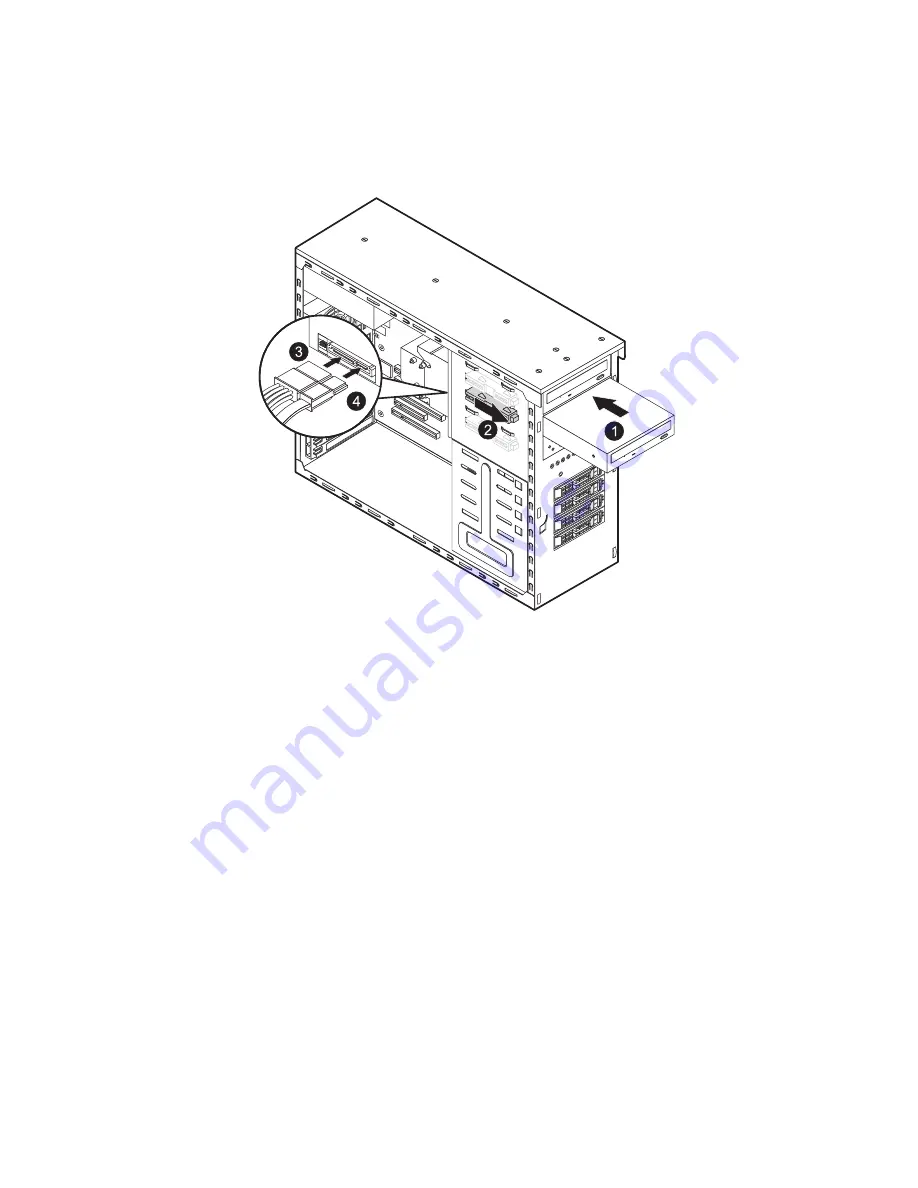
Insert the new 5.25" storage device (1) and slide the tool-less
bracket to the right in the locked position (2).
9
Connect the power (3) and SATA cables (4) to the new 5.25" drive.
10 Replace the front bezel.
11 Observe the post-installation instructions described on page 29.
To upgrade or replace a defective storage device:
1
Perform the pre-installation instructions described on page 28.
2
Remove the side panel described on page 36.
3
Remove the front bezel. Perform steps 4 and 5 of the previous
section.
Содержание AT310 F1 Series
Страница 1: ...AT310 F1 Series User Guide ...
Страница 14: ...xiv ...
Страница 18: ...xviii ...
Страница 19: ...1 System tour ...
Страница 34: ...1 System tour 16 ...
Страница 35: ...2 System setup ...
Страница 44: ...2 System setup 26 ...
Страница 45: ...3 System upgrades ...
Страница 74: ...3 System upgrades 56 ...
Страница 75: ...4 System BIOS ...
Страница 108: ...4 System BIOS 90 ...
Страница 109: ...5 System troubleshooting ...
Страница 119: ...Appendix A Server management tools ...
Страница 125: ...Appendix B Rack mount configuration ...
Страница 132: ...Appendix B Rack mount configuration 114 4 Install the rail bracket to the inner rails by using two screws for each side ...
Страница 133: ...115 5 Extend the middle sliding piece of each mounting rail forward until you hear an audible click ...
Страница 137: ...Appendix C Acer Smart Console ...
Страница 149: ...131 FRU Reading Provides information about major system components including chassis mainboard and product information ...
Страница 176: ...158 troubleshooting 99 user password 80 ...


