


39
5
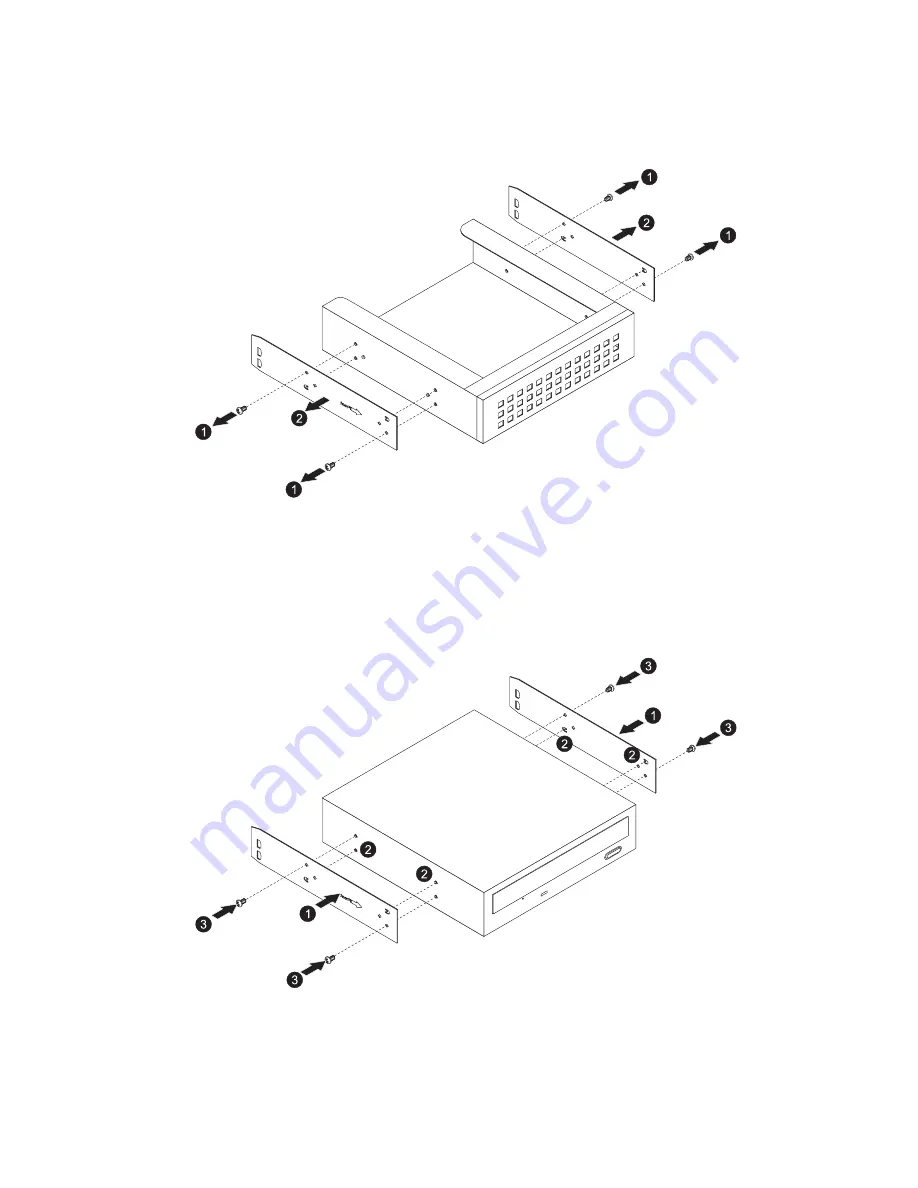
Remove the four screws (1) that attach the metal brackets to the
empty 5.25-inch drive cage. Detach the metal brackets (2).
6
Align the metal brackets with the new storage device and make
sure the arrow (1) is pointing to the front. Align the notches on
the brackets with the holes (2) on the device.
7
Use four screws to secure the metal brackets to the new 5.25-inch
storage device.
Содержание AT150 F1 Series
Страница 1: ...AT150 F1 Series User Guide ...
Страница 12: ...xii ...
Страница 13: ...1 System tour ...
Страница 15: ...3 External and internal structure Front panel With 3 5 inch HDD bays ...
Страница 29: ...2 System setup ...
Страница 37: ...3 System upgrades ...
Страница 55: ...43 4 Disconnect the heatsink fan cable 1 from its mainboard connector and lift the heatsink fan 2 ...
Страница 76: ...3 System upgrades 64 ...
Страница 77: ...4 System BIOS ...
Страница 115: ...5 System troubleshooting ...
Страница 125: ...Appendix A Server management tools ...
Страница 136: ...Appendix A Server management tools 124 ...
Страница 137: ...Appendix B Rack mount configuration ...
Страница 145: ...133 5 Extend the middle sliding piece of each mounting rail forward until you hear an audible click ...
Страница 148: ...Appendix B Rack mount configuration 136 ...
Страница 149: ...Appendix C Acer Smart Console ...
Страница 177: ...165 Exit Yes At the prompt click Yes to exit from remote redirection No Click No to return to the current session ...
Страница 178: ...Appendix C Acer Smart Console 166 ...
Страница 182: ...170 ...


