


3 System upgrades
38
Configuring a 5.25-inch storage
device
The three 5.25-inch device bays support a variety of storage devices for
additional storage capacity and scalability.
By default, the system ships with a DVD-ROM drive installed on the
topmost device bay. You can choose to replace these default drives, or
you can install a new storage device on the second device bay.
Please ensure all installed devices support the SATA interface.
Installing an optional 5.25-inch storage
device
1
Perform the pre-installation instructions described on page 26.
2
Remove the side panel described on page 28.
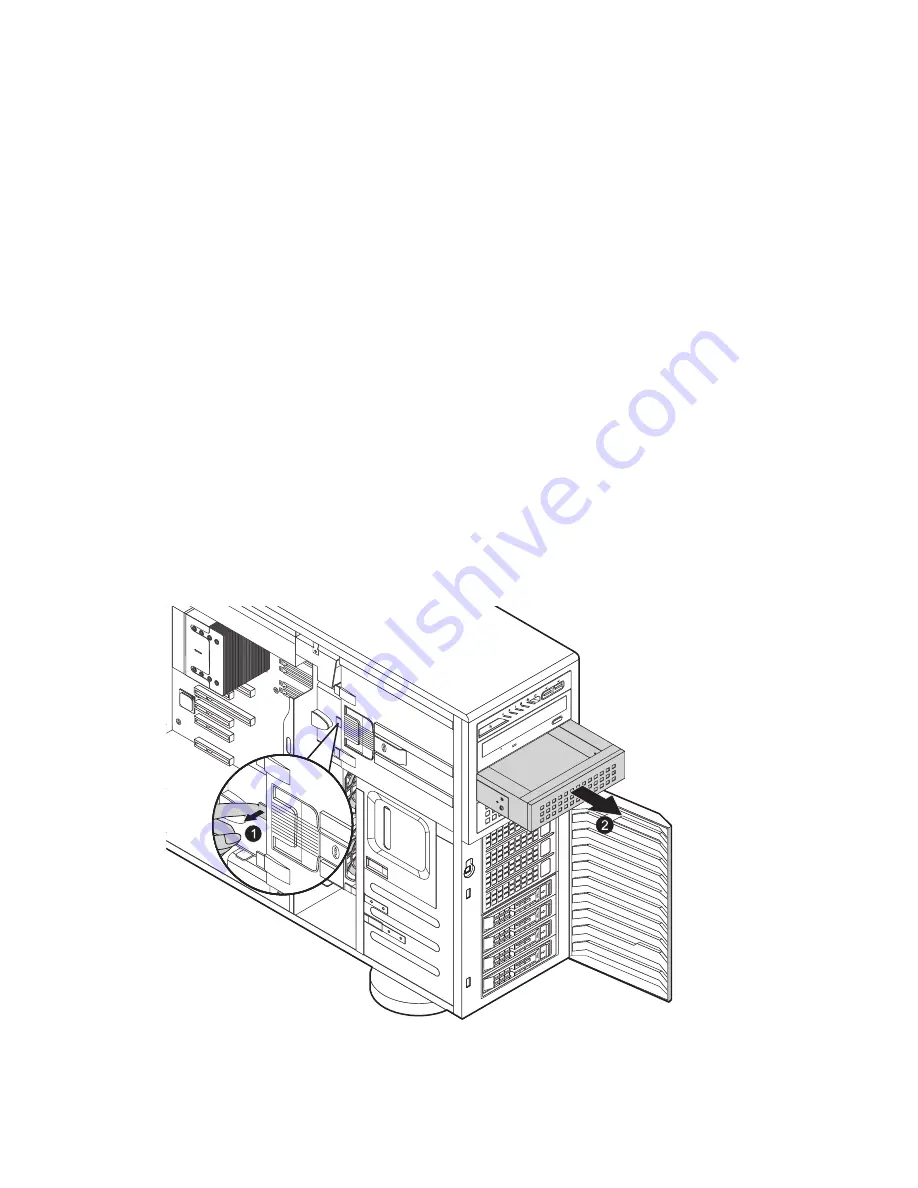
3
Pull the locking tab (1) to release the empty 5.25-inch drive cage.
4
Pull out the dummy 5.25-inch drive cage (2).
Содержание AT150 F1 Series
Страница 1: ...AT150 F1 Series User Guide ...
Страница 12: ...xii ...
Страница 13: ...1 System tour ...
Страница 15: ...3 External and internal structure Front panel With 3 5 inch HDD bays ...
Страница 29: ...2 System setup ...
Страница 37: ...3 System upgrades ...
Страница 55: ...43 4 Disconnect the heatsink fan cable 1 from its mainboard connector and lift the heatsink fan 2 ...
Страница 76: ...3 System upgrades 64 ...
Страница 77: ...4 System BIOS ...
Страница 115: ...5 System troubleshooting ...
Страница 125: ...Appendix A Server management tools ...
Страница 136: ...Appendix A Server management tools 124 ...
Страница 137: ...Appendix B Rack mount configuration ...
Страница 145: ...133 5 Extend the middle sliding piece of each mounting rail forward until you hear an audible click ...
Страница 148: ...Appendix B Rack mount configuration 136 ...
Страница 149: ...Appendix C Acer Smart Console ...
Страница 177: ...165 Exit Yes At the prompt click Yes to exit from remote redirection No Click No to return to the current session ...
Страница 178: ...Appendix C Acer Smart Console 166 ...
Страница 182: ...170 ...


