


Chapter 3
75
8.
See “Separating the Upper Case from the Lower Case” on page 45.
9.
See “Removing the Bluetooth Module” on page 52.
10.
See “Removing the RTC Battery” on page 53.
11.
See “Removing the USB Board” on page 54.
12.
See “Removing the Main Board” on page 55.
13.
See “Removing the LCD Module” on page 61.
14.
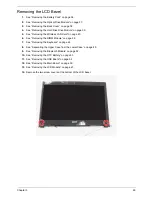
See “Removing the LCD Bezel” on page 65.
15.
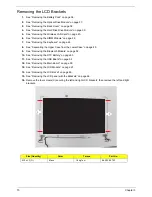
See “Removing the LCD panel with the Brackets” on page 66.
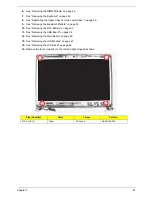
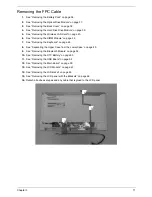
16.
Release the antenna cables from the latches and carefully peel off the antenna cables from the
adhesives.
NOTE:
There is no need to remove the antenna unless you really need to replace it.
Содержание Aspire 4350
Страница 6: ...VI ...
Страница 16: ...8 Chapter 1 5 USB 2 0 port Connect to USB 2 0 devices e g USB mouse USB camera Icon Item Description ...
Страница 26: ...18 Chapter 1 ...
Страница 40: ...32 Chapter 2 ...
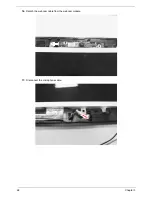
Страница 76: ...68 Chapter 3 16 Detach the webcam cable from the webcam module 17 Disconnect the microphone cable ...
Страница 77: ...Chapter 3 69 18 Release the LCD cable from the tape 19 Remove the LCD panel with brackets from the back cover ...
Страница 84: ...76 Chapter 3 ...
Страница 106: ...98 Chapter 5 ...
Страница 108: ...100 Chapter 6 Exploded Diagram ...
Страница 109: ...Chapter 6 101 ...
Страница 121: ...Appendix A 113 Model Definition and Configuration Appendix A ...
Страница 146: ...138 Appendix B ...
Страница 148: ...140 Appendix C ...