


3 Upgrading your system
64
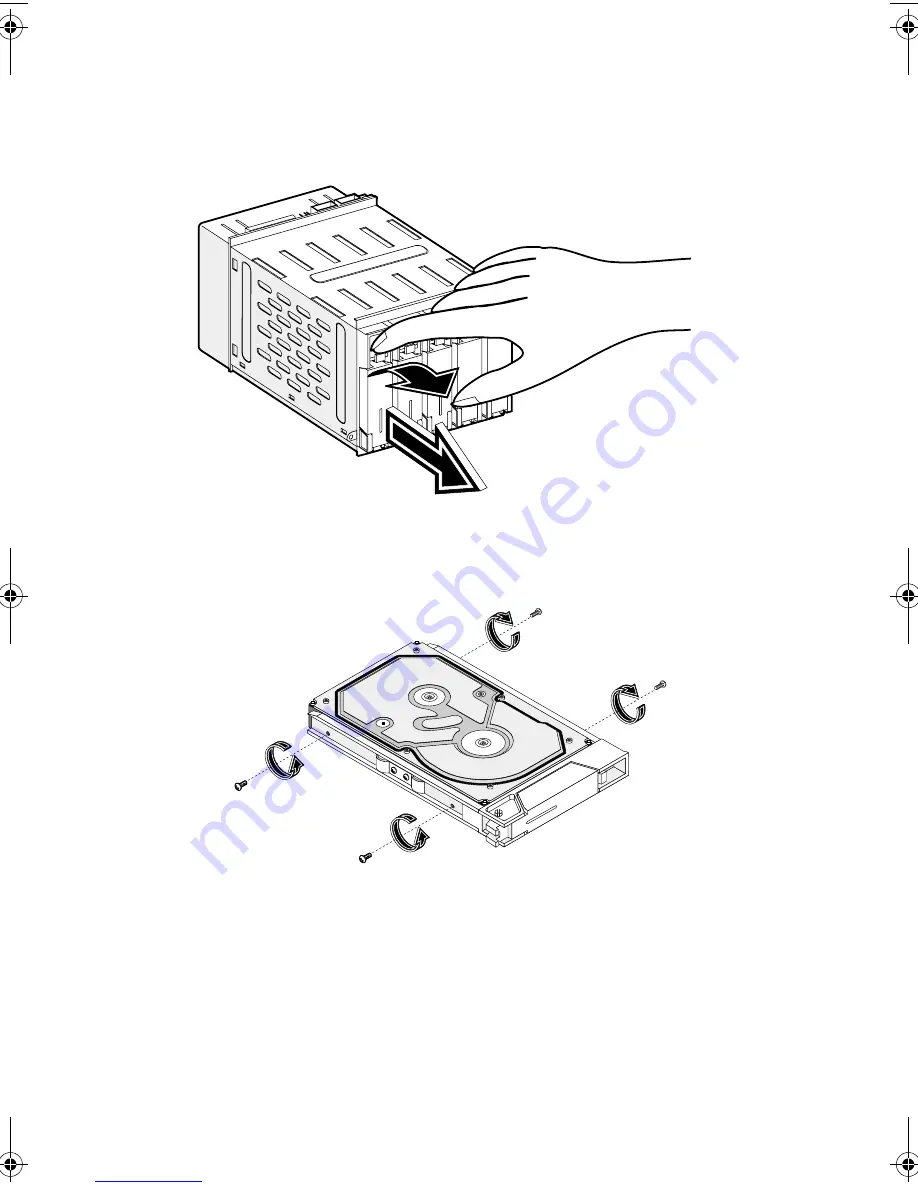
2
Press your finger to the BPL5M hot-swap cage to release the drive
tray.
3
Remove the four tray screws to open the drive tray. Keep the
screws for later use.
4
When applicable, pull out any previously installed hard disk.
5
Install a hard disk on the drive tray then secure it with the four
tray screws you have removed earlier.
6
Insert the tray into the hot-swap cage with the lever still extended.
Make sure that the drive is properly inserted before closing the
lever.
7
Push the lever back until it clicks into place.
AA G610.book Page 64 Monday, October 22, 2001 9:46 AM
Содержание Altos G610
Страница 1: ...Acer Altos G610 User s guide ...
Страница 10: ......
Страница 11: ...1 System overview ...
Страница 18: ...1 System overview 8 ...
Страница 19: ...2 System tour ...
Страница 51: ...41 e Place the server on the tray and secure it with the four screws removed from the stands ...
Страница 56: ...2 System tour 46 ...
Страница 57: ...3 Upgrading your system ...
Страница 90: ...3 Upgrading your system 80 ...
Страница 91: ...4 BIOS Setup utility ...
Страница 134: ...4 BIOS Setup utility 124 ...
Страница 135: ...Appendix A ASM Pro quick installation guide ...
Страница 136: ...This appendix shows you how to set up ASM Pro and its agent software ...
Страница 154: ...Appendix A ASM Pro quick installation guide 144 ...