WSD/HDe
Digital Audio Option Installation
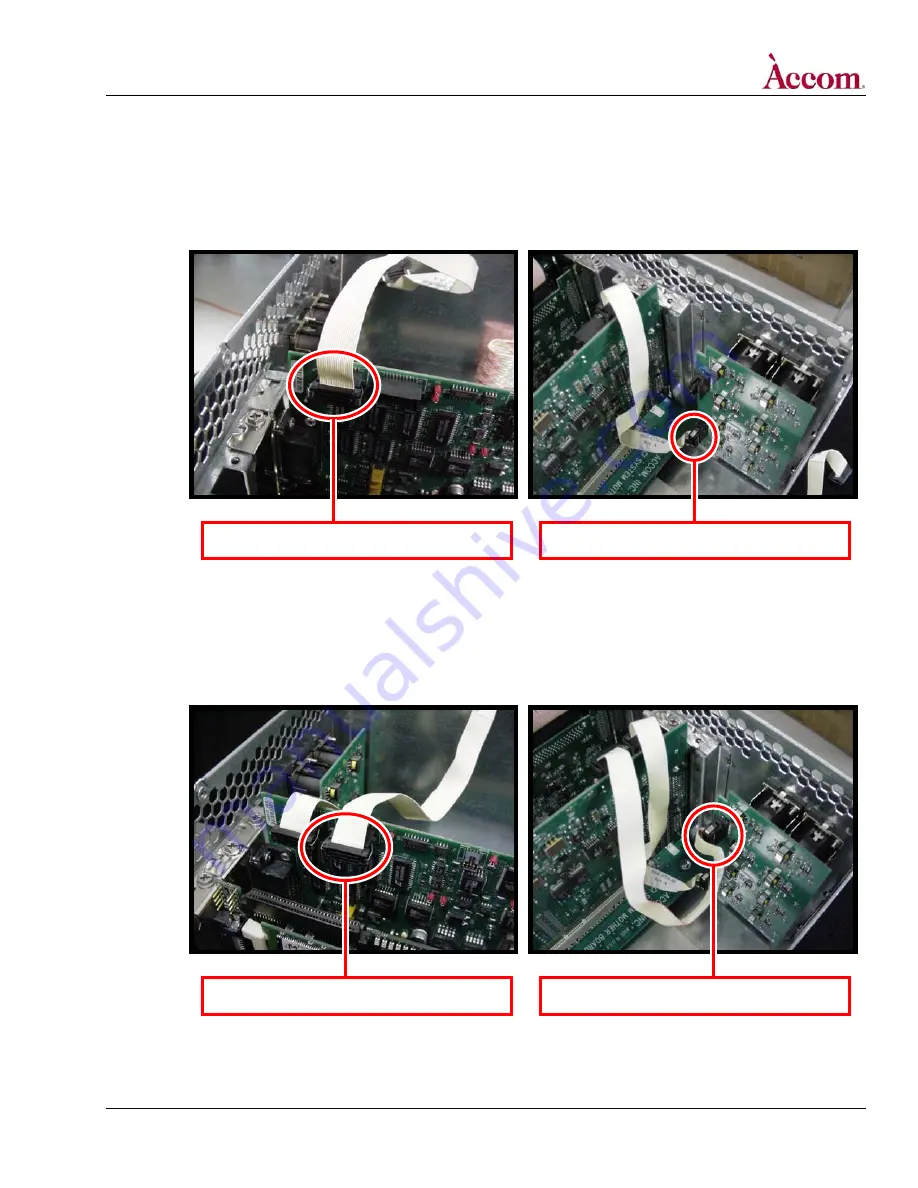
6. Install the FIRST internal 20-pin ribbon cable (Part # 9000-0776-00) between the Digital Audio Board and the internal digital
audio I/O board.
A. Near the rear top edge of the new Digital Audio PCI board, locate connector J7 and insert one end of the FIRST flat ribbon cable
into the connector, as shown in the LEFT photo below. Insert the other end of this flat ribbon cable into connector J2 (this is the
LOWER connector) on the internal digital audio I/O board, as shown in the RIGHT photo below.
Insert one end of ribbon cable into connector J7.
Insert other end of ribbon cable into connector J2.
7. Install the SECOND internal 20-pin ribbon cable (Part # 9000-0776-00) between the Digital Audio Board and the internal
digital audio I/O board.
A. Near the rear top edge of the new Digital Audio PCI board, locate connector J6 and insert one end of the SECOND flat ribbon
cable into the connector, as shown in the LEFT photo below. Insert the other end of this flat ribbon cable into connector J1 (this
is the UPPER connector) on the internal digital audio I/O board, as shown in the RIGHT photo below.
Insert other end of ribbon cable into connector J1.
Insert one end of ribbon cable into connector J6.
Continued on next page…
Document Revised: 5-Nov-04 @ 8:09 AM
©
2004 / Accom, Incorporated
Page 5 of 15


