WSD/HDe
Digital Audio Option Installation
Procedure 2 – Changing the Drive Letter / Verifying the “QTMovies” Folder
Install the WSD/HDe in your equipment rack (if it was removed from the rack), and reattach all the cables to the rear panel of the
WSD/HDe. You may want to perform the procedure below BEFORE re-installing the chassis in the equipment rack, in case there is a
problem encountered that you will need to fix.
Before the two audio disk drives included in this Digital Audio Option kit were shipped from the Accom factory, they were formatted as a
RAID-1 (mirror) volume, given a volume name of “Audio Data”, and had a “QTMovies” folder created on the volume. When you install
these two disk drives into your WSD/HDe, all of this information about the disk drives will be retained and present. However, the Windows
operating system will automatically assign the drive letter “D” to this new disk drive volume in your WSD/HDe. This is incorrect, and must
be changed to drive letter “G” in order for the WSD/HDe to use the drive volume properly. The following procedure details the simple
procedure to change the drive letter volume.
1. Turn ON and boot up the WSD/HDe.
A. Following the usual power-on procedure, reapply AC power to the WSD/HDe chassis and turn on the power with the switch
located on the REAR of the WSD/HDe chassis (located just above the AC power cord).
B. Press the “POWER” momentary push button located at the FRONT of the WSD/HDe chassis (behind the front panel).
C. On the VGA display attached to the WSD/HDe, wait for the Windows 2000 O/S to boot up, and the WSD/HD “Heidi Edit”
application to appear.
2. QUIT
all applications (including “Heidi Edit” and “Internet Explorer”).
A. Before continuing with the following steps, be sure to quit ALL applications that are running in Windows 2000.
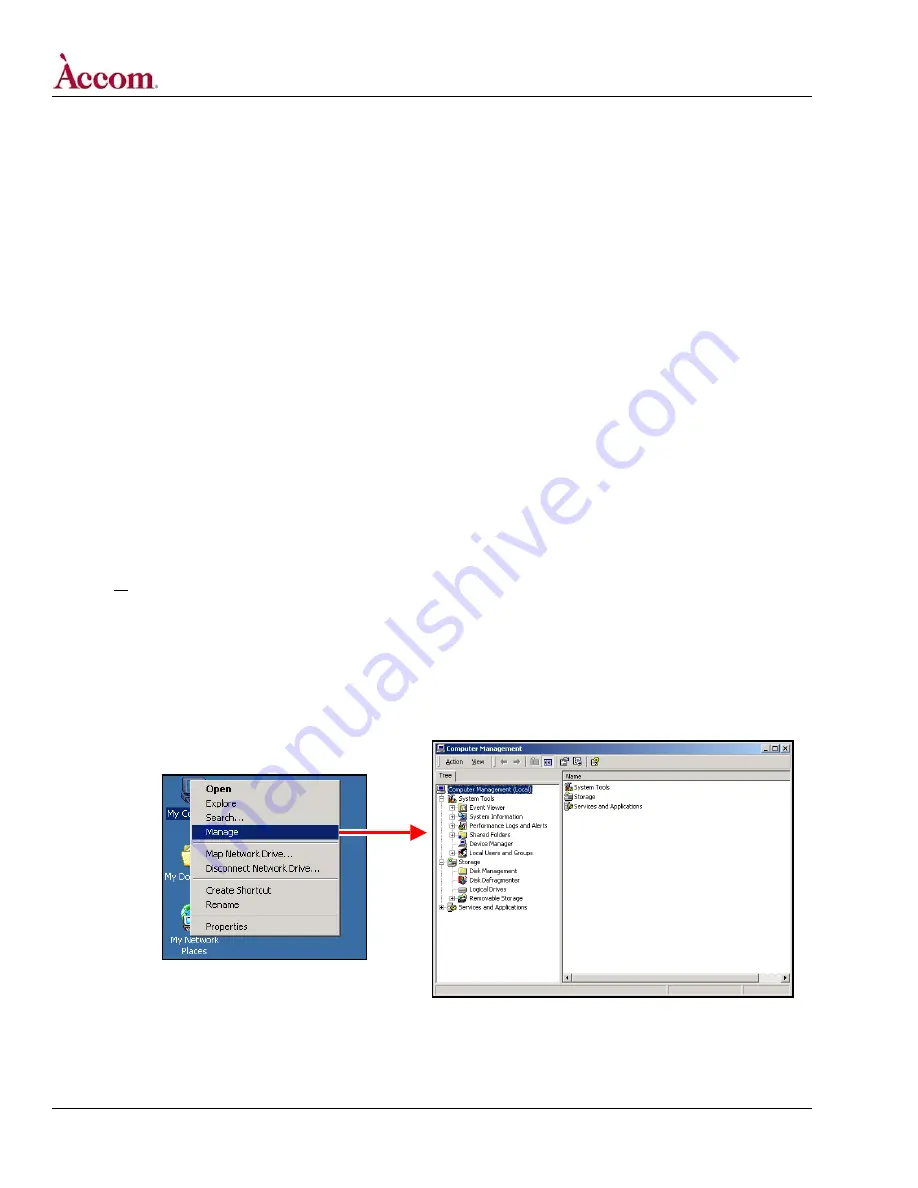
3. Open the Computer Management Window.
A. On the WSD/HDe desktop right-click the mouse on the “My Computer” icon, and then select the “Manage” item in the pop-up
window that appears, as shown in the LEFT illustration below. This will open the “Computer Management” window, as shown
in the RIGHT illustration below.
Continued on next page…
Page 12 of 15
©
2004 / Accom, Incorporated
Document Revised: 5-Nov-04 @ 8:09 AM


