WSD/HDe
Digital Audio Option Installation
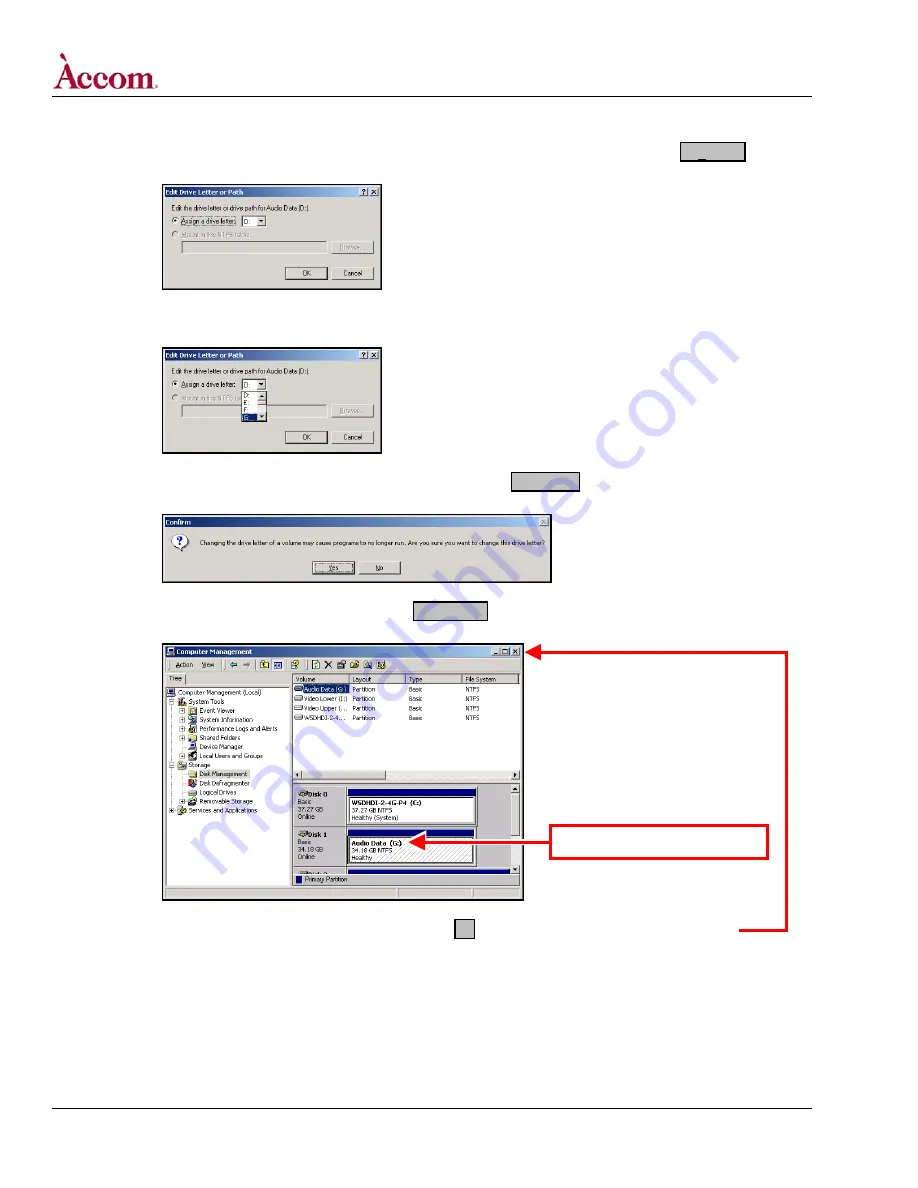
E. In the “Change Drive Letter and Paths for Audio Data (D:)” dialog window (shown above), click on the Edit… button.
This presents the “Edit Drive Letter or Path” dialog window, shown below.
F. In the “Edit Drive Letter or Path” dialog window, click on the pull-down “Assign a drive letter” item and select the letter “G:”
item, as shown below.
G. In the “Edit Drive Letter or Path” dialog window (shown above), click the OK button. This presents the “Confirm”
dialog window, as shown below.
H. In the “Confirm” dialog window (shown above), click the YES button. This will change the drive letter of the “Audio
Data” Disk 1 volume in the “Computer Management” window, as shown below.
I. Close the “Computer Management” window by clicking on the
X
button in the upper right corner of the window.
Drive letter “(G:)” is now shown.
Continued on next page…
Page 14 of 15
©
2004 / Accom, Incorporated
Document Revised: 5-Nov-04 @ 8:09 AM


