E-4
Appendix E
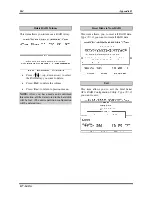
Option 2
Delete RAID set
This item allows you to remove a RAID Array
on this onboard Serial ATA RAID controller.
NOTE:
After you have made and confirmed
this selection, all the data stored in the hard disk
will be lost. (The entire partition configuration
will be deleted too.)
Option 3
Rebuild Raid1 set
This item allows you to rebuild only “Mirrored”
RAID set.
You need to check which hard disk is the source
disk and which one is the destination disk when
you decide to rebuild mirrored RAID set.
Option 4
Resolve Conflicts
When a RAID set is created, the metadata
written to the disk includes drive connection
information (Primary Channel, Secondary
Channel).
If, after a disk failure, the replacement disk was
previously part of a RAID set (or used in
another system), it may have conflicting
metadata, specifically in reference to the drive
connection information. If so, this will prohibit
the RAID set from being either created or
rebuilt.
In order for the RAID set to function properly,
this old metadata must be first overwritten with
the new metadata. To resolve this, select
“Resolve Conflict”. The correct metadata,
including the correct drive connection
information, will then be written to the
replacement disk.
NOTE:
For more information on RAID
function, please refer to the RAID Management
Software enclosed in the CD that came packed
with this motherboard.
Option 5
Low Level Format
This item allows you to do the “Low Level
Format” for each single HDD one at a time.
Option 6
Logical Drive Info
This item displays the drive information of the
RAID type you had built.
IC7-MAX3
Содержание IC7-MAX3
Страница 1: ...IC7 MAX3 Socket 478 System Board User s Manual 4200 0370 12 Rev 1 01 ...
Страница 5: ...1 User s Manual ...
Страница 18: ...14 14 IC7 MAX3 IC7 MAX3 ...
Страница 21: ...Introduction 1 3 1 2 Layout Diagram User s Manual ...
Страница 22: ...1 4 Chapter 1 1 4 Chapter 1 IC7 MAX3 IC7 MAX3 ...
Страница 42: ...2 20 Chapter 2 2 20 Chapter 2 IC7 MAX3 IC7 MAX3 ...
Страница 66: ...3 24 Chapter 3 3 24 Chapter 3 IC7 MAX3 IC7 MAX3 ...
Страница 68: ...A 2 Appendix A A 2 Appendix A IC7 MAX3 IC7 MAX3 ...
Страница 70: ...B 2 Appendix B Click Next 5 Click Finish to complete setup 6 IC7 MAX3 ...
Страница 74: ...C 2 Appendix C C 2 Appendix C IC7 MAX3 IC7 MAX3 ...
Страница 76: ...D 2 Appendix D D 2 Appendix D IC7 MAX3 IC7 MAX3 ...
Страница 82: ...F 2 Appendix F F 2 Appendix F IC7 MAX3 IC7 MAX3 ...

