background image


P/N: 4310-0000-61 
Rev. 1.00


www.abit.com.tw 


Johnathan “Fatal1ty” Wendel 


Содержание Fatal1ty FP-IN9 SLI

Страница 1: ...d Socket 775 User s Manual For more information www abit com tw LGA775 ATX NB NVIDIA nForce 650i SLI SB NVIDIA nForce 430 SLI MCP 1066MHz FSB Dual DDR2 800 NVIDIA Gigabit LAN 4x SATA 3Gb s 7 1 Channel HD Audio Silent OTES Technology FPIO LED Lighting Quick Power Reset Button Vista HW Ready ...

Страница 2: ...nual or product Product names appearing in this manual are for identification purpose only and trademarks and product names or brand names appearing in this document are the property of their respective owners This document contains materials protected under International Copyright Laws All rights reserved No part of this manual may be reproduced transmitted or transcribed without the expressed wr...

Страница 3: ...in the world winning prizes and acclaim including the 2005 CPL World Tour Championship in New York City for a 150 000 first place finish LIVIN LARGE Since my first big tournament wins I have been a Professional Cyberathlete traveling the world and livin large with lots of International media coverage on outlets such as MTV ESPN and G4TV to name only a few It s unreal it s crazy I m living a dream ...

Страница 4: ...make my dreams a reality I know there is a business side to all of this but for me the true reward is making products that are so good I can win with them and making them available to fellow gamers Gaming is my life and many fellow gamers around the world are also some of my best friends so giving back to the gaming community is really important to me Johnathan Fatal1ty Wendel ...

Страница 5: ...necting Peripheral Devices 1 16 1 8 1 Floppy and IDE Disk Drive Connectors 1 16 1 8 2 Serial ATA Connectors 1 17 1 8 3 Additional USB 2 0 Port Headers 1 18 1 8 4 Internal Audio Connectors 1 19 1 8 5 Front Panel Audio Connection Header 1 19 1 8 6 PCI and PCI Express X1 Slot 1 21 1 9 Onboard Indicators and Buttons 1 22 1 9 1 LED Indicators 1 22 1 9 2 Onboard Buttons 1 22 1 10 Connecting Rear Panel I...

Страница 6: ...o rápida 4 5 4 6 Русский Краткое руководство по установке 4 6 4 7 Eesti Kiirpaigaldusjuhend 4 7 4 8 Latviski Ātrās instalēšanas instrukcija 4 8 4 9 Lietuvių Trumpas instaliavimo vadovas 4 9 4 10 Polski Instrukcja szybkiej instalacji 4 10 4 11 Magyar Gyorstelepítési útmutató 4 11 4 12 Türkçe Hızlı Kurulum Kılavuzu 4 12 4 13 ةغللا ةيبرعلا ليلد بيكرتلا عيرسلا 4 13 4 14 یسراف یامنﻩار بصن عیرس 4 14 4 1...

Страница 7: ...nsing and optical S PDIF Out Serial ATA 4x SATA 3Gb s supports NVIDIA MediaShield with SATA RAID 0 1 0 1 5 and JBOD Expansion Slots 2x PCI E X16 slots 2x PCI E X1 slots 2x PCI slots Internal I O Connectors 1x Floppy port 2x Ultra ATA 133 IDE connectors 4x SATA 3Gb s connectors 2x USB 2 0 headers 1x FP Audio header 1x CD In connector Rear Panel I O 1x PS 2 Keyboard connector 1x PS 2 Mouse connector...

Страница 8: ...1 2 FP IN9 SLI 1 2 Motherboard Layout ...

Страница 9: ...e board with the mounting holes on the chassis If the holes line up and there are screw holes you can attach the board with studs If the holes line up and there are only slots you can only attach with spacers Take the tip of the spacers and insert them into the slots After doing this to all the slots you can slide the board into position aligned with slots After the board has been positioned check...

Страница 10: ... CPU ratio clock was incorrectly set in the BIOS menu or d whenever there is modification on the CPU or memory modules This header uses a jumper cap to clear the CMOS memory and have it reconfigured to the default values stored in BIOS Pins 1 and 2 shorted Default Normal operation Pins 2 and 3 shorted Clear CMOS memory To clear the CMOS memory and load in the default values 1 Power off the system ...

Страница 11: ...be renewed To renew the backup battery 1 Power off the system and disconnect with AC power source 2 Remove the exhausted battery 3 Insert a new CR2032 or equivalent battery Pay attention to its polarity The side is its positive polarity 4 Connect AC power source and power on the system 5 Enter the BIOS setup menu Reconfigure the setup parameters if necessary CAUTION Danger of explosion may arise i...

Страница 12: ... or 24 pin cables can both be connected to this 24 pin connector Connect from pin 1 for either type However a 20 pin power supply may cause the system unstable or even unbootable for the sake of insufficient electricity A minimum power of 300W or higher is recommended ATX12V1 ATX 12V 8 Pin Power Connector This connector supplies power to CPU The system will not start without connecting power to th...

Страница 13: ... A wrong orientation will only result in the LED not lighting but a wrong connection of the switches could cause system malfunction HLED Pin 1 3 Connects to the HDD LED cable of chassis front panel RST Pin 5 7 Connects to the Reset Switch cable of chassis front panel SPKR Pin 13 15 17 19 Connects to the System Speaker cable of chassis SLED Pin 2 4 Connects to the Suspend LED cable if there is one ...

Страница 14: ...ors each provide power to the cooling fans installed in your system CPUFAN1 CPU Fan Power Connector SYSFAN1 System Fan Power Connector AUXFAN1 2 Auxiliary Fan Power Connector These fan connectors are not jumpers DO NOT place jumper caps on these connectors ...

Страница 15: ...is served for demo only For detailed information on how to install the one you bought refer to its installation guidelines 1 Place the board so that the lever hook of the socket is on your left side Use your left thumb and forefinger to hold the lever hook pull it away from the retention tab Rotate the lever to fully open position 2 Use your right thumb to raise the load plate Lift it up to fully ...

Страница 16: ...tention tab 8 Place the heatsink and fan assembly onto the socket Align the four fasteners toward the four mounting holes on the motherboard 9 Press each of the four fasteners down into the mounting holes Rotate the fastener clock wise to lock the heatsink and fan assembly into position 10 Attach the four pin power plug from the heatsink and fan assembly to the CPU FAN connector A higher fan speed...

Страница 17: ... For a 4 DIMM dual channel installation Populate 2 DIMM modules of the same type and size on slots DIMM1 DIMM3 and another 2 DIMM modules of the same type and size on slots DIMM2 DIMM4 DIMM1 and DIMM3 slots are made of the same color DIMM2 and DIMM4 are made of another same color Usually there is no hardware or BIOS setup required after adding or removing memory modules but you will have to clear ...

Страница 18: ...e into the slots until the ejector tabs at both sides of the slot automatically snap into the mounting notch Do not force the DIMM module in with extra force as the DIMM module only fits in one direction 6 To remove the DIMM modules push the two ejector tabs on the slot outward simultaneously and then pull out the DIMM module Static electricity can damage the electronic components of the computer ...

Страница 19: ...s specifications This motherboard provides two PCI Express X16 slots One PCIE graphics card installation Normal Mode Insert your PCIE graphics card into PCIEXP1 Master slot There will be no video output in the Normal Mode for one PCIE graphics card installation into PCIEXP2 Slave slot Never remove or lose the SLI Switch Card as this card still works in this Normal Mode ...

Страница 20: ...e exactly the same type shape or model as the one you have at hand 1 There is one SLI Switch Card factory mounted on this motherboard This card served as a switch between Normal and SLI video output mode The default setting is Normal mode for single graphics card As shown in this photo the card is factory mounted with its Normal Mode side toward the retention slot base 2 To change from Normal to S...

Страница 21: ... SLI ready graphics cards into both PCIEXP1 Master and PCIEXP2 Slave slots 6 Bridge connecting two graphics cards with the SLI Connector Card fit in both directions Insert and secure the SLI supporting bracket Refer to the instruction of your SLI ready graphics cards on how to select Normal or SLI video output mode For SLI mode connect your monitor to the SLI ready graphics card installed on the P...

Страница 22: ...ed with pin 1 on both the FDC1 port and the floppy connector Each of the IDE port connects up to two IDE drives at Ultra ATA 100 mode by one 40 pin 80 conductor and 3 connector Ultra ATA 66 ribbon cables Connect the single end blue connector at the longer length of ribbon cable to the IDE port of this board the other two ends gray and black connector at the shorter length of the ribbon cable to th...

Страница 23: ...ion of disk arrays through these SATA connectors To connect SATA device 1 Attach either end of the signal cable to the SATA connector on motherboard Attach the other end to the SATA device 2 Attach the SATA power cable to the SATA device and connect the other end from the power supply The motherboard in this photo is served for DEMO only and may not be the same type or model as the one described i...

Страница 24: ...onal USB 2 0 ports by connecting bracket or cable to the rear I O panel or the front mounted USB ports of your chassis Pin Pin Assignment Pin Pin Assignment 1 VCC 2 VCC 3 Data0 4 Data1 5 Data0 6 Data1 7 Ground 8 Ground 10 NC Make sure the connecting cable bears the same pin assignment ...

Страница 25: ...ion you must carefully check the pin assignment before connecting from the front panel module An incorrect connection may cause malfunction or even damage the motherboard Please do not connect the Ground cable or USB VCC cable from the front panel module to the Pin 4 AVCC of this header Pin Pin Assignment HD AUDIO Pin Pin Assignment AC 97 AUDIO 1 MIC2 L 1 MIC In 2 AGND 2 GND 3 MIC2 R 3 MIC Power 4...

Страница 26: ...river is originally configured to support HD Audio For AC 97 audio connection you may 1 Right click the Realtek HD Audio Manager icon in system tray 2 Click Audio I O tab and then click Connector Settings 3 Click Disabled front panel jack detection and then click OK to confirm ...

Страница 27: ...Hardware Setup FP IN9 SLI 1 21 1 8 6 PCI and PCI Express X1 Slot Install PCI Express X1 cards into slots PCIE1 and or PCIE2 Install PCI cards into slots PCI1 and or PCI2 ...

Страница 28: ...light up when the power supply is connected with power source VCC This LED lights up when the system power is on SLI_LED1 This LED lights up when the SLI Switch Card is working under SLI Mode 1 9 2 Onboard Buttons PWRSW1 Push this button to power on the system RESET1 Push this button to reset the system ...

Страница 29: ...em R L R R Rear Left Rear Right Connects to the rear left and rear right channel in the 7 1 channel audio system S L S R Surround Left Surround Right Connects to the surround left and surround right channel in the 7 1 channel audio system Line In Connects to the line out from external audio sources Line Out Connects to the front left and front right channel in the 7 1 channel or regular 2 channel ...

Страница 30: ...1 24 FP IN9 SLI For more information www abit com tw ...

Страница 31: ...ressing the Reset button on the computer chassis Only when these two methods fail should you restart the system by powering it off and then back on After pressing Del key the main menu screen appears Phoenix AwardBIOS CMOS Setup Utility SoftMenu Setup PC Health Status Standard CMOS Features Load Fail Safe Defaults Advanced BIOS Features Load Optimized Defaults Advanced Chipset Features Set Passwor...

Страница 32: ...f the CPU installed on this motherboard SLI Ready Memory This item selects the SPD profile for SLI Ready memories The configuration options may vary depending on the type of module you installed The following items become configurable when the item SLI Ready Memory is set to Enabled CPU Operating Speed This item displays the CPU operating speed according to the type and speed of your CPU Select th...

Страница 33: ...U processor speed MEM DDR2 This item determines the DRAM frequency Estimated DDR2 Data Rate This item displays the estimated DRAM frequency Multiplier Factor This item displays the multiplier factor for the CPU you installed NB PCIe X16 Clock This item determines the PCI Express slot frequency slot PCIEXP1 Voltages Control This option allows you to switch between the default and user defined volta...

Страница 34: ...1 General Help F5 Previous Values F6 Fail Safe Defaults F7 Optimized Defaults Date mm dd yy This item sets the date you specify usually the current date in the format of Month Date and Year Time hh mm ss This item sets the time you specify usually the current time in the format of Hour Minute and Second IDE Channel 1 Maste Slaver IDE Channel 2 Master Slave SATA Channel 1 4 Click Enter key to enter...

Страница 35: ...tly greater than the size of a formatted disk given by a disk checking program Cylinder This item configures the numbers of cylinders Head This item configures the numbers of read write heads Precomp This item displays the number of cylinders at which to change the write timing Landing Zone This item displays the number of cylinders specified as the landing zone for the read write heads Sector Thi...

Страница 36: ...op for all errors except a diskette or keyboard error Base Memory This item displays the amount of base memory installed in the system The value of the base memory is typically 640K for systems with 640K or more memory size installed on the motherboard Extended Memory This item displays the amount of extended memory detected during system boot up Total Memory This item displays the total memory av...

Страница 37: ...Test When set to Enabled this item speeds up the Power On Self Test POST after powering on the system The BIOS shorten or skip some check during the POST CPU Feature Click Enter key to enter its submenu Phoenix AwardBIOS CMOS Setup Utility CPU Feature EIST Function Auto Item Help Thermal Control Enabled Limit CPUID MaxVal Disabled Execute Disable Bit Enabled Virtualization Technology Enabled Move ...

Страница 38: ...ing sequence to boot up system This item functions only when there is the option of Hard Disk in any one of the First Second Third Boot Device items First Boot Device Second Boot Device Third Boot Device Boot Other Device Select the drive to boot first second and third in the First Boot Device Second Boot Device and Third Boot Device items respectively The BIOS will boot the operating system accor...

Страница 39: ...Version Ctrl For OS This item specifies which version of MPS Multi Processor Specification this motherboard will use Leave this item at its default setting Delay For HDD Secs This item allows the BIOS to support some old or special HDD devices by prolonging this delay time A larger value will give more delay time to the device for which to initialize and to prepare for activation Full Screen LOGO ...

Страница 40: ...tting Current Value Item Help Memory Timing Setting Auto x tCL CAS Latency Auto 5 5 x tRCD Auto 5 5 x tRP Auto 5 5 x tRAS Auto 18 18 x Command Per Clock CMD Auto 2T 2T Advance Memory Settings x tRRD Auto 3 3 x tRC Auto 22 22 x tWR Auto 5 5 x tWTR Auto 9 9 x tREF Auto 7 8uS Move Enter Select PU PD Value F10 Save ESC Exit F1 General Help F5 Previous Values F6 Fail Safe Defaults F7 Optimized Defaults...

Страница 41: ...BIOS Setup FP IN9 SLI 2 11 tRRD tRC tWR tWTR tREF Back to Advanced Chipset Features Setup Menu SLI Broadcast Aperture Options Disabled Auto LDT Frequency Options 1X 2X 3X 4X 5X 6X 7X 8X ...

Страница 42: ...p LAN Boot ROM Disabled Onboard FDD Controller Enabled Move Enter Select PU PD Value F10 Save ESC Exit F1 General Help F5 Previous Values F6 Fail Safe Defaults F7 Optimized Defaults OnChip IDE SATA Device Click Enter key to enter its submenu Phoenix AwardBIOS CMOS Setup Utility OnChip IDE SATA Device IDE SATA Function Setup Press Enter Item Help RAID Configuration Press Enter Move Enter Select PU ...

Страница 43: ...abled Move Enter Select PU PD Value F10 Save ESC Exit F1 General Help F5 Previous Values F6 Fail Safe Defaults F7 Optimized Defaults IDE 1 Controller This item allows you to enable or disable the IDE1 controller IDE 2 Controller This item allows you to enable or disable the IDE2 controller IDE DMA Transfer Access This item selects the DMA mode for devices connected through IDE channels OnChip SATA...

Страница 44: ... disable the RAID function SATA1 RAID SATA4 RAID This item allows you to enable or disable the RAID function for each of the SATA 1 4 port individually Back to Integrated Peripherals Setup Menu Init Display First This item allows you to choose the primary display card OnChip USB This option enables or disables the USB controller USB Keyboard Support Select BIOS for the legacy operating system such...

Страница 45: ...les or disables the LAN controller OnChip LAN Boot ROM This item allows you to use the boot ROM instead of a disk drive to boot up the system and access the local area network directly Onboard FDD Controller This option enables or disables the floppy disk controller ...

Страница 46: ... set to S3 STR Power Button Function This item selects the method of powering off your system Delay 4 Sec Pushing the power button for more than 4 seconds will power off the system This will prevent the system from powering off in case you accidentally hit or pushed the power button Instant Off Pressing and then releasing the power button at once will immediately power off the system Wake Up by PM...

Страница 47: ...ystem The mouse wake up function can only be used with the PS 2 mouse not with the COM port or USB type Some PS 2 mice cannot wake up the system because of compatible problems If the specs of your keyboard are too old it may fail to power on KB Power On Password This item sets the password required in order to power on your computer Do not forget your password or you will have to clear the CMOS an...

Страница 48: ...s Auto ESCD The system will automatically detect the settings Manual Choose the specific IRQ resources in the IRQ Resources menu IRQ Resources Click Enter key to enter its submenu This item sets each system interrupt to either PCI Device or Reserved Phoenix AwardBIOS CMOS Setup Utility IRQ Resources IRQ 5 assigned to PCI Device Item Help IRQ 10 assigned to PCI Device IRQ 11 assigned to PCI Device ...

Страница 49: ...BIOS Setup FP IN9 SLI 2 19 Disabled MPEG ISA VESA VGA cards do not work with PCI VGA Maximum Payload Size This item sets the maximum TLP payload size for the PCI Express devices ...

Страница 50: ...Voltage 1 80 V CPU VTT Voltage 0 92 V NB Voltage 1 19 V ATX 12V 12 00 V ATX 3 3V 3 30 V Move Enter Select PU PD Value F10 Save ESC Exit F1 General Help F5 Previous Values F6 Fail Safe Defaults F7 Optimized Defaults CPU Shutdown Temperature This item sets the temperature that will shutdown the system automatically in order to prevent system overheats CPU Warning Temperature This item selects the CP...

Страница 51: ...mp This item sets the reference point for taking temperature The options are System and CPU In the situation when connecting a 3 pin CPU fan assembly and you still want the speed control function to take effect you must 1 Plug the 3 pin CPU fan assembly to SYSFAN1 fan power connector 2 Set the SYS FanEQ Reference Temp from the default System to CPU SYS FanEQ Target Temp This item sets the temperat...

Страница 52: ... performance system operations 2 10 Load Optimized Defaults This option loads the BIOS default values that are factory settings for optimal performance system operations 2 11 Set Password This option protects the BIOS configuration or restricts access to the computer itself 2 12 Save Exit Setup This option saves your selections and exits the BIOS setup menu 2 13 Exit Without Saving This option exi...

Страница 53: ... Manager and double click the AUTORUN file 2 Click the item needed for installation Drivers Click to enter the driver installation menu Manual Click to enter the user s manual menu Utility Click to enter the utilities installation menu abit Utility Click to enter the installation menu of utilities exclusively developed by abit Browse CD Click to browse the contents of this Driver Utility CD Close ...

Страница 54: ... nVidia nForce Chipset Driver first after having installed the Windows operating system 3 3 Realtek HD Audio Driver To install this program 1 Click on the Drivers tab in the installation menu screen 2 Click the Realtek HD Audio Driver item The installation screen appears 3 Follow the prompts on the screen to complete installation 4 After restarting the system right click the Sound Manager icon loc...

Страница 55: ... the pull down menu to select the channel configuration 7 Click OK button to apply the Audio I O settings and exit 3 4 USB 2 0 Driver There is no need to install this driver for Windows 2000 with Service Pack 4 Windows XP with Service Pack 1 or their later version ...

Страница 56: ...re To install this utility 1 Click on the abit Utility tab in the installation menu screen 2 Click the ABITEQ item The following screen appears 3 Follow the prompts on the screen to complete installation 4 Restart the system for the program to take effect 5 Execute the ABIT EQ by entering the Windows Menu Start All Programs abit ABITEQ 6 The ABIT EQ shows you the status of Voltage Fan Speed and Te...

Страница 57: ...lity 1 Click on the abit Utility tab in the installation menu screen 2 Click the FlashMenu item The following screen appears 3 Follow the prompts on the screen to complete installation 4 Restart the system for the program to take effect 5 Execute the FlashMenu by entering the Windows Menu Start All Programs abit FlashMenu 6 This FlashMenu screen appears You can easily update the BIOS from clicking...

Страница 58: ... driver disk into floppy disk drive when the screen instruction prompts you to install a third party SCSI or RAID driver 4 Press F6 key and then follow the screen instruction to complete the installation To create a driver disk 1 Click on the abit Utility tab in the installation menu screen 2 Click the Generate NVRaid Floppy Disk 32bit item The installation screen appears 3 Insert one blank floppy...

Страница 59: ...From First Floppy Drive 3 Skip CD ROM Boot Try Next Boot Device Type 1 and hit Enter key The following options appear 1 Make Driver Disk 2 Exit Type 1 and hit Enter key to start making 5 The driver options appear 1 Generate NVRaid Floppy Disk 32bit 2 Generate NVRaid Floppy Disk 64bit Type the number of the actions you want and hit Enter key 6 Insert floppy disk to the floppy drive4 Press any key t...

Страница 60: ...3 8 FP IN9 SLI For more information www abit com tw ...

Страница 61: ...nnectez tous les câbles d alimentation de la carte mère installez la fiche du cavalier sur le réglage Effacer CMOS pendant quelques secondes et puis installez la fiche à son réglage Normal Après reconnectez l alimentation électrique et redémarrez le contenu BIOS sera paramétré à nouveau à sa configuration d usine Connections des Composants du Boîtier L alimentation électrique ATX ATXPWR1 ATX12V1 C...

Страница 62: ...u einem Fehlbetrieb des Motherboards führen Um den Inhalt des CMOS Speichers zu löschen stecken Sie alle Netzkabel vom Motherboard ab setzen Sie die Jumperkappe einige wenige Sekunden auf die Einstellung CMOS löschen und setzen Sie sie dann wieder zurück auf die Einstellung Normal Nach dem Wiederanschluss aller Netzkabel und einem Neustart des Computers setzt sich der BIOS Inhalt auf seine Standar...

Страница 63: ...zeramento CMOS e poi rimetterlo nella sua impostazione normale Normal Dopo avere ricollegato tutti i cavi d alimentazione ed avere riavviato il sistema i contenuti del BIOS saranno ripristinati alla loro configurazione predefinita Collegamento dei componenti della struttura Alimentazione ATX ATXPWR1 ATX12V1 Connettori ventolina CPUFAN1 SYSFAN1 AUXFAN1 NBFAN1 Connettori del pannello frontale FPIO1 ...

Страница 64: ...ormal Tras reconectar la alimentación y reiniciar el equipo el contenido de la BIOS se reiniciará a la configuración predeterminada Conexión de los componentes del chasis Fuente de alimentación ATX ATXPWR1 ATX12V1 Conexiones de ventilador CPUFAN1 SYSFAN1 AUXFAN1 NBFAN1 Conexiones del panel frontal FPIO1 HLED Conecte el cable del LED del disco duro RST Conecte el cable del interruptor de reinicio S...

Страница 65: ...laca principal coloque o shunt do jumper na posição Clear CMOS durante alguns segundos e de seguida volte a colocar o shunt do jumper na posição Normal Depois de ligar e reiniciar o computador o conteúdo da BIOS é restaurado para a configuração predefinida Ligar os componentes do chassis Fonte de alimentação ATX ATXPWR1 ATX12V1 Conectores da ventoinha CPUFAN1 SYSFAN1 AUXFAN1 NBFAN1 Conectores de p...

Страница 66: ...MOS а потом верните ее обратно в гнездо настройки Нормальная Потом снова подключите питание и перезагрузите компьютер содержимое BIOS настроится на конфигурацию по умолчанию Соединение компонентов корпуса Электропитание ATX ATXPWR1 ATX12V1 ВЕНТИЛЯТОРНЫЕ соединения CPUFAN1 SYSFAN1 AUXFAN1 NBFAN1 Соединения передней панели FPIO1 HLED Соединяется с кабелем HDD LED RST Соединяется с кабелем включателя...

Страница 67: ...stutamisasendisse Clear CMOS ning ühendage seejärel silluse kork uuesti vaikeasendisse Normal Pärast toitekaablite tagasiühendamist ja taaskäivitamist taastub BIOSi vaikekonfiguratsioon Raami komponentide ühendamine ATX toiteallikas ATXPWR1 ATX12V1 Ventilaatorite konnektorid CPUFAN1 SYSFAN1 AUXFAN1 NBFAN1 Esipaneeli konnektorid FPIO1 HLED Ühendage HDD LED kaabliga RST Ühendage lähtestusnupu Reset ...

Страница 68: ...t CMOS un pēc tam savienojiet tiltslēga uzgali atpakaļ uzstādījumā Normal Normāls Pēc tam pievienojiet strāvu un atsāknējiet BIOS saturs tiks atiestatīts tā noklusējuma konfigurācijā Šasijas sastāvdaļu pievienošana ATX barošanas avots ATXPWR1 ATX12V1 VENTILATORA savienotāji CPUFAN1 SYSFAN1 AUXFAN1 NBFAN1 Priekšējā paneļa savienotāji FPIO1 HLED Pievieno HDD LED kabeli RST Pievieno atiestates slēdža...

Страница 69: ...ite jungės trinkelę į jos Normos aptaisą Po to vėl įjunkite maitininimą ir įkelkite kompiuterį iš naujo BIOS turinys grįš į pradinę numatytąją sąranką Korpuso komponentų sujungimas ATX elektros tiekimas ATXPWR1 ATX12V1 VĖDINTVŲ jungtys CPUFAN1 SYSFAN1 AUXFAN1 NBFAN1 Priekinio panelio jungtys FPIO1 HLED Sujunkite su HDD LED kabeliu RST Sujunkite su pakartotinos kelties jungiklio kabeliu SPKR Sujunk...

Страница 70: ...orki zgodnie z ustawieniem Zerowanie CMOS Clear CMOS a następnie założyć nasadkę zworki z powrotem zgodnie z ustawieniem Normalne Normal Po ponownym podłączeniu przewodów zasilających i uruchomieniu komputera zostanie przywrócona konfiguracja domyślna BIOS Podłączanie elementów obudowy Zasilacz ATX ATXPWR1 ATX12V1 Złącza WENTYLATOR FAN CPUFAN1 SYSFAN1 AUXFAN1 NBFAN1 Złącza panela przedniego FPIO1 ...

Страница 71: ... néhány másodpercre majd csatlakoztassák vissza az átkötést a Normális ponthoz Miután ismét bekötik a tápot és újraindítják a gépet a BIOS visszaáll az alapértelmezett konfigurációba Készülékház komponenseinek csatlakoztatása ATX táp ATXPWR1 ATX12V1 Ventilátor csatlakozók CPUFAN1 SYSFAN1 AUXFAN1 NBFAN1 Előlap csatlakozók FPIO1 HLED Csatlakoztassa a HDD LED kábelhez RST Csatlakoztassa a reszettelés...

Страница 72: ...ç kablolarını ayırınız jumper kepini bir kaç saniye süreyle Clear CMOS CMOS u Sil ayarı üzerine takın ve ardından jumper kepini Normal ayarına takın Tüm güç kablolarını yeniden bağlayıp bilgisayarı yeniden başlattıktan sonra BIOS içeriği varsayılan yapılandırmasına döner Kasa Bileşenlerinin Bağlanması ATX Güç Kaynağı ATXPWR1 ATX12V1 FAN Konnektörleri CPUFAN1 SYSFAN1 AUXFAN1 NBFAN1 Ön Panel Konnekt...

Страница 73: ...Multilingual QIG FP IN9 SLI 4 13 4 13 اﻟﻌﺮﺑﻴﺔ اﻟﻠﻐﺔ اﻟﺴﺮﻳﻊ اﻟﺘﺮآﻴﺐ دﻟﻴﻞ ...

Страница 74: ...4 14 FP IN9 SLI 4 14 ﻓﺎرﺳﯽ ﺳﺮﻳﻊ ﻧﺼﺐ راهﻨﻤﺎﯼ ...

Страница 75: ...源ケーブルを マザーボードから抜き ジャンパキャップを CMOS の 消去 設定に数秒間取り付け その後ジャンパキャップ をその 標準 設定に戻します すべての電源を再び接 続し再起動すると BIOS の内容はその初期設定にリセ ットされます シャーシコンポーネントの接続 ATX 電源装置 ATXPWR1 ATX12V1 ファンコネクタ CPUFAN1 SYSFAN1 AUXFAN1 NBFAN1 前面パネルコネクタ FPIO1 HLED HDD LED ケーブルに接続 RST リセットスイッチケーブルに接続 SPKR システムスピーカーケーブルに接続 SLED サスペンド LED ケーブルに接続 PWR 電源スイッチケーブルに接続 PLED 電源 LED ケーブルに接続 追加 USB ポートヘッダ FP USB1 FP USB2 追加 IEEE1394 ポートヘッダ FP 1394 1 ...

Страница 76: ...지움 설정으로 변경한 후 점퍼 캡을 다시 정상 설정으로 연결하십시오 이후 모든 전원을 다시 연결하고 재부팅하면 롬 바이오스 내용이 처음상태로 초기화될 것입니다 컴퓨터 케이스 각종 컨넥터 연결 전원공급장치 ATXPWR1 ATX12V1 팬 연결부 CPUFAN1 SYSFAN1 AUXFAN1 NBFAN1 전면 판넬 연결 컨넥터 FPIO1 HLED HDD LED 케이블에 연결하세요 RST 초기화 스윗치 케이블에 연결하세요 SPKR 시스템 스피커 케이블에 연결하세요 SLED 유휴 Suspend LED 케이블에 연결하세요 PWR 전원 스위치 케이블에 연결하세요 PLED 전원 LED 케이블에 연결하세요 추가 USB 포트 헤더 FP USB1 FP USB2 추가 IEEE1394 포트 헤더 FP 1394 1 FP 1394 2 ...

Страница 77: ...pada pengesetan Clear CMOS untuk beberapa saat kemudian pasangkan semula tukup pelompat ke pengesetan Normal Selepas bekalan kuasa disambung semula dan anda telah reboot komputer kandungan BIOS akan diset semula kepada tata rajah lalainya Menyambungkan Komponen komponen Casis Bekalan Kuasa ATX ATXPWR1 ATX12V1 Penyambung KIPAS CPUFAN1 SYSFAN1 AUXFAN1 NBFAN1 Penyambung Panel Depan FPIO1 HLED Sambung...

Страница 78: ...ไฟ ที จ ายกำลังไฟฟ าออกจากแผงวงจรหลัก แล วนำตัวเชื อม สัญญาณ Jumper เลื อนจากตำแหน ง Normal ไปยัง Clear CMOS ประมาณ 2 3 วินาที แล วนำตัวเชื อมกลับมา ไว ที ตำแหน ง Normal ดังเดิม หลังจากนั นให ต อสายไฟทั ง หมดกลับเหมือนเดิมและเปิดเครื อง ข อมูลของ BIOS จะถูก กำหนดใหม ให เป นข อมูลเดิมที กำหนดจากโรงงาน การต อเข าอุปกรณ ของตัวถัง จุดต อแหล งจ ายไฟ ATXPWR1 ATX12V1 จุดต อพัดลม CPUFAN1 SYSFAN1 AUXFAN1 N...

Страница 79: ...k Interface 網路 NVIDIA Gigabit 乙太網路 音效 支援 7 1 聲道 HD 音效 支援自動插孔偵測以及光學 S PDIF 音源 輸出 Serial ATA 4 組 SATA 3Gb s 支援 NVIDIA MediaShield 的 SATA RAID 0 1 0 1 5 以及 JBOD 功能 擴充插槽 2 個 PCI E X16 插槽 2 個 PCI E X1 插槽 2 個 PCI 插槽 內部輸入 輸出接頭 1 個軟碟埠 2 個 Ultra ATA 133 IDE 接頭 4 個 SATA 3Gb s 接頭 2 個 USB 2 0 接頭 1 個 FP Audio 接頭 1 個 CD In 接頭 後面板輸入 輸出接頭 1 個 PS 2 鍵盤接頭 1 個 PS 2 滑鼠接頭 1 個 S PDIF 輸出接頭 1 個 7 1 聲道音效接頭 4 個 USB 2 0 接頭 1...

Страница 80: ...AUXFAN1 輔助冷卻風扇插座 NBFAN1 北橋冷卻風扇插座 前面板插座 FPIO1 HLED 連接至硬碟 LED 連接線 RST 連接至重新啟動開關連接線 SPKR 連接至系統喇叭連接線 SLED 連接至暫停 LED 連接線 PWR 連接至電源開關連接線 PLED 連接至電源 LED 連接線 附加的 USB 連接埠接頭 FP USB1 FP USB2 除了位於 I O 面板上的內建 USB 接頭外 您可透過帶有 支架的延長線 連接這些各有兩個附加 USB 連接埠的 接頭 附加的 IEEE1394 連接埠接頭 FP 1394 1 FP 1394 2 除了位於 I O 面板上的內建 IEEE1394 接頭外 您可透 過 帶 有 支 架 的 延 長 線 連 接 這 些 各 有 一 個 附 加 IEEE1394 連接埠的接頭 前面板音效接頭 FP AUDIO1 本接頭提供前面板 HD 高品質...

Страница 81: ...k Interface 网络 NVIDIA Gigabit 以太网络 音效 支持 7 1 声道 HD 音效 支持 动插孔侦测以及 S PDIF 音源输出 串行 ATA 4 组 SATA 3Gb s 支持 NVIDIA MediaShield 的 SATA RAID 0 1 0 1 5 以及 JBOD 功能 扩充插槽 2 个 PCI E X16 插槽 2 个 PCI E X1 插槽 2 个 PCI 插槽 内部输入 输出接头 1 个软盘端口 2 个 Ultra ATA 133 IDE 接头 4 个 SATA 3Gb s 接头 2 个 USB 2 0 接头 1 个 FP Audio 接头 1 个 CD In 接头 后面板输入 输出接头 1 个 PS 2 键盘接头 1 个 PS 2 鼠标接头 1 个 S PDIF 输出接头 1 个 7 1 声道音效接头 4 个 USB 2 0 接头 1 个 RJ ...

Страница 82: ...接器 AUXFAN1 辅助冷却风扇连接器 NBFAN1 北桥冷却风扇连接器 前面板连接器 FPIO1 HLED 连接 HDD LED 电缆 RST 连接复位开关电缆 SPKR 连接系统扬声器电缆 SLED 连接挂起 LED 电缆 PWR 连接电源开关电缆 PLED 连接电源 LED 电缆 附加的 USB 端口接头 FP USB1 FP USB2 除了位于 I O 面板 的板载 USB 连接器外 这些接头可 以通过带线卡的延长电缆分别提供两个附加的 USB 端 口连接 附加的 IEEE1394 端口接头 FP 1394 1 FP 1394 2 除了位于 I O 面板 的板载 IEEE1394 连接器外 这些 接头可以通过带线卡的延长电缆分别提供 个附加的 IEEE1394 端口连接 前面板音频接头 FP AUDIO1 本接头提供前面板 HD 高品质 音效连接 内部音频连接器 CD1 AUX1...

Страница 83: ...ting methods to discharge CMOS data recover the hardware default status and then making the motherboard work again There is no need to bother returning the motherboard to where you bought it from or go through an RMA process Step 1 Switch off the power supply unit and then switch it on again after one minute If there is no power switch on the power supply unit disconnect its power cord for one min...

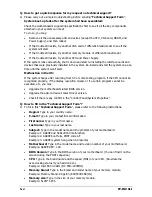
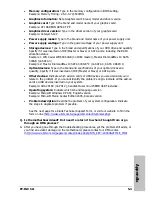
Страница 84: ...f the display resolution mixed or if a certain program cannot be executed etc you may Upgrade the motherboard s latest BIOS version Upgrade the add on device s latest driver version Check if there is any conflict in the Control Panel System Properties Q How to fill in the Technical Support Form A To fill in this Technical Support Form please refer to the following instructions Region Type in your ...

Страница 85: ...ptical drives and quantity Specify if it was inserted on IDE Master or Slave or SATA ports Other devices Indicate which add on cards or USB devices you are absolutely sure relate to the problem If you cannot identify the problem s origin indicate all the add on cards or USB devices inserted on your system Example AHA 29160 on PCI 2 Sandisk Cruzer mini 256MB USB Flash disk Operating system Indicate...

Страница 86: ...rst name Last Name Subject Motherboard BIOS Version CPU Memory brand Memory size Memory configuration Graphics card Graphics driver version Power supply maker Power supply wattage Storage devices Optical devices Other devices Operating system Problem description ...

Страница 87: ...rtugal Greece Denmark Norway Sweden Finland Switzerland Universal ABIT NL B V Jan van Riebeeckweg 15 5928LG Venlo The Netherlands Tel 31 77 3204428 Fax 31 77 3204420 Chamber of Commerce Venlo number 12062448 Austria Czech Romania Bulgaria Slovakia Croatia Bosnia Serbia Macedonia Slovenia Universal ABIT Austria Computer GmbH Schmalbachstrasse 5 A 2201 Gerasdorf Wien Austria Tel 43 1 7346709 Fax 43 ...

Страница 88: ...P N 4310 0000 61 Rev 1 00 www abit com tw Johnathan Fatal1ty Wendel ...

Отзывы: