Operation Manual / Power2 340-H / Low-pressure stage
9 Disassembly and assembly / 9.12 Measuring clearance A and B
© Copyright 2022 ABB. All rights reserved.
HZTL4053_EN
Rev.F
March 2022
9.12
Measuring clearance A and B
u
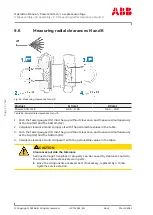
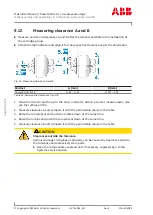
Measure and record clearances A and B after the removal and before the installation of
the cartridge group.
u
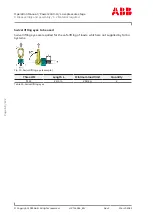
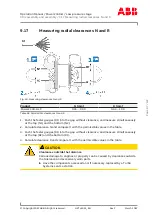
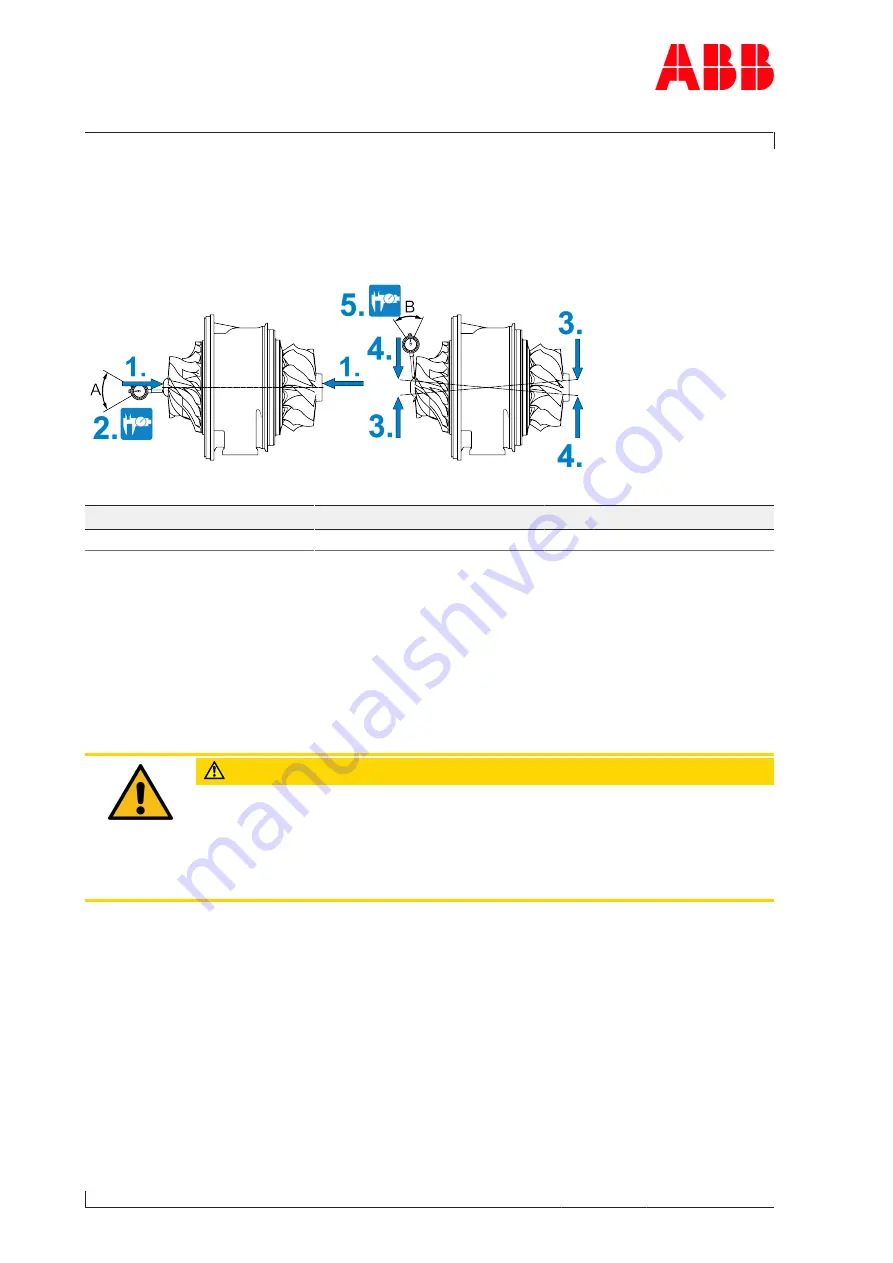
Attach the dial indicator and align it for the respective clearance as per the illustration.
Fig. 33: Measuring clearance A and B
Product
A [mm]
B [mm]
Power2 340-H LP
0.12 ... 0.21
0.70 ... 1.37
Table 43: Permissible clearances A and B
1. Move the rotor to and fro up to the stop. In order to obtain a correct measurement, elev-
ate the turbine a little.
2. Measure clearance A and compare it with the permissible values in the table.
3. Raise the compressor and push the turbine down at the same time.
4. Raise the turbine and push the compressor down at the same time.
5. Measure clearance B and compare it with the permissible values in the table.
CAUTION
Clearances outside the tolerance
Serious damage to engines or property can be caused by clearances outside
the tolerance and excessively worn parts.
u
Have the components assessed and, if necessary, replaced by a Turbo
Systems service station.
Page
80
/
122
Содержание PT003924
Страница 2: ......

