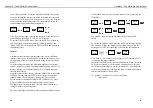

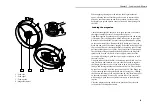


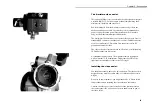

Through the hole located on the upper left corner of the camera lens
port, carefully loosen the tightening screw used to later hold the
video lens onto the camera internal tubular holder.
Do not unscrew it completely as it could fall into the camera hous-
ing. two or three turn will suffice.
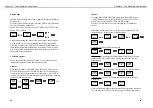
The video housing is made of two "half shell".
The back one holds the video on/off switch, led and mini monitor
connector, the front one integrates the manual iris and threaded ring
used to secure the video assist onto the camera.
Unscrew the three allen screws holding both part together (see dia-
gram)
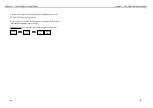
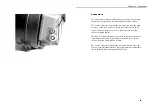
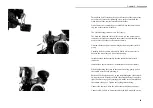
Carefully feed the camera wire and its Molex white connector in
between the video lens and video front housing.
Install the video head assembly into the tubular holder located
inside the
camera video port. Note the 45° orientation of the head assembly.
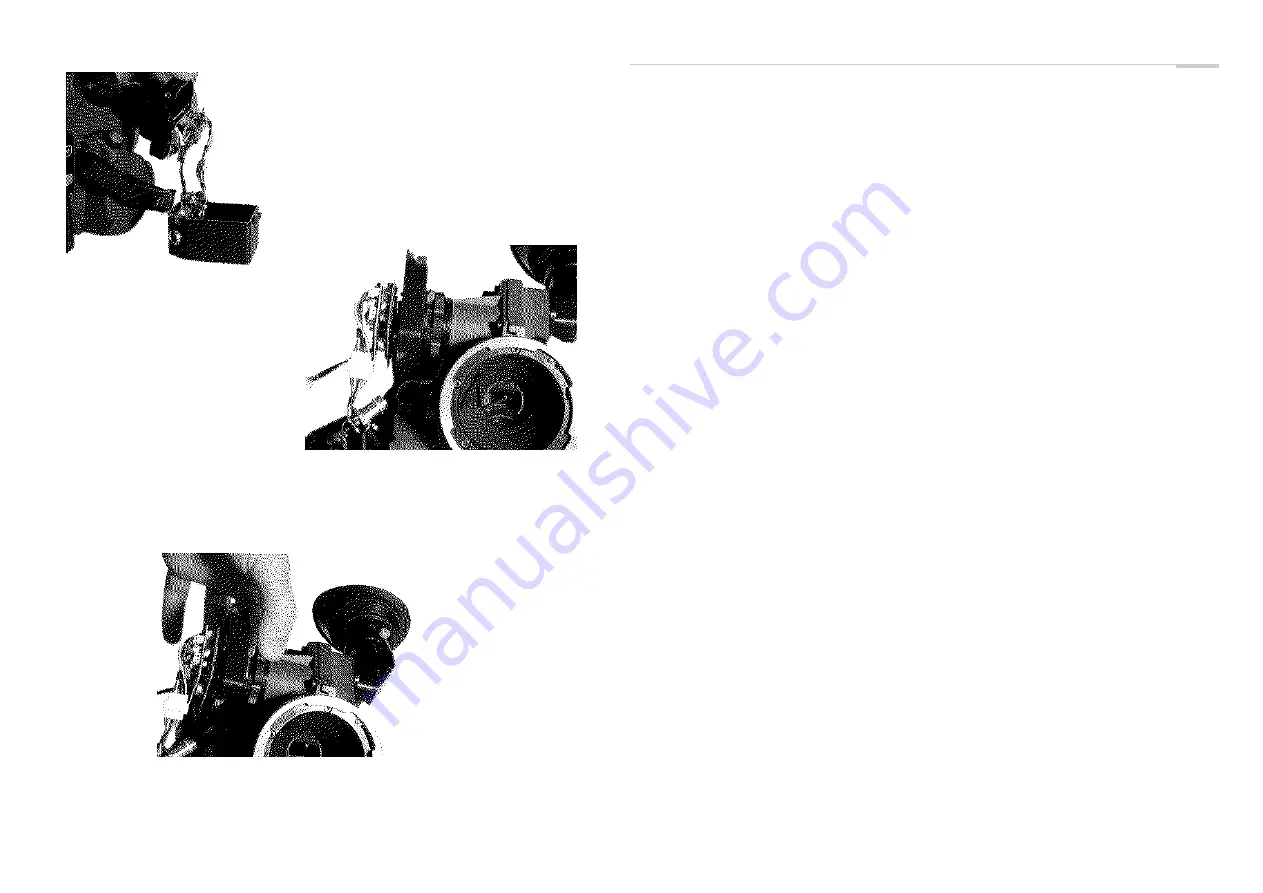
When approaching the video to the camera housing, gently pull on
the camera wire to avoid pinching it.
Push the CCD head all the way in and start turning the video thread-
ed ring clockwise. Slightly rock the video front housing from left to
right in order to engage its locating pin with the cutout machined on
the camera video port. Tighten the locking threaded ring.
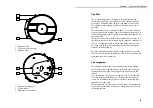
Connect the camera wire to the video three pin Molex connector
Connect a BNC cable to a monitor and to the BNC mounted on the
Chapter 5 - Accessories
55
Содержание A-Minima
Страница 1: ...u s e r s g u i d e...
Страница 2: ...1 presentation...
Страница 7: ...2 control panel...
Страница 17: ...3 magazine...
Страница 22: ...4 connectors...
Страница 24: ...5 accessories...


