12
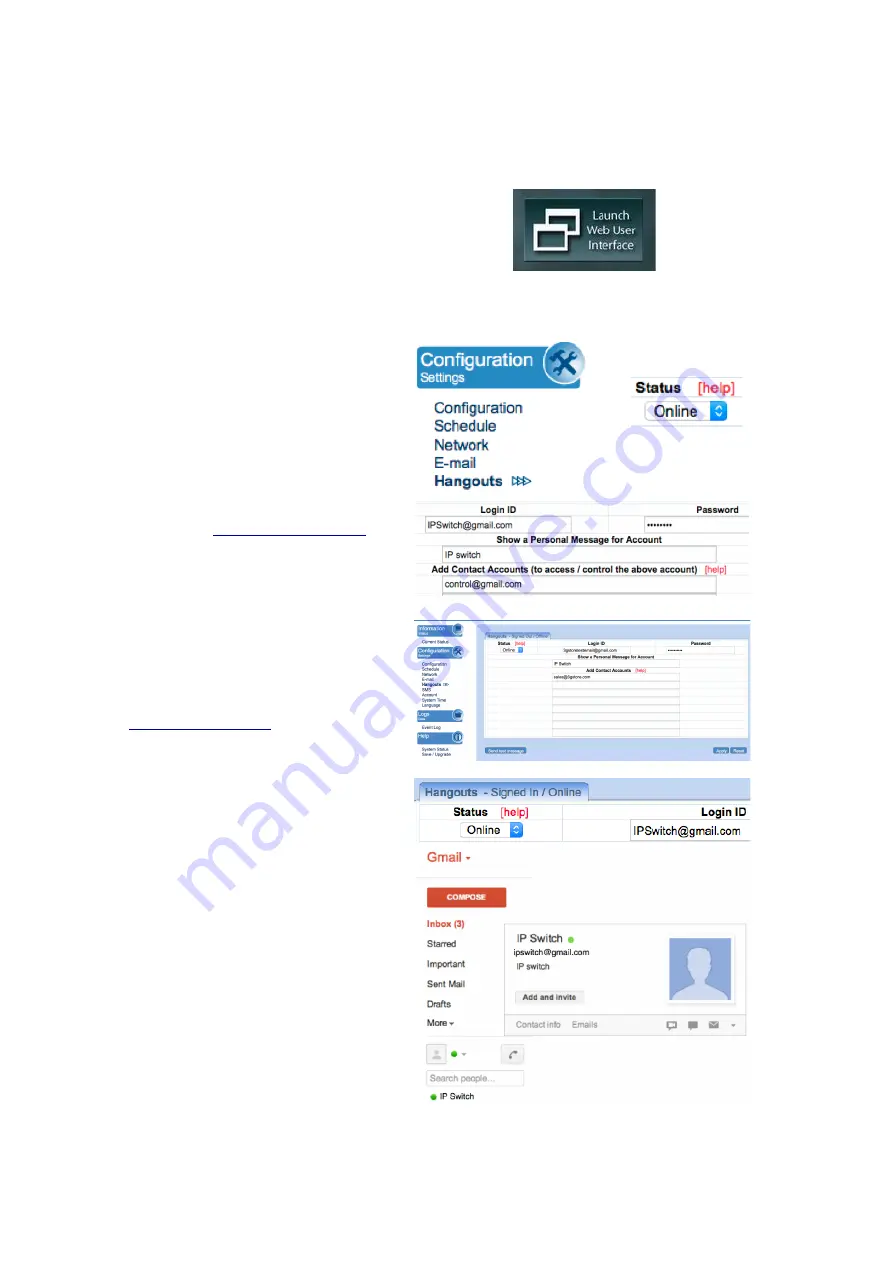
3.4.1. How to Setup Hangouts
Step 1:
From the Utility application, select
‘Launch Web User Interface’
-
when prompted, log in with the
default user name & password:
User Name: admin
Password: admin
NOTE: If Utility cannot locate your
Switch, please refer back to
section 3.2.1
Step 2:
Below the ‘
Configuration Settings
’
button on the left, select
‘Hangouts’
a.
Refer to
‘Status’
(offline by
default)
- You will need to change
this to
‘Online
’
b
. For the
‘Login ID
,’ enter the
Gmail Account for the Switch
(
Example:
)
.
c.
Enter the Password (
or APP
Password if using 2-step verification
– see
section 5.2.1
) for the same
Gmail account in the
‘Password
Field’
to the right
d.
Under the
‘Add Contact
Accounts’
enter your control Gmail
account that will be used to control
the
switch
(
Example
:
)
e.
Click
‘Apply’
to save
Step 3:
Allow a few moments for the Switch
to connect and Sign in.
Step 4:
Once connected, log into your
control Gmail account. Do NOT log
into the Switch account. The users
listed in your
Contact List
will
receive a notification to add the IP
Switch as a ‘
contact
’.
Once added, you can control the IP
Switch by chatting with it.
*NOTE:
If you do not receive an ‘invite’,
you may need to log into the Switch’s
Gmail account to ADD CONTACTS
manually.


