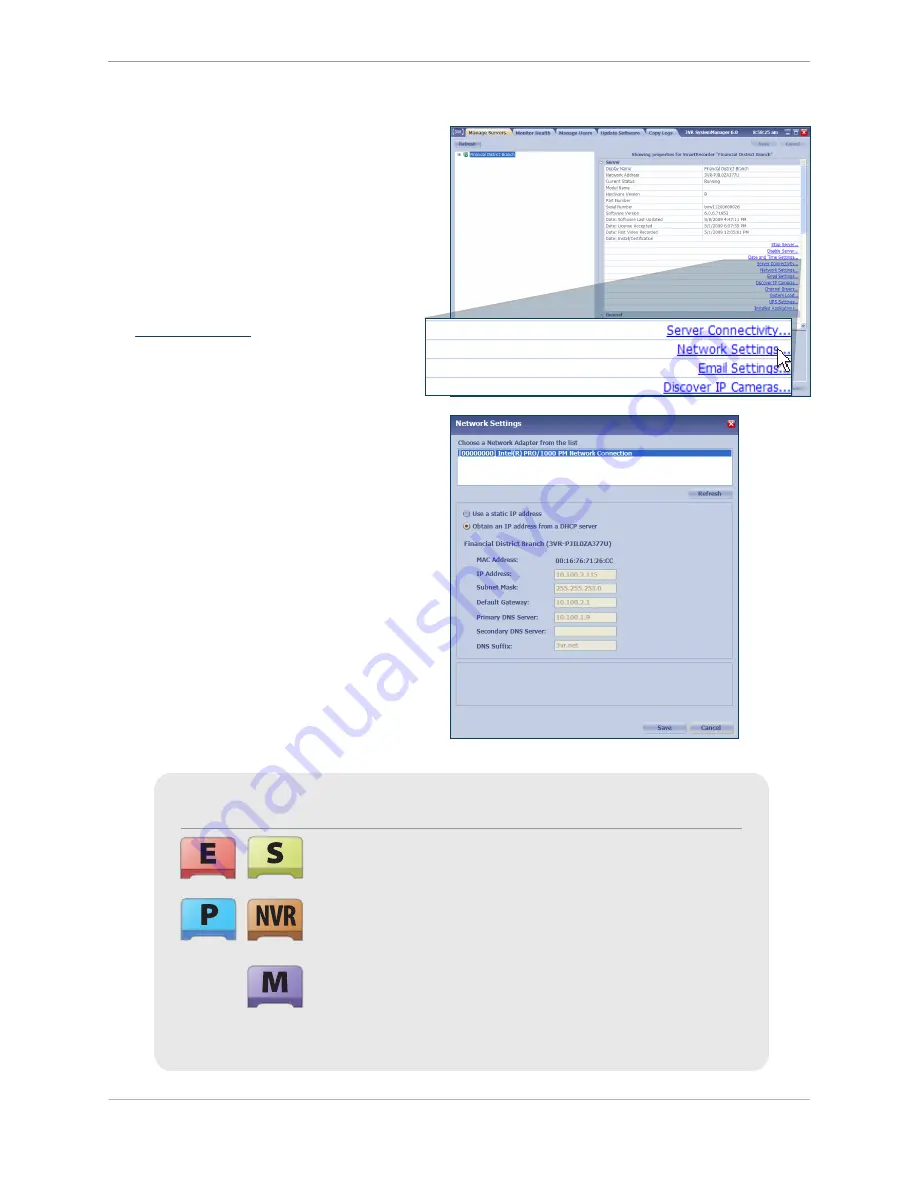
Step 7:
Configure Network Settings
Under the
2.
Server
category heading, click
Network Settings
.
In the
3.
Network Settings
dialog box, select
the network adapter from the list. If there are
two adapters listed, select the adapter labeled
primary.*
If the SmartRecorder IP address is assigned
4.
automatically,
select
Obtain an IP address from a DHCP
server
.
The network settings will automatically be
filled in when the DHCP server assigns the
SmartRecorder an IP address.
In th
1.
e
Manage Servers
tab of
SystemManager, select the SmartRecorder
name. Information about the system will
appear to the right.
details*
E-Series and S-Series SmartRecorders will only show one network
adapter in the
Network Settings
window.
P-Series SmartRecorders and P-Series, S-Series, and E-Series NVR
units will have two network adapters listed. Select the adapter
labeled as
Primary
in the list.
M-Series SmartRecorders will have two network adapters listed, but
only one Ethernet port is activated on the unit. If you are having
difficulty storing the network settings, try configuring the system
with the other network adapter selected.
Chapter 1: Installing a 3VR SmartRecorder
25
Содержание P-Series SmartRecorder
Страница 4: ...4...
Страница 9: ...Product Diagrams M Series SmartRecorder Front view Back view Product Diagrams 9...
Страница 10: ...10...
Страница 31: ...Chapter 1 Installing a 3VR SmartRecorder 31...
Страница 32: ...32...
Страница 47: ...Chapter 2 Configuring a 3VR SmartRecorder 47...
Страница 48: ......


